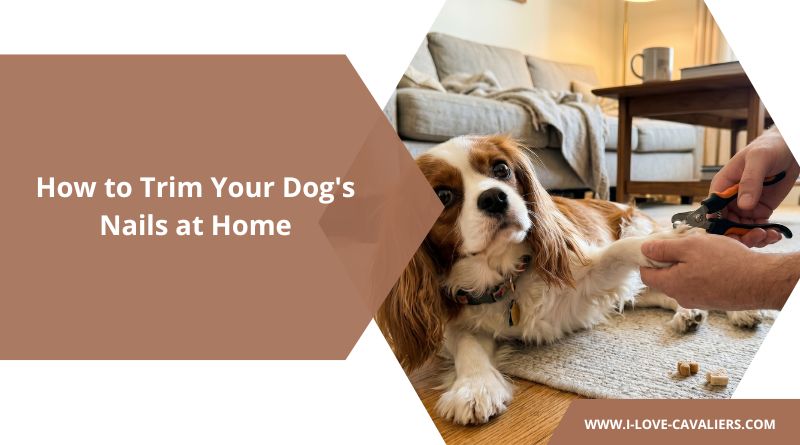
The first time I tried to trim Snickers’ nails myself, I sat on the kitchen floor with the clippers in one hand and his little black paw in the other. He looked up at me like I was about to perform open-heart surgery. I had cornstarch ready. Tissue ready. YouTube tutorials still playing on my phone, just in case.
I clipped one nail. He didn’t flinch. I clipped a second. Nothing. By the fifth nail, I was so cocky I went a little too close to the pink part and he yelped before I’d even drawn blood.
That was the end of the session. He gave me a look that said “we’re done here,” walked away, and didn’t let me near his paws for two weeks.
That bad experience cost me months. So I want to save you from the version of nail trimming that ends in panic on both sides. The fix isn’t a better tool. It’s understanding what the quick actually does, when to stop, and how to break the fear loop that keeps most owners overpaying a groomer for a job they could absolutely do at home.
Let’s get into it.
Why Long Nails Hurt More Than You Think
Most owners think long nails are a cosmetic problem. They’re not.
- Joint stress. When nails touch the floor, they push the toe up and back. Over months and years, that changes how your dog distributes weight. The result is chronic strain on the wrists, hips, and lower spine.
- Splayed toes. Long nails force the toe joints out of their natural position. Older dogs with this issue often develop a permanent splay that doesn’t correct even after a trim.
- Pain on hard floors. Slipping, sliding, and bracing on tile or hardwood is way harder when nails get in the way. Some dogs start avoiding certain rooms entirely.
- The fear cycle. Owner is scared to cut. Nails grow. The quick grows with them. Cutting safely becomes harder. Owner gets more scared. This is the real reason most dogs walk around with talons.
The fix isn’t doing it perfectly. It’s doing it regularly enough that the quick stays short and the trim stays easy.
Tools You’ll Actually Need
You don’t need a full grooming kit. You need three things and they all fit in a drawer
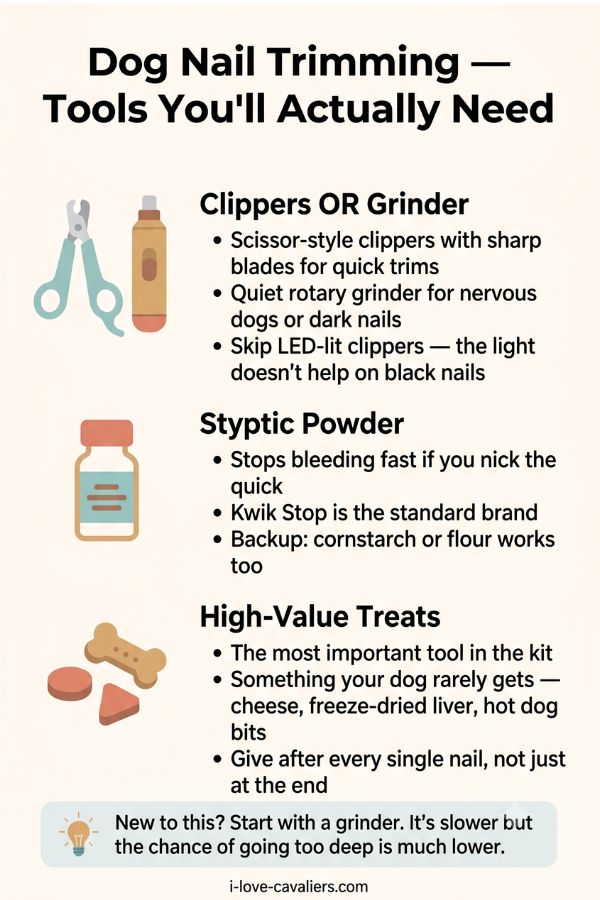
| Tool | Why It Matters | What to Look For |
|---|---|---|
| Clippers OR grinder | The actual trimming tool. Pick one. | Scissor-style clippers with sharp blades, OR a quiet rotary grinder with multiple speeds |
| Styptic powder | Stops bleeding fast if you nick the quick | A small bottle lasts years. Kwik Stop is the standard brand |
| High-value treats | The single most important thing in the kit | Something your dog rarely gets. Cheese, freeze-dried liver, hot dog bits |
Skip the fancy LED-lit clippers. They look great on Amazon and they don’t actually help you see the quick on black nails. The light is too weak to backlight the nail in any useful way.
If you’re brand new and your dog won’t sit still, start with a grinder. It’s slower, but the chance of going too deep at once is much lower. This is the method I’d go with for any nervous dog or any dark-nailed dog.
Finding the Quick on White Nails vs Black Nails
The quick is the blood vessel and nerve that runs inside the nail. Cut it and your dog bleeds, feels pain, and remembers it. Find it before you cut.
Light or White Nails
You can see the quick through the nail. It’s the pink part inside. Cut about 2 millimeters past where the pink ends and you’re safe. Tilt the paw so you’re looking at it from underneath. The quick is easier to spot from below than from the side.
Black or Dark Nails
This is where most owners give up. They shouldn’t. You can absolutely trim black nails at home, you just have to slow down.
Take a tiny slice off the tip. Look at the cross-section in the center of the nail. You’ll see one of three things:
- Chalky and white: keep going. You’re nowhere near the quick.
- Shiny, jelly-like, slightly gray: stop. You’re close to the quick. Move to the next nail.
- Black or gray dot in the middle of the shiny zone: that’s the start of the pulp. Do not cut another millimeter.
This layered-shaving technique is what professional groomers use. It works because you’re never cutting blindly. You cut, check, cut, check.
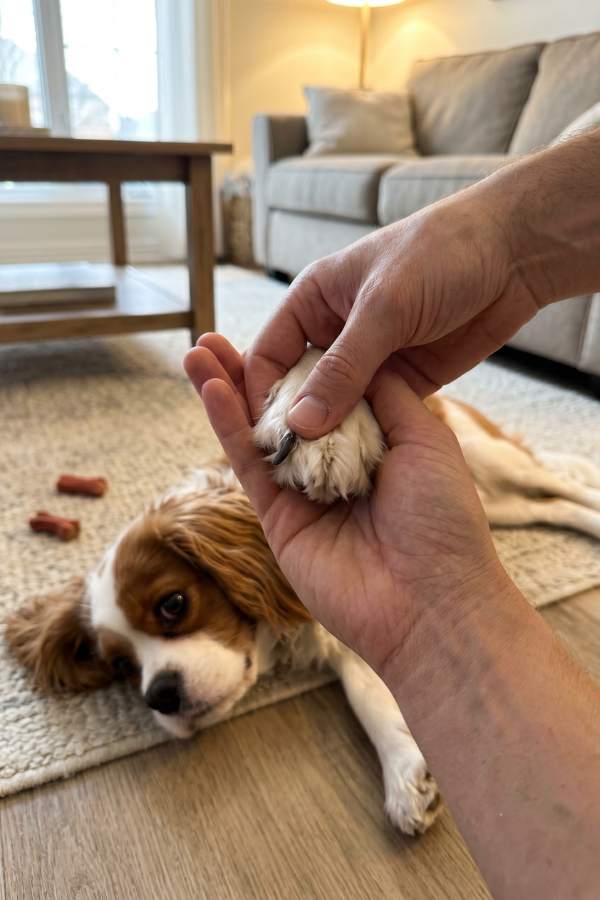
Get Your Dog Used to Paw Handling First
If your dog hates having his paws touched, no clipper in the world will save the session. Fix that first.
For three to five days before your first trim, do this while watching TV: lift one paw, hold it for two seconds, give a treat. That’s it. No clippers. No pressure. Just normalize paw contact with food paired up.
I started doing this with Snickers years ago and now he offers his paw without being asked (and yes, he expects payment for the privilege). The dogs that hate nail trims aren’t being dramatic. They’ve learned that paws getting touched leads to something scary. You’re rewriting that association.
If your dog is already paw-shy, this prep phase takes longer. Two weeks is normal. Don’t rush it.
The Step-by-Step Trim
Once you and your dog are ready, here’s the actual flow. Read it once before you start.
Hold the Paw the Right Way
Sit beside your dog or have him lie on his side. Lift the paw gently and rest it in your palm. Don’t yank it backward or up too high.
The paw should stay in your dog’s natural range of motion. If you’re twisting it, he’s going to pull away, and you can’t blame him.
Use your thumb to push the fur away from the nail you’re about to cut.
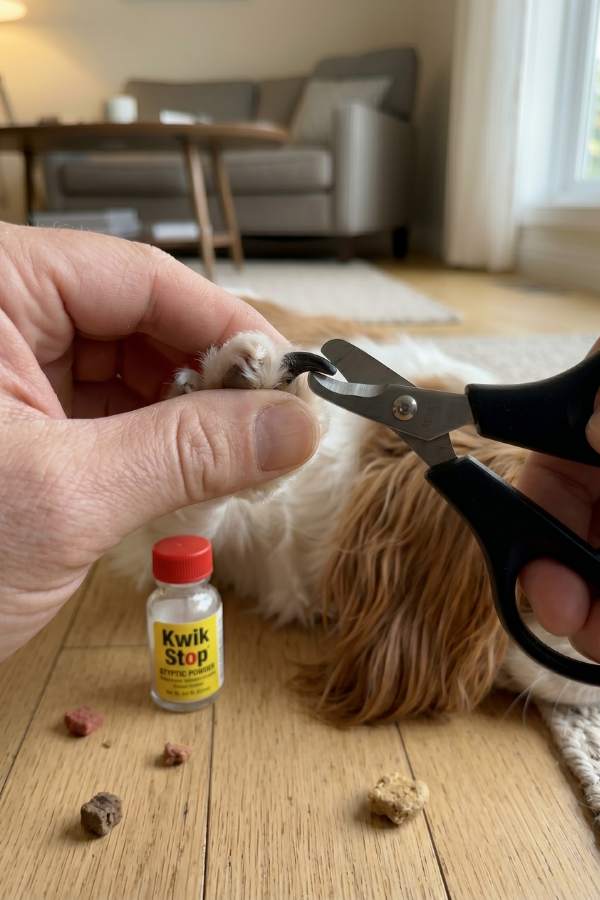
Make the First Cut
If you’re using clippers, position them so you’re cutting at a 45-degree angle on the underside of the nail, matching the natural curve. Squeeze in one smooth motion. Don’t saw.
If you’re using a grinder, touch the tip of the nail for two seconds, lift off, then touch again. Short passes. Never hold it on one spot.
Check the Cross-Section After Each Cut
This is the step most owners skip and it’s the one that saves you from quicking your dog.
Look at the end of the nail you just cut. Apply the layered-shaving rule from earlier. If the center is still chalky white, you can take another tiny pass. If it’s shiny, stop. If you see a dark dot, definitely stop.
Then move on to the next nail.
Watch the Dewclaws
The dewclaw is that floppy nail higher up on the leg. It doesn’t touch the ground, so it doesn’t wear down. Left alone, it can curve back into the skin and cause a nasty infection.
Trim it the same way as the regular nails, but support it gently with your fingers since it has more give. Check dewclaws every two to three weeks regardless of how often you’re trimming the others.
If You Cut the Quick: Stop the Bleeding
It’s going to happen at least once. Stay calm.
Press a pinch of styptic powder directly onto the nail tip and hold pressure for 30 to 60 seconds. If you don’t have styptic powder, cornstarch works. So does flour. Even a bar of unscented soap (drag the nail across it to create a plug).
The bleeding should stop within a minute. If it’s still bleeding hard after 20 minutes, call your vet.
The mistake I see most owners make is panicking and giving the dog tons of attention right after a quicking. That reinforces the idea that something terrible just happened. Keep your energy flat. Wipe up, give a treat, and move on. Your dog reads your reaction more than the actual cut.
The Trick No One Tells You: The Quick Recedes
This is the part that changes everything.
The quick isn’t a fixed length. It grows with the nail. When you trim regularly, the quick gradually retreats up into the nail, leaving you more room to cut safely next time. The opposite is also true. Overgrown nails have an overgrown quick, which is why you can’t fix them in one session.
For dogs with long quicks, the protocol is:
- Trim just the very tip every 5-7 days.
- Do this for 6-8 weeks.
- The quick will visibly recede, and you’ll be able to trim closer to normal length.
Most owners try to fix overgrown nails in one big session and end up quicking the dog so badly that the dog refuses to be trimmed again. The slow approach wins every time.
How Often Should You Trim?
This isn’t a one-size-fits-all answer. It depends on what surfaces your dog walks on and how much.
| Dog’s Lifestyle | Trim Every |
|---|---|
| Daily walks on pavement | 6-8 weeks |
| Mixed indoor/outdoor on soft surfaces | 3-4 weeks |
| Small breeds or mostly indoors | 2-3 weeks |
| Dewclaws (regardless of dog) | 2-3 weeks |
The old “you can hear nails clicking on the floor, so it’s time” rule isn’t reliable for small dogs (their step is too light to make noise) or for households without hard flooring. A better test: stand your dog square on a flat surface. If you see the nails touching the floor when the paw is flat, they’re too long.
When to Skip DIY and Pay the Groomer
There’s no shame in this. Some dogs have a hard NO around their paws and you’ll lose months of trust by forcing it. Other situations are flat-out beyond what a calm owner can do at home.
Pay the groomer or vet tech if:
- Your dog has a severe trauma response to having paws handled (panting, drooling, snapping). A pro with restraint tools and experience is worth $15 every few weeks while you work on desensitization separately.
- Nails are dangerously overgrown and curling into the pad. That first big trim needs a vet who can sedate if needed.
- You’re working with a senior dog with arthritis who can’t get into position comfortably. Letting a pro do it on a grooming table is kinder than wrestling at home.
If your dog is licking his paws constantly between trims, that’s not always about nails. Paw chewing is a common allergy symptom too, so check the natural remedies for dog allergies guide if the licking persists. And if he’s also pacing or panting more than usual around handling sessions, look at the subtle signs of stress in dogs before you push another trim.
My Pick for At-Home Trimming Gear
After trying both, here’s what I keep in the drawer.
Boshel Dog Nail Clippers for the days I’m doing a quick touch-up. They’re scissor-style, sharp, and have a small safety guard that you can ignore but doesn’t get in the way.
- Sharp stainless steel blades
- Comfortable rubber handle
- Works on small to medium dogs
Casfuy Dog Nail Grinder for serious sessions, especially on Snickers’ back paws where the nails are thicker.
- Two-speed quiet motor
- USB rechargeable
- Three port sizes for different nail sizes
- Lasts about 2 hours per charge
And a small bottle of Kwik Stop Styptic Powder. One bottle has lasted me three years.
I don’t think you need both clippers and a grinder, but if you can swing it, start with the grinder for the first six months while you’re learning to read the quick. Switch to clippers once you’re confident.
I’m a passionate dog parent and at-home groomer, but I’m not a veterinarian or certified canine professional. Nail trimming is generally safe for healthy adult dogs, but if your dog has a medical condition, severe anxiety, or extremely overgrown nails, talk to your vet or a certified groomer first.
Happy trimming!