Snickers was doing circles around the kitchen last Saturday while I rolled out a batch of oat biscuits. Normal weekend routine. I had the whole thing done in about 20 minutes, treats cooling on the counter, mess cleaned up, dog parked in front of the baking sheet like a security guard.
Then my friend texted me a photo of a bag of dog treats she’d just bought. $11.99 for 20 biscuits. She was excited about them. “Premium, all-natural, oven-baked.” I looked at the ingredient list she sent. Wheat flour, sugar, canola oil, and a bunch of stuff I’d need a chemistry degree to identify. She paid twelve dollars for that.
I looked at the batch on my counter. Oats, cheese, an egg. Thirty-three biscuits. Total cost: $1.65.
I’ve been making Snickers’ treats at home for a while now, so I already knew the savings were real. But seeing that side-by-side comparison hit different.
People are paying $8, $10, $12 for bags of treats they could make at home in less time than it takes to drive to the pet store. Better ingredients, bigger batches, a fraction of the cost. And somehow most dog owners don’t realize it yet.
Why Cheap Treats Don’t Mean Bad Treats
There’s a weird guilt that comes with trying to save money on your dog. Like if you’re not buying the most expensive option, you’re cutting corners on their health. That’s not how it works.
- The most nutritious treat ingredients are the cheapest ones. Oats, peanut butter, eggs, sweet potatoes, bananas. These are pantry staples that cost almost nothing per serving, and they’re better for your dog than anything with a “natural flavoring” label on it.
- Store-bought treat prices are mostly markup. The packaging, the branding, the shelf space at PetSmart, the marketing budget. You’re paying for all of that. The actual ingredients in a $10 bag of treats cost the manufacturer less than $2.
- Your dog doesn’t know the price. Snickers eats a $0.08 homemade biscuit with the exact same joy as a $0.40 store-bought one. Possibly more, because the homemade ones actually smell like real food.
- Fewer ingredients means fewer problems. Most store-bought treats have 15 to 25 ingredients. The recipes below have 4 each. Less stuff going in means less chance of something disagreeing with your dog’s stomach.
Both recipes below cost under $5 per batch and make enough treats to last two to three weeks. That’s roughly $0.10 to $0.15 per treat. Compare that to the $0.30 to $0.50 per treat you’re paying at the store.
Recipe 1: Peanut Butter & Oat Cookies
This is the one I make most often. Snickers can be dead asleep on the couch, but the second I open the peanut butter jar, he’s in the kitchen. Every time. These cookies have a crunchy snap to them that he loves, and they smell like peanut butter crackers coming out of the oven. Four ingredients, one bowl, about 25 minutes total.
Ingredients
| Ingredient | Amount | Approx. Cost |
|---|---|---|
| Old-fashioned oats | 2 cups | $0.40 |
| Peanut butter (unsweetened, no xylitol) | 1/3 cup | $0.55 |
| Egg | 1 large | $0.35 |
| Water | 2-4 tablespoons | Free |
| Total | ~$1.30 |
A dollar thirty. For a full batch of dog cookies. I’ve spent more on a single gas station snack for myself.
Always check your peanut butter label. The ingredients should be peanuts and maybe salt. If you see xylitol or birch sugar listed anywhere, don’t use it. Xylitol is extremely toxic to dogs, even in small amounts.
Steps
Step 1: Blend the Oats
Pour the oats into a blender or food processor and pulse until they turn into a rough flour. Some visible flakes are fine. You’re not going for powdered perfection, just broken-down enough that the dough holds together. About 20 to 30 seconds does it.
No blender? Ziplock bag and a rolling pin. Crush until the oats are mostly broken down. Takes a little longer but gets the job done.
Step 2: Mix the Dough
Combine the oat flour, peanut butter, and egg in a medium bowl. Stir with a fork until it starts clumping. Add water one tablespoon at a time until the dough holds together when you squeeze it. You want it firm, like Play-Doh. Not wet, not crumbly. If the peanut butter is cold and stiff, microwave it for 10 seconds first.
Step 3: Roll and Cut
Preheat your oven to 325 degrees F (165 C). Line a baking sheet with parchment paper.
Dust your counter with a little oat flour. Press or roll the dough to about 1/4 inch thick. Cut into whatever shapes you want. I use a knife and cut a grid of small squares because it’s fast and I don’t have to wash a cookie cutter. Snickers has zero opinions on treat geometry.
Place them on the baking sheet. They barely spread, so pack them close.
Step 4: Bake
Bake at 325 F for 18 to 22 minutes until the edges are golden and the tops look dry. They’ll feel slightly soft when hot. That’s normal. They harden as they cool. For extra crunch, turn the oven off and leave them inside with the door cracked for 15 more minutes.
The peanut butter smell fills the kitchen about halfway through. This is when Snickers transitions from “casually lying in the doorway” to “sitting directly in front of the oven with perfect posture.”
Step 5: Cool Completely
Let the cookies cool on the baking sheet for at least 20 minutes. Test one by snapping it in half. Clean break means they’re ready. If it bends, give them a few more minutes or pop them back in at 300 F for 5 minutes.
Storage
Airtight container at room temperature for up to 10 days. Fridge for up to 3 weeks. Freezer for up to 3 months. This batch makes roughly 28 to 34 cookies depending on how you cut them. I keep a week’s worth in a jar on the counter and freeze the rest.
Serving Size
One to two cookies per day for small dogs (under 20 lbs). Two to three for medium dogs. These are small and relatively low-calorie, but peanut butter does add fat, so don’t go overboard. Snickers gets one after his morning walk. Sometimes two if we went on a longer one.
If you like the idea of adding coconut oil to your dog’s treats for skin and coat benefits, our coconut oil treat recipes are built specifically for that.
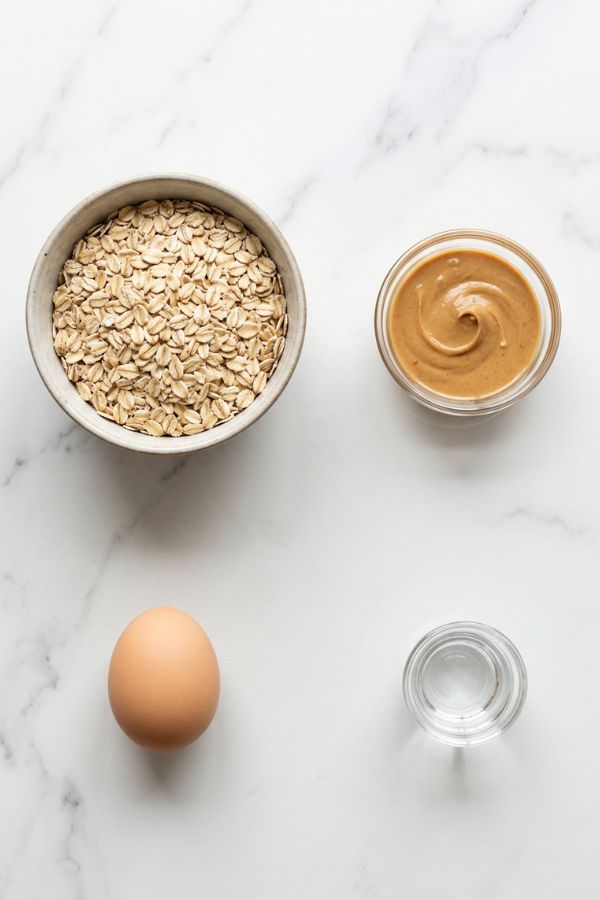
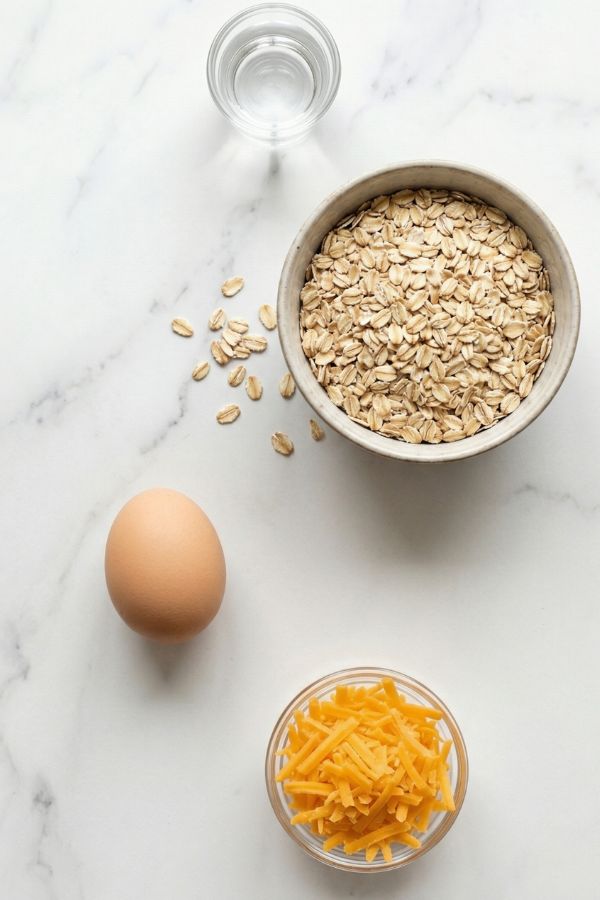
Recipe 2: Cheesy Oat Biscuits
This is the crowd-pleaser. Every dog I’ve tested these on has loved them, including two that are notoriously picky about treats. The cheese smell hits the kitchen about halfway through baking, and from that point on, Snickers parks himself in front of the oven and doesn’t move until the timer goes off.
Four ingredients total. One bowl. No mixer needed. The batch costs less than a coffee.
Ingredients
| Ingredient | Amount | Approx. Cost |
|---|---|---|
| Old-fashioned oats | 1.5 cups | $0.30 |
| Shredded cheddar cheese | 1/2 cup | $1.00 |
| Egg | 1 large | $0.35 |
| Water | 3-4 tablespoons | Free |
| Total | ~$1.65 |
Under two dollars for a full batch. That might be the cheapest treat recipe that exists.
Use regular full-fat cheddar. Low-fat cheese doesn’t melt as well and the biscuits won’t hold together. Pre-shredded bags work fine. So does a block you shred yourself, which is usually cheaper per ounce.
Steps
Step 1: Blend the Oats
Pour the oats into a blender or food processor and pulse until they’re a rough flour. Doesn’t need to be perfectly smooth. Some visible oat flakes are fine and give the biscuits a nice texture. Takes about 20 to 30 seconds.
No blender? Ziplock bag and a rolling pin. Crush until most of the oats are broken down. This is how I did it the first time and it worked fine (sounds weird, but it works).
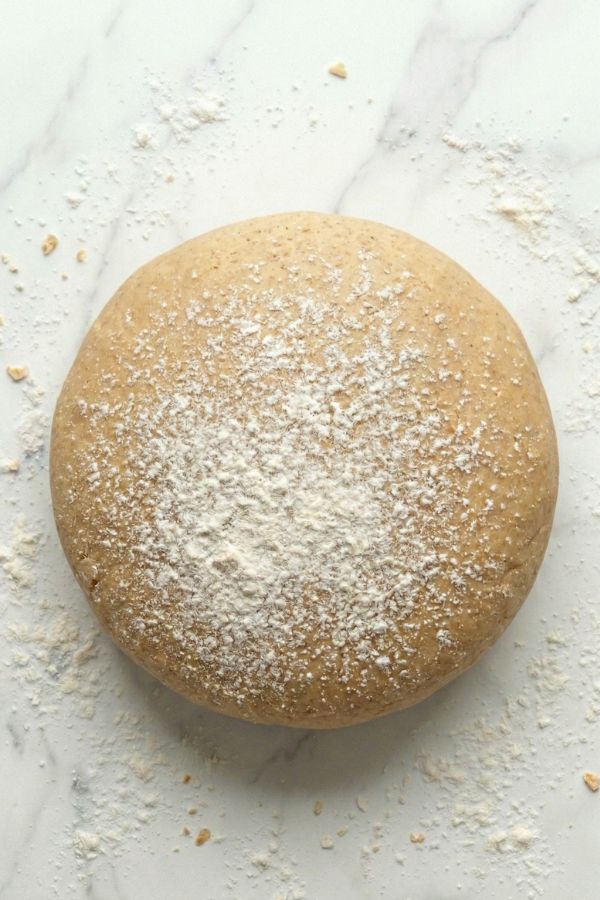
Step 2: Mix the Dough
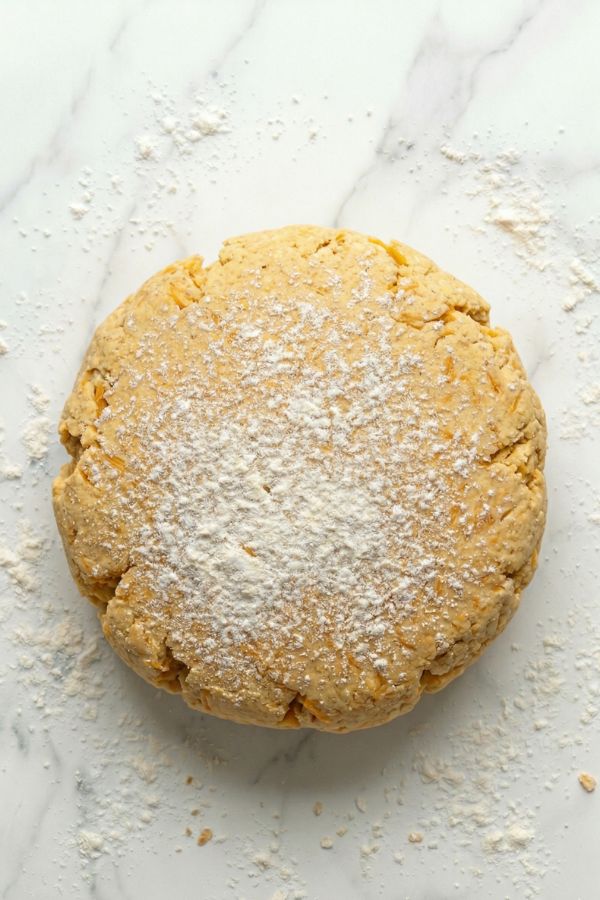
In a medium bowl, combine the oat flour, shredded cheese, and egg. Stir with a fork until everything starts clumping together. Add water one tablespoon at a time, mixing between each addition, until the dough holds together when you squeeze a handful. It should feel like wet sand that sticks to itself. Not sticky-wet, not dry-crumbly.
The cheese will be in visible shreds throughout the dough. That’s fine. It melts during baking and binds everything together.
Step 3: Preheat and Roll
Set your oven to 325 degrees F (165 C). Line a baking sheet with parchment paper.
Dust your counter or cutting board with a little oat flour. Press the dough out with your hands or a rolling pin to about 1/4 inch thick. Cut into small squares, circles, or whatever shape you want. I use a butter knife and cut a grid of 1-inch squares. Fastest method, zero cleanup, and Snickers doesn’t care about shapes.
Place the pieces on the baking sheet. They don’t spread much, so you can put them close together.
Step 4: Bake
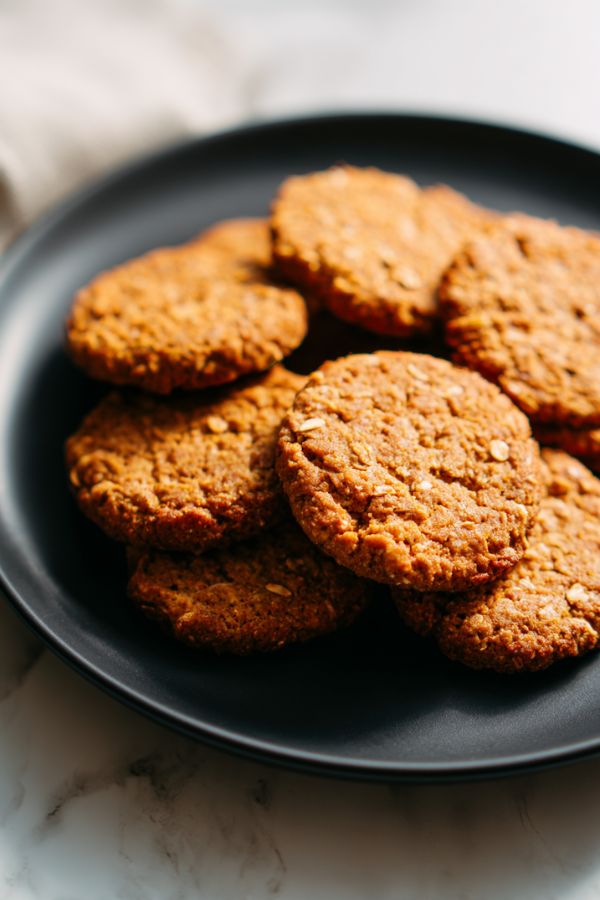
Bake at 325 F for 18 to 22 minutes. The edges should be golden and the tops should look dry. The cheese will have melted into the oat flour and the whole biscuit will smell like a cheesy cracker. They’ll feel slightly soft when hot. That’s normal. They crisp up as they cool.
For extra crunch, turn the oven off after baking and leave the biscuits inside with the door cracked for another 15 minutes. This dries them out more and gives you a satisfying snap when you break one.

Step 5: Cool on the Sheet
Let them cool completely on the baking sheet. At least 20 minutes. They go from soft to firm during this time. Test one by snapping it in half. Clean break means they’re done. Bendy means give them a few more minutes, or pop them back in the oven at 300 F for 5 minutes.
Storage
Airtight container at room temperature for up to 10 days. Fridge for up to 3 weeks. Freezer for up to 3 months. This batch makes roughly 30 to 36 small biscuits depending on how you cut them. I keep about 10 days’ worth on the counter in a jar and freeze the rest in a bag.
Serving Size
One to two biscuits per day for small dogs. These are small and low-calorie, but the cheese does add some fat, so don’t go overboard. Snickers gets one after his morning walk and sometimes one before bed if he does the stare. You know the one.
Cost Per Treat: The Full Picture
Here’s what each treat actually costs you, broken down to the penny.
| Treat | Batch Cost | Treats Per Batch | Cost Per Treat |
|---|---|---|---|
| Sweet Potato Chews | ~$2.30 | ~24 | $0.10 |
| Cheesy Oat Biscuits | ~$1.65 | ~33 | $0.05 |
| Store-bought (mid-range) | ~$8.75 | ~25 | $0.35 |
| Store-bought (premium) | ~$12.00 | ~20 | $0.60 |
The cheesy oat biscuits cost five cents each. I still find that hard to believe, and I’ve made them at least a dozen times. You could make both recipes back to back, have treats for an entire month, and spend less than $4 total.
FAQs
My dog is lactose intolerant. Is the cheese okay?
Hard cheeses like cheddar are very low in lactose compared to soft cheeses or milk. Most lactose-intolerant dogs can handle the small amount of cheddar in these biscuits without issues. If you’re unsure, give your dog one biscuit and wait 24 hours. No gas, no loose stools, you’re fine. If you see a reaction, swap to the peanut butter and pumpkin version mentioned above.
Can I use instant oats instead of old-fashioned?
Instant oats will work, but the texture is different. They’re already partially broken down, so you might not even need to blend them. The biscuits will be slightly softer and less crunchy. Old-fashioned oats give a better snap after baking. Avoid flavored instant oats (the kind with cinnamon and sugar packets). Plain only.
Are these safe for puppies?
Puppies over 12 weeks old can have both treats. Cut the sweet potato chews in half lengthwise so they’re thinner and easier to chew. For the biscuits, make them smaller. Half a biscuit is plenty for a puppy. If your puppy is teething, the sweet potato chews are great because the chewy texture feels good on sore gums.
I’m a dog owner who enjoys finding ways to spoil my pup without emptying my wallet, but I’m not a veterinarian or certified animal nutritionist. If your dog has specific dietary restrictions or health conditions, check with your vet before introducing new treats.
Happy treating!