Last Sunday I spent an embarrassing amount of time staring into the fridge, trying to figure out what to feed Snickers for dinner. I had chicken thighs that needed to be used up, half a bag of rice, and some vegetables slowly dying in the crisper drawer. The kibble bag was nearly empty too.
I’d been making Snickers homemade food on and off for months, but “on and off” was the problem. Some days he’d get a beautiful fresh bowl. Other days I’d scramble at 6 PM because I forgot to cook anything, and he’d end up with kibble and a side of guilt from me.
That’s when I decided to just block out two hours on a Sunday and cook everything for the entire week. All at once. Done.
I grabbed my biggest pot, pulled out a baking sheet, and turned the kitchen into a mini dog-food factory. By the time I cleaned up, I had seven perfectly portioned containers sitting in the fridge, and Snickers was asleep on the couch, completely unaware that his meals for the week were already handled.
Turns out, meal prepping for your dog isn’t much different from meal prepping for yourself. You just need a system.
Why Meal Prep Changes Everything
If you’ve ever tried homemade dog food and quit because it felt like too much daily work, meal prep is the fix. The first two reasons below matter most. The rest are just nice bonuses.
- You Actually Stick With It
Cooking fresh food every single day burns people out fast. One afternoon per week? That’s doable for months, even years.
- Your Dog Eats Consistently
Dogs do better on a steady diet than a rotating chaos of whatever’s in the fridge. Meal prep means the same balanced recipe, properly portioned, every day.
- You Save Money on Ingredients
Buying protein and vegetables in bulk is cheaper than grabbing small amounts throughout the week. I started buying 5-pound packs of chicken thighs and my per-meal cost dropped by about 30%.
- Less Stress, Less Cleanup
One cooking session means one mess to clean up instead of seven. Your future self will thank you on a Wednesday night when all you have to do is pop the lid off a container.
Choosing Your Weekly Recipe
Before you start prepping, you need one solid recipe that covers the basics: protein, carbohydrate, vegetables, and healthy fat. You don’t need to rotate between six different recipes. One good one, made well, is plenty.
I tested a few combinations over the past couple months and landed on two that work for Snickers. Pick the one that fits your budget and your dog’s preferences (and yes, dogs definitely have preferences).
The chicken version is gentler on sensitive stomachs and slightly cheaper. The beef version is more calorie-dense and better for active dogs or larger breeds. This is the method I’d go with if your dog hasn’t had homemade food before: start with the chicken recipe for the first two weeks, then try beef if you want variety.
If you’re brand new to homemade dog food, check out our Simple 4-Ingredient Dog Food Recipe first to get comfortable with the process.
Recipe A: Chicken, Rice & Vegetable Prep
This makes roughly 35 cups of food, enough for a 30-pound dog for about 7 days.
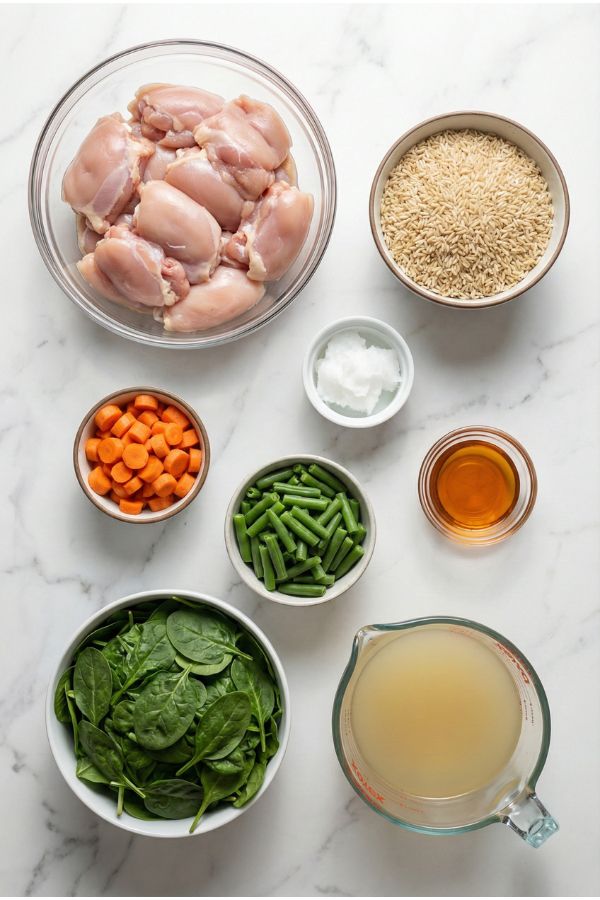
Ingredients
| Ingredient | Amount |
|---|---|
| Boneless, skinless chicken thighs | 4 lbs |
| Brown rice (uncooked) | 3 cups |
| Carrots | 3 medium, peeled and diced |
| Green beans (fresh or frozen) | 2 cups, chopped |
| Spinach (fresh) | 2 packed cups |
| Salmon oil | 2 tablespoons |
| Coconut oil | 1 tablespoon |
| Low-sodium chicken broth | 8 cups |
If your dog has never eaten spinach before, start with half the amount listed and watch for any digestive changes over two days.
Step-by-Step Instructions
Prep Time: 20 minutes Cook Time: 50 minutes Total Time: About 70 minutes plus cooling
Step 1: Cook the Rice
Pour your brown rice and 6 cups of chicken broth into a large pot. Bring to a boil, then drop the heat to low and cover. Let it simmer for about 40 minutes until the rice is soft and the liquid is absorbed. Don’t stir it every five minutes. Just leave it alone.
Step 2: Bake the Chicken
While the rice cooks, preheat your oven to 400°F. Lay the chicken thighs on a parchment-lined baking sheet in a single layer. No seasoning, no oil, no salt. Bake for 25 minutes until the internal temperature hits 165°F. I bought a cheap meat thermometer after undercooking chicken once (don’t skip this part).
Let the chicken cool for 10 minutes, then chop into small, bite-sized pieces. For smaller dogs or puppies, run it through a food processor a few times until the pieces are about the size of a pea.
Step 3: Prep the Vegetables
While both the rice and chicken cook, you’ve got about 20 minutes of downtime. Use it. Dice your carrots into small cubes, roughly the size of your pinky nail. Chop the green beans into half-inch pieces. Roughly chop the spinach.
Toss the carrots and green beans into a pot with the remaining 2 cups of chicken broth. Bring to a boil and cook for 8 minutes until the carrots are fork-tender but not mushy. Add the spinach in the last 2 minutes. It wilts fast.
Drain and set aside.
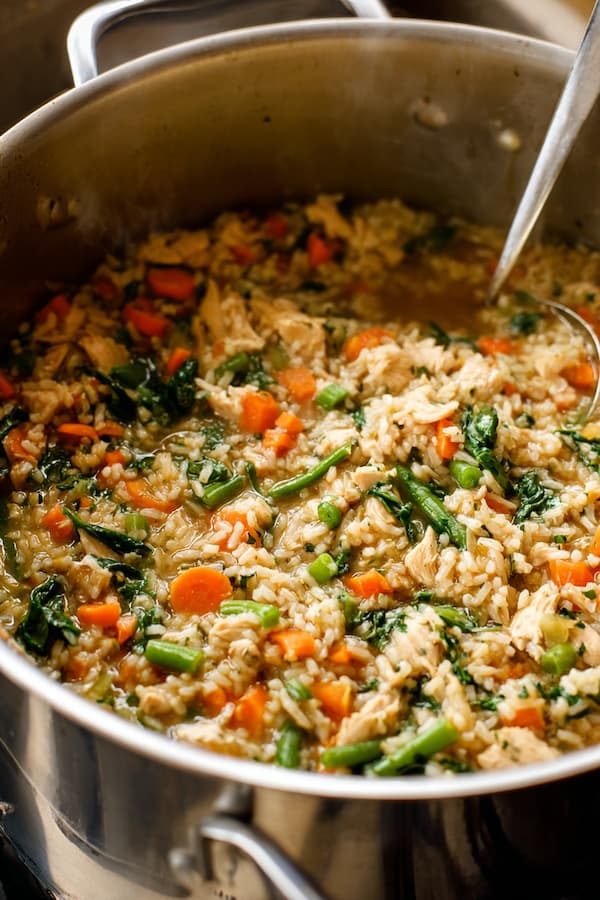
Step 4: Combine Everything
Grab your biggest mixing bowl. Add the cooked rice, chopped chicken, and drained vegetables. Drizzle the salmon oil and coconut oil over the top. Mix thoroughly until everything is evenly distributed.
The texture should be moist and slightly sticky, similar to a thick stew. If it looks dry, splash in a bit of the leftover vegetable broth.
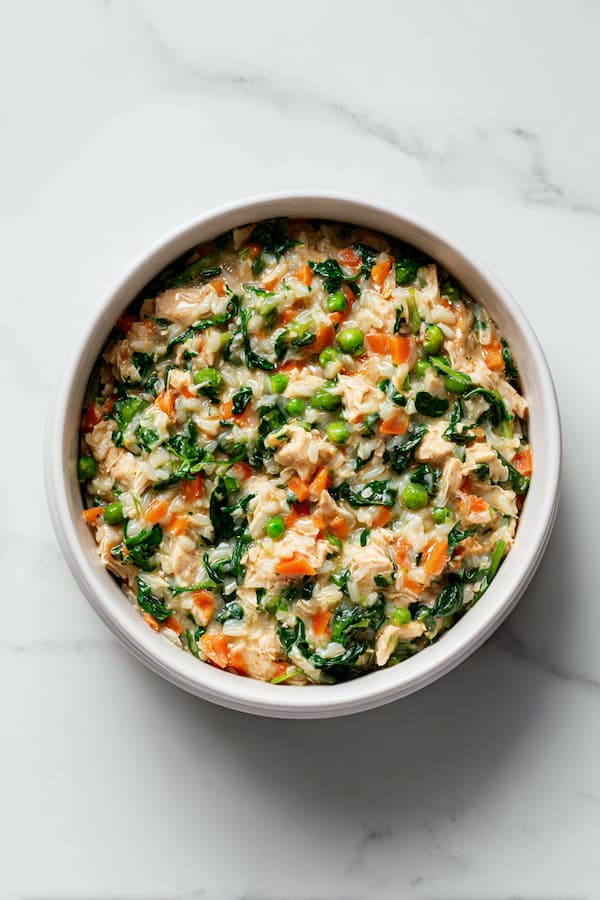
Step 5: Cool Completely Before Portioning
This matters more than people think. Never put warm food into storage containers, or you’ll get condensation that breeds bacteria. Spread the mixture out on a clean baking sheet or leave it in the bowl with a fan nearby. Wait until it’s fully room temperature, about 45 minutes to an hour.
Recipe B: Beef, Sweet Potato & Oat Prep
Higher in calories and iron. Makes roughly 38 cups, enough for a 30-pound dog for about 7 days.
Ingredients
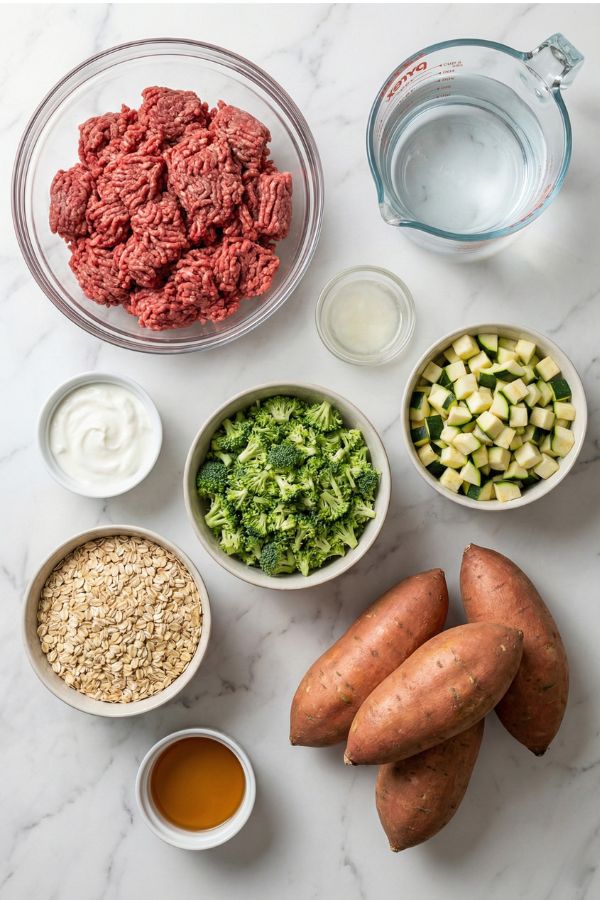
| Ingredient | Amount |
|---|---|
| Lean ground beef (90% lean) | 4 lbs |
| Sweet potatoes | 3 large (about 2.5 lbs) |
| Old-fashioned oats | 2 cups |
| Broccoli florets | 2 cups, finely chopped |
| Zucchini | 2 medium, diced |
| Plain Greek yogurt (full-fat, no sweeteners) | 1 cup |
| Coconut oil | 2 tablespoons |
| Water | 4 cups |
Step-by-Step Instructions
Prep Time: 15 minutes Cook Time: 55 minutes Total Time: About 70 minutes plus cooling
Step 1: Roast the Sweet Potatoes
Preheat oven to 400°F. Pierce each sweet potato with a fork four or five times and place them directly on the oven rack with a baking sheet underneath to catch drips. Roast for 45-50 minutes until they’re soft enough that a knife slides through with zero resistance.
Let them cool, scoop out the flesh, and mash with a fork. Don’t worry about getting it perfectly smooth. A few lumps are fine.
Step 2: Brown the Beef
While the sweet potatoes roast, set a large skillet over medium-high heat. Add the ground beef and break it apart with a wooden spoon. Cook for 10-12 minutes until no pink remains. Break the meat into small crumbles as it cooks. For smaller dogs, the pieces should be no bigger than a pencil eraser.
Drain excess fat through a colander. Keep a thin layer of fat in the meat for nutrition, but you don’t want it greasy.
Step 3: Cook the Oats and Vegetables
Bring 4 cups of water to a boil. Add the oats and reduce heat to medium-low. Cook for 5 minutes, stirring once or twice.
Add the chopped broccoli and diced zucchini to the oat pot. Cook for another 4 minutes until the broccoli is bright green and the zucchini is just tender. Drain any excess water.
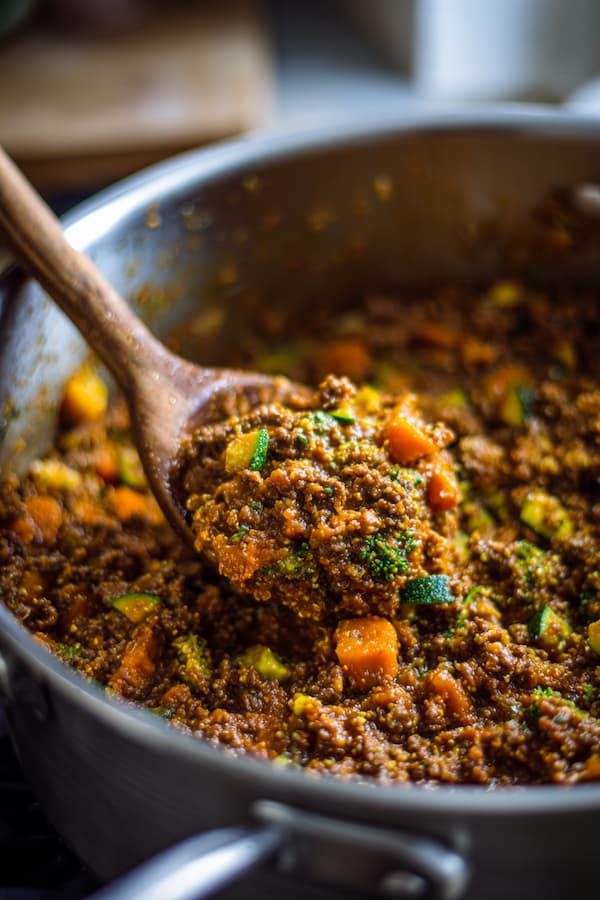
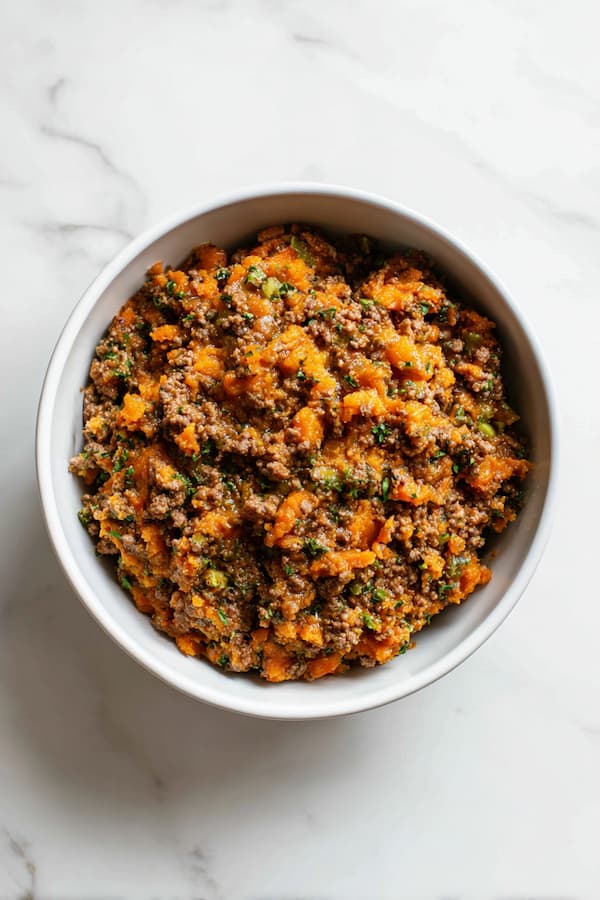
Step 4: Mix It All Together
In your largest bowl, combine the mashed sweet potato, ground beef, oat-and-vegetable mixture, Greek yogurt, and coconut oil. Stir until everything is blended evenly. The yogurt creates a creamy texture that most dogs go crazy for.
I noticed Snickers gets more excited about this recipe than the chicken one. Not scientific, but he does this little hop thing when he smells the beef cooking that he doesn’t do for chicken. Take that for what it’s worth.
Step 5: Cool and Portion
Same rule as Recipe A. Let the food cool to room temperature before storing. No shortcuts on this step.
The Portioning System
Getting the portions right matters just as much as the recipe itself. Too much and your dog gains weight. Too little and you’re shortchanging their nutrition.
Daily Amounts by Weight
| Dog Weight | Daily Total (cups) | Per Meal (2 meals/day) |
|---|---|---|
| 5-10 lbs | 0.75 – 1.25 | 0.4 – 0.6 |
| 10-20 lbs | 1.25 – 2 | 0.6 – 1 |
| 20-30 lbs | 2 – 3 | 1 – 1.5 |
| 30-50 lbs | 3 – 4.5 | 1.5 – 2.25 |
| 50-70 lbs | 4.5 – 5.5 | 2.25 – 2.75 |
| 70+ lbs | 5.5 – 7 | 2.75 – 3.5 |
These are starting points. Every dog is different based on age, breed, metabolism, and how much they move during the day. Weigh your dog weekly for the first month and adjust portions up or down based on what you see. You should be able to feel their ribs without pressing hard, but not see them sticking out.
How I Portion
I use cheap deli containers from Amazon. The 16-oz size holds exactly one day’s food for Snickers (he’s about 18 pounds). I label each container with the day of the week using a piece of tape and a marker.
It takes me about 5 minutes to fill all seven containers once the food is cooled. Monday through Friday go in the fridge. Saturday and Sunday get stacked in the freezer. On Thursday night I move the frozen containers to the fridge so they’re thawed and ready.
Storage That Keeps Food Fresh and Safe
Proper storage is the difference between food that lasts all week and food you have to throw out on Wednesday.
Fridge Storage (5 Days)
Keep containers sealed tight at 40°F or below. Glass containers are better than plastic for keeping food fresh, but good BPA-free plastic works fine too (and won’t shatter if you drop one). Smell and visually check each container before serving. If anything looks off or smells sour, toss it.
Freezer Storage (Up to 3 Months)
Freeze individual portions in freezer-safe containers or silicone bags with the air pressed out. Lay bags flat for easy stacking. Label with the date. Thaw overnight in the fridge, never on the counter and never in the microwave. Microwaving creates hot spots that can burn your dog’s mouth and destroys some nutrients.
Serving Temperature
Dogs prefer food at room temperature or slightly warm. Pull the container from the fridge 10-15 minutes before mealtime, or add a splash of warm water and stir. Tested this with Snickers both ways and the warm version gets a completely different reaction. More tail, less hesitation.
The Supplement Piece
Both recipes above provide solid protein, carbs, fats, and vegetable nutrients. But if you’re feeding homemade food as your dog’s primary diet (not just a topper), you need a supplement to fill the gaps that fresh ingredients alone can’t cover. Calcium ratios, trace minerals, and certain vitamins don’t show up in high enough amounts from food alone.
This isn’t optional if you’re going full homemade. I learned this the hard way after Snickers’ vet flagged slightly low calcium levels at a checkup about six months into homemade feeding.
If you want a free, DIY calcium source, I wrote a full guide on Homemade Eggshell Calcium for Dogs that pairs well with these recipes.
What I Use
After that vet visit, I started using Azestfor Homemade Dog Food Vitamins and it’s been my go-to ever since. It’s specifically made for homemade diets, not a generic pet vitamin.
What stands out about it:
- Covers 24 vitamins and minerals including calcium and phosphorus in the right ratio
- Meets AAFCO nutritional standards when paired with their recipes
- One bag makes about 33 pounds of complete food
- Powder form mixes into food with zero fuss
You add it at serving time, not during cooking. Heat breaks down a lot of the vitamins, which defeats the purpose (sounds obvious, but I made that mistake in the beginning).
Other Solid Options
| Supplement | Price Range | Best For |
|---|---|---|
| JustFoodForDogs DIY Nutrient Blend | $35-$45 | Comes with exact grocery lists and recipes, completely foolproof |
| Nordic Naturals Omega-3 Pet | $15-$25 | If your recipe doesn’t include fish oil, add this separately for coat and brain health |
If you’re only going to buy one thing from this list, go with Azestfor or JustFoodForDogs. Those two cover the most ground.
Meal Prep Equipment Worth Having
You don’t need a professional kitchen to do this. But a few tools make the difference between a smooth two-hour session and a frustrating three-hour one.
Large Stock Pot or Dutch Oven
You need something that holds at least 6 quarts. Anything smaller and you’ll be cooking in batches, which kills the whole point of doing it all at once. I use a Lodge 7-Quart Dutch Oven that I’ve had for years. Cast iron distributes heat evenly and it’s nearly indestructible.
Kitchen Scale
Guessing portions leads to overfeeding or underfeeding, both of which cause problems over time. A basic digital scale costs about $12 and takes the guesswork out completely. The Ozeri Pronto Digital Scale is accurate down to 0.05 oz and has a tare function so you can weigh food directly in the bowl.
Storage Containers
Get a set of identical containers so they stack neatly. I use 16-oz deli containers with snap-on lids. A 24-pack costs around $15 on Amazon and lasts for months.
Food Processor (optional but helpful)
If you’re cooking for a small dog or a puppy, a food processor chops meat and vegetables down to the right size in seconds. Way faster than doing it by hand.
Frequently Asked Questions
Can I prep two different recipes and alternate weeks?
Yes, and I’d actually recommend it after the first month. Rotating between the chicken and beef recipes gives your dog more nutritional variety over time. Just don’t alternate daily, as that can upset their stomach. Week on, week off works well.
My dog is a picky eater. Will they eat this?
Most dogs go wild for fresh food because the smell is completely different from kibble. If yours is hesitant, mix a spoonful of the homemade food into their regular food for a few days and gradually increase the ratio. Warming it slightly also helps release the aroma.
How do I know if the portions are right?
Weigh your dog weekly for the first month. If they’re gaining weight, reduce portions by about 10%. If they’re losing, increase by 10%. Your vet can also do a body condition assessment at any checkup. It takes two minutes and tells you exactly where your dog stands.
Can I use this for puppies?
Puppies have different calcium and protein requirements for growth. These recipes work as a base, but you’ll need a puppy-specific supplement and potentially adjusted portions. Talk to your vet before putting a puppy on a fully homemade diet.
We’ve got a separate guide for that: Vet-Approved Homemade Dog Food Recipes for Puppies.
Is meal prepping cheaper than commercial dog food?
It depends on what you’re comparing it to. It’s cheaper than premium fresh dog food brands (Farmer’s Dog, Ollie) by a wide margin. Compared to mid-range kibble, it’s roughly the same cost when you buy proteins in bulk. The real value is knowing exactly what’s in your dog’s bowl.
Sundays With Snickers
It’s been about two months since I started the Sunday meal prep routine, and honestly, it’s become one of my favorite parts of the week. Not because I love cooking (I really don’t), but because there’s something satisfying about opening the fridge on a Tuesday night and just grabbing a container instead of scrambling.
Snickers has figured out the routine too. Every Sunday when I pull out the big pot, he plants himself in the kitchen doorway and watches the whole process like a little quality control inspector. He doesn’t move until I wash his bowl and scoop out a fresh serving.
Two hours on a Sunday. Seven days of food handled. One very happy dog with a very clean bowl.
I’m a passionate dog lover and kitchen enthusiast, but I’m not a certified veterinarian or animal nutritionist. Long-term homemade diets should always be discussed with your vet to make sure your pup is getting everything they need.
Bon appétit to your furry friend!
Affiliate Disclosure: This page contains affiliate links. We earn a small commission when you purchase through these links at no extra cost to you. Thank you for supporting our work!