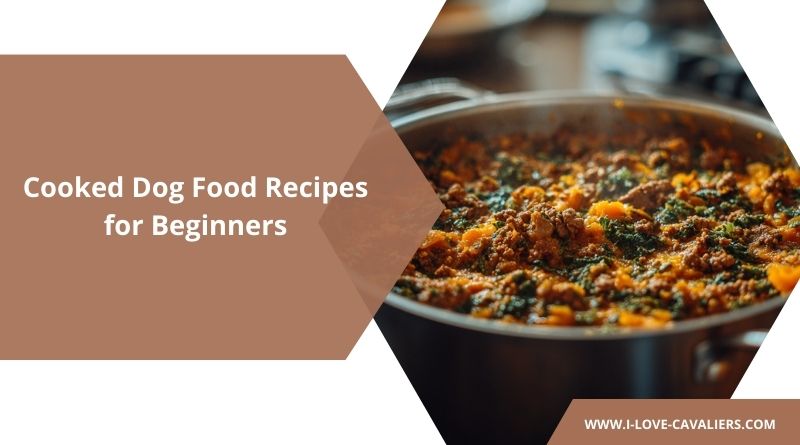
You’ve been thinking about making homemade dog food, but every recipe you find looks complicated. Twenty ingredients, special supplements, confusing meal plans—it’s overwhelming. You want to feed your dog better food, but you’re not ready to become a canine nutritionist.
Here’s the reality: cooking for your dog doesn’t have to be complicated. You can start with simple, beginner-friendly recipes that take less time than your own dinner. In this guide, you’ll learn two foolproof cooked dog food recipes that provide balanced nutrition without the stress. No fancy equipment needed, no expensive ingredients, and definitely no guesswork.
What Beginner Dog Food Recipes Need
A good beginner recipe should be simple, forgiving, and nutritionally balanced. Here’s what to look for:
Five ingredients or less – You don’t need twenty different components to make healthy dog food. Simple recipes are easier to prepare, cost less, and are less likely to go wrong.
Common ingredients – The best beginner recipes use ingredients you can find at any grocery store. No hunting down exotic supplements or specialty meats.
Flexible portions – Recipes that scale easily based on your dog’s size and how much you want to prepare at once.
Balanced nutrition – Each recipe should include protein, carbohydrates, vegetables, and healthy fats. While long-term homemade feeding requires supplements, these recipes provide solid basic nutrition.
Important Notes Before You Start
- Consult your veterinarian before switching to homemade dog food, especially if your dog has health conditions or you plan to feed homemade meals long-term. Your vet can recommend necessary supplements and ensure the diet meets your dog’s needs.
- Transition gradually over 7-10 days by mixing increasing amounts of homemade food with your dog’s current diet. Sudden changes can cause digestive upset.
- Watch for changes in your dog’s energy, coat condition, stool quality, and weight. These indicate whether the diet is working well or needs adjustment.
- Consider supplements for long-term feeding. While these recipes provide excellent nutrition, dogs eating primarily homemade food may need calcium, fish oil, and a multivitamin to ensure complete nutritional balance.
Now let’s get cooking.
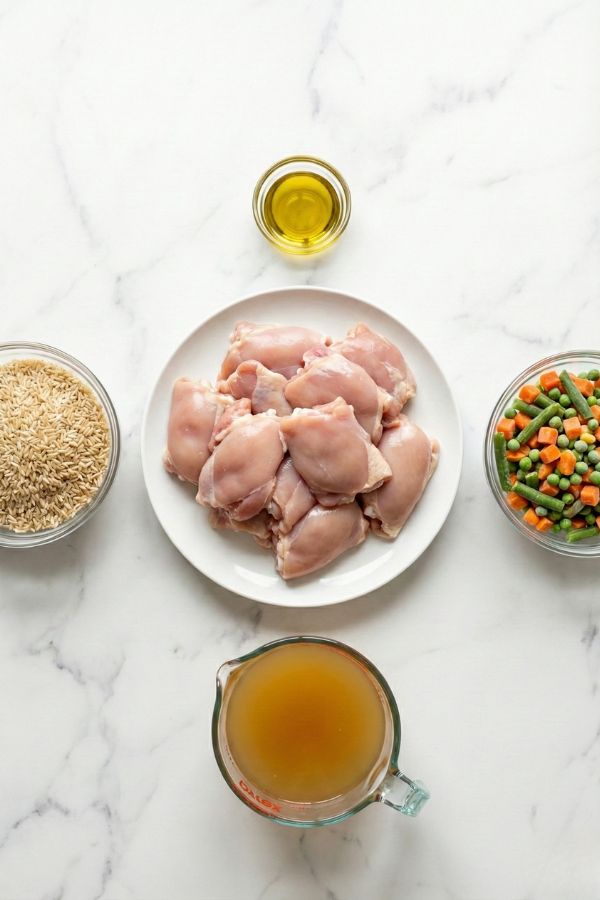
Recipe 1: Simple Chicken & Veggie Bowl
This is the perfect first recipe for anyone new to cooking dog food. It’s straightforward, uses basic ingredients, and dogs absolutely love it. I make this for Charlotte at least twice a week because it’s easy and I always have the ingredients on hand.
Ingredients
- 2 pounds boneless, skinless chicken thighs or breast
- 2 cups brown rice (uncooked)
- 2 cups mixed vegetables (carrots, green beans, peas—fresh or frozen)
- 2 tablespoons olive oil or coconut oil
- 4 cups water or low-sodium chicken broth
Why These Ingredients:
Chicken thighs provide protein and natural fat for energy and muscle maintenance. Brown rice delivers complex carbohydrates and fiber for sustained energy and healthy digestion. Mixed vegetables add vitamins, minerals, and antioxidants. The oil ensures your dog gets healthy fats for coat health and nutrient absorption.
Equipment Needed
- Large pot with lid
- Cutting board and knife
- Mixing bowl
- Storage containers
Estimated Prep Time: 10 minutes
Cooking Time: 45 minutes
Total Time: 55 minutes
Yield: About 8-10 cups (feeds a 50-pound dog for 4-5 days)
Step-by-Step Instructions

Step 1: Prepare the Chicken
Cut chicken into 1-inch cubes. You don’t need to be precise—rough chunks work fine. Smaller pieces cook faster and are easier for dogs to eat.
If you’re using frozen chicken, thaw it completely first. Never cook from frozen, as it won’t cook evenly.
Step 2: Cook the Rice
In your large pot, combine brown rice and 4 cups of water or broth. Bring to a boil over high heat. Once boiling, reduce heat to low, cover, and simmer for 35-40 minutes.
Don’t lift the lid during cooking—this releases steam and extends cooking time. The rice is done when it’s tender and has absorbed all the liquid.
Step 3: Cook the Chicken
While rice cooks, prepare the chicken in a separate pan if you have one. If not, you can cook everything together in one pot (see the One-Pot variation below).
Place chicken cubes in a pan with a small amount of water (about 1/2 cup). Cook over medium heat for 12-15 minutes, stirring occasionally, until chicken is fully cooked with no pink inside. Internal temperature should reach 165°F.
Step 4: Prepare the Vegetables
If using fresh vegetables, chop carrots into small pieces and trim green beans. If using frozen, no prep needed.
Add vegetables to the cooking rice during the last 10 minutes of cooking time. This steams them perfectly without overcooking.
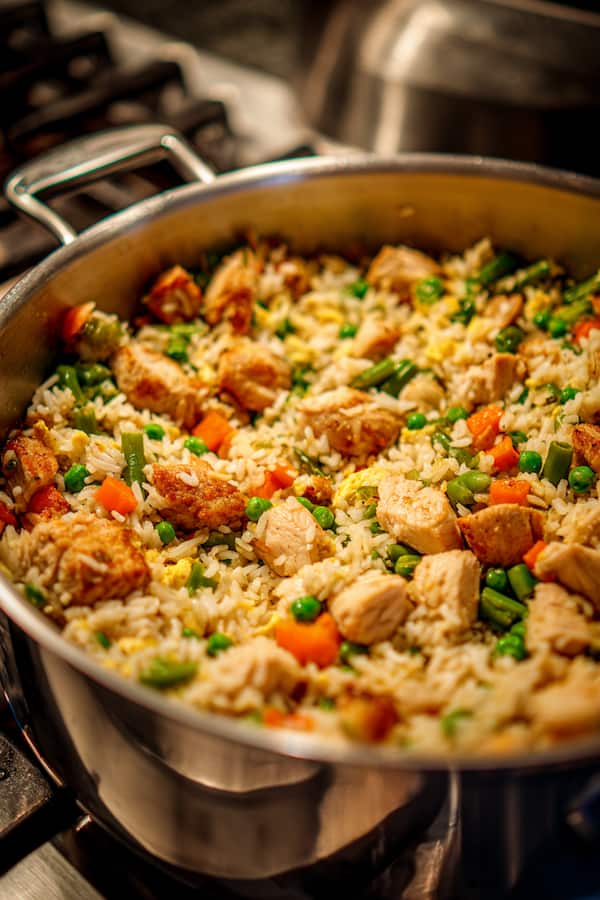
Step 5: Combine Everything
Once rice, vegetables, and chicken are cooked, drain any excess liquid from the chicken. In a large mixing bowl, combine the rice and vegetable mixture with the cooked chicken.
Drizzle olive oil or coconut oil over the mixture and stir thoroughly to distribute evenly. The oil adds healthy fats and makes the food more palatable.
Step 6: Cool and Store
Let the mixture cool to room temperature before serving or storing. Never put hot food directly in the refrigerator—it raises the internal temperature and can affect other foods.
Divide into meal-sized portions based on your dog’s feeding amounts. Store in airtight containers in the refrigerator for up to 5 days, or freeze portions for up to 3 months.
Serving Guidelines
Daily Feeding Amounts (divide into 2 meals):
- Small dogs (10-20 lbs): 1-1.5 cups per day
- Medium dogs (20-50 lbs): 2-3 cups per day
- Large dogs (50-80 lbs): 3-4 cups per day
- Giant breeds (80+ lbs): 4-6 cups per day
These are starting points. Adjust based on your dog’s activity level, age, and body condition. If they’re gaining weight, reduce portions slightly. If losing weight, increase portions.
Additional Tips
- Batch cooking: Double or triple the recipe and freeze individual portions. You’ll have homemade dog food ready for weeks.
- Texture preferences: Some dogs prefer finely chopped ingredients, others like bigger chunks. Adjust to your dog’s preference.
- Flavor boost: Save the chicken cooking liquid as “doggy gravy” to drizzle over meals or mix into dry kibble.
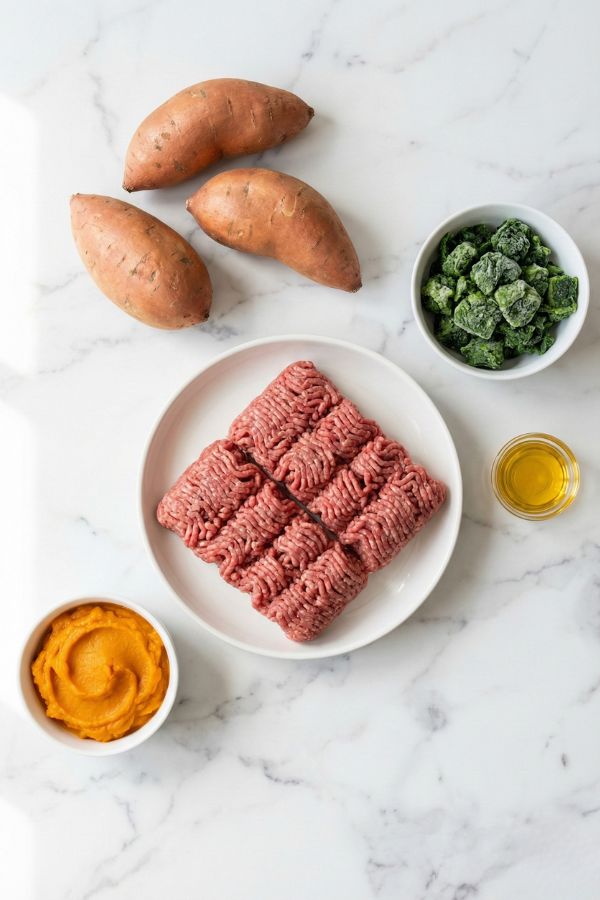
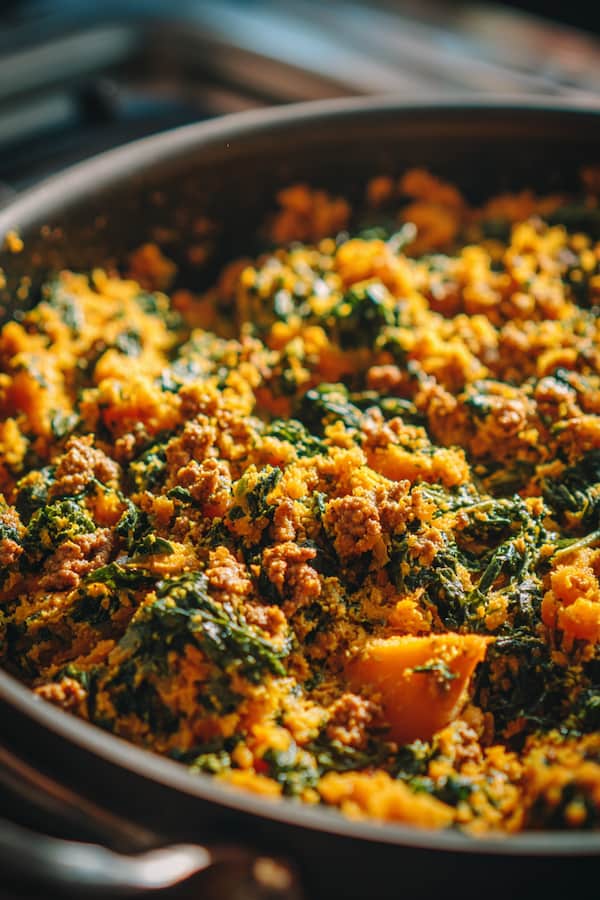
Recipe 2: Beef & Sweet Potato Power Bowl
This recipe is slightly more nutrient-dense than the chicken version, perfect for active dogs or those needing to gain healthy weight. The beef provides iron and B vitamins, while sweet potato delivers beta-carotene and fiber.
Ingredients
- 2 pounds lean ground beef (90% lean or higher)
- 3 medium sweet potatoes (about 2 pounds)
- 2 cups spinach (fresh or frozen, chopped)
- 2 tablespoons fish oil or flaxseed oil
- Optional: 1/4 cup plain pumpkin puree for digestive health
Why These Ingredients:
Ground beef offers high-quality protein, iron, zinc, and B vitamins for muscle and energy. Sweet potatoes provide complex carbs, fiber, and vitamin A for immune health and vision. Spinach adds folate, iron, and antioxidants. Fish oil delivers omega-3 fatty acids for coat, skin, and joint health.
Equipment Needed
- Large skillet or pot
- Baking sheet (for sweet potatoes)
- Fork for mashing
- Large mixing bowl
- Storage containers
Estimated Prep Time: 15 minutes
Cooking Time: 50 minutes
Total Time: 65 minutes
Yield: About 10-12 cups (feeds a 50-pound dog for 5-6 days)
Step-by-Step Instructions

Step 1: Roast the Sweet Potatoes
Preheat your oven to 400°F. Pierce sweet potatoes several times with a fork (this prevents them from exploding). Place on a baking sheet and roast for 45-50 minutes until very soft.
Alternatively, you can peel and cube sweet potatoes, then boil for 15-20 minutes. Roasting gives better flavor, but boiling is faster.
Let cool slightly, then scoop out the flesh and mash with a fork. Discard the skins or save them for compost.
Step 2: Brown the Beef
While sweet potatoes cook, brown the ground beef in a large skillet over medium-high heat. Break it into small crumbles as it cooks—aim for pieces about the size of kibble.
Cook for 10-12 minutes until no pink remains. If using higher-fat beef, drain excess fat and discard. You want to keep some fat for nutrition, but too much can cause digestive upset.
Step 3: Add the Spinach
When beef is nearly done, add chopped spinach directly to the pan. Stir and cook for 2-3 minutes until wilted. Frozen spinach should be thawed and excess water squeezed out before adding.
The spinach will look like a lot at first but wilts down significantly. Don’t worry if it seems like too much—it’ll cook down to almost nothing.
Step 4: Combine Ingredients
In a large mixing bowl, combine the mashed sweet potato, cooked beef and spinach mixture, and fish oil. Mix thoroughly until everything is evenly distributed.
If your dog has a sensitive stomach or you want extra digestive support, stir in the optional pumpkin puree at this stage.
Step 5: Cool and Portion
Allow the mixture to cool completely to room temperature. This typically takes 30-45 minutes. You can speed it up by spreading the mixture on a large baking sheet.
Once cool, divide into meal portions and store in airtight containers. Refrigerate for up to 5 days or freeze for up to 3 months.
Serving Guidelines
Daily Feeding Amounts (divide into 2 meals):
- Small dogs (10-20 lbs): 1-2 cups per day
- Medium dogs (20-50 lbs): 2-3.5 cups per day
- Large dogs (50-80 lbs): 3.5-5 cups per day
- Giant breeds (80+ lbs): 5-7 cups per day
This recipe is slightly more calorie-dense than the chicken version, so portions are a bit smaller. Monitor your dog’s weight and adjust accordingly.
Additional Tips
- Texture control: If the mixture seems too dry, add a splash of low-sodium beef broth. Too wet? Mix in some cooked white rice to absorb excess moisture.
- Make-ahead sweet potatoes: Roast a bunch of sweet potatoes on Sunday, mash and freeze in 2-cup portions. This cuts prep time in half for future batches.
- Quality matters: Choose organic spinach when possible, as conventional spinach often has high pesticide residue.
Storage and Food Safety
Proper storage keeps your homemade dog food safe and nutritious. Follow these guidelines:
Refrigeration:
- Store cooked dog food in airtight glass or BPA-free plastic containers
- Use within 5 days of preparation
- Keep refrigerator at 40°F or below
- Smell and visually inspect before serving—when in doubt, throw it out
Freezing:
- Freeze in individual meal portions for easy thawing
- Use freezer-safe containers or heavy-duty freezer bags
- Label with recipe name and date
- Use within 3 months for best quality
- Arrange flat in freezer for space-efficient storage
Thawing:
- Transfer frozen portions to refrigerator 24 hours before serving
- Never thaw at room temperature (bacteria growth risk)
- Can thaw in cold water if needed faster
- Never refreeze thawed dog food
Making It Complete: The Supplement Question
These two recipes give your dog fresh, whole-food nutrition that most commercial kibble can’t match. But before you commit to long-term homemade feeding, there’s one thing worth knowing: commercial dog foods are formulated to AAFCO standards, ensuring every vitamin and mineral is covered in precise amounts. When you cook at home, you get better ingredients—but trace nutrients like calcium, zinc, vitamin D, and certain B vitamins can quietly fall short over time.
The fix is simple: a supplement powder mixed into each bowl.
#1 Pick: Azestfor Homemade Dog Food Vitamins
This is the supplement I recommend first for anyone making recipes exactly like the two above. A powder designed from the ground up for home-cooked meals, not a generic multivitamin repurposed for dogs.
- 21 essential vitamins and minerals, including calcium, phosphorus, and taurine—exactly what chicken-rice and beef-sweet-potato meals are missing
- AAFCO compliant when used with their recipes, meaning your homemade meals meet the same nutritional standard as premium commercial food
- Free vet-approved recipes included—great if you want to expand beyond these beginner bowls
- Excellent value: 1 lb bag makes approximately 33 lbs of complete, balanced dog food
- Available in Chicken flavor and Veggie flavor (for dogs with poultry sensitivities)
Dosing: 1¼ teaspoon per cup of food. Always add after cooking, not during.
#2 Pick: JustFoodForDogs DIY Nutrient Blend
→ View on Amazon (Chicken & White Rice)
JustFoodForDogs is the #1 vet-recommended fresh pet food brand in the US, and their DIY Nutrient Blend is the most clinically rigorous option on this list. It’s the only homemade dog food supplement backed by actual clinical feeding trials, not just AAFCO nutrient calculations.
- 100% human-grade nutraceuticals, regulated by the FDA
- Recipe-specific formula—each blend is matched to a specific recipe (Chicken & White Rice, Beef & Russet Potato, Fish & Sweet Potato, etc.), so the nutrients are precisely calibrated for that exact food combination
- Comes with a full cooking guide and step-by-step instructions
- Makes approximately 30 lbs of food per package
- Available in multiple protein options to match your preference
Best for owners who want maximum precision and clinical-grade confidence. The recipe-specific approach means a bit less flexibility than Azestfor—you’ll be following their recipe rather than your own—but the nutritional accuracy is hard to beat.
#3 Pick: Wholistic Pet Organics Canine Complete
If you prefer whole-food, organic ingredients over lab-synthesized compounds, this is your option. Trusted by veterinarians since 1998 and made in the USA with USDA-certified organic ingredients and zero fillers, synthetics, or GMOs.
- Organic kelp, flaxseed, fish protein, digestive enzymes, and probiotics—all from whole food sources
- Supports immune function, skin and coat health, digestion, and overall vitality
- Works for all life stages: puppies, adults, and seniors of all breeds
- Available in sizes from 8 oz all the way up to 16 lb bags for multi-dog households
- NASC certified, HACCP and GMP certified
The key difference from Azestfor and JustFoodForDogs: this is a whole-food multivitamin rather than a precision AAFCO-balancing supplement. It’s excellent for general health support and filling everyday nutritional gaps, but if you’re feeding homemade as a sole diet long-term, pairing it with a calcium source is a good idea.
Quick Comparison
| Azestfor | JustFoodForDogs DIY | Wholistic Canine Complete | |
|---|---|---|---|
| Type | Vitamin-mineral premix powder | Recipe-specific nutrient blend | Organic whole-food multivitamin |
| AAFCO compliant | ✅ Yes | ✅ Yes | ⚠️ Supplemental |
| Best for | Beginners using their own recipes | Maximum clinical precision | Organic-focused pet parents |
| Flexibility | High – use with any recipe | Low – follow their recipes | High – add to any meal |
| Amazon link | Link | Link | Link |
How to Use Any of These
Add the powder at serving time, not during cooking—heat degrades vitamins and reduces their effectiveness. Follow package dosing by weight. And if homemade food becomes your dog’s primary diet (more than 50% of meals), a vet check after 2–3 months is worth it. A basic blood panel confirms everything is dialed in.
Transitioning to Homemade Dog Food
Don’t switch your dog to homemade food overnight. A gradual transition prevents digestive upset and allows their system to adjust.
7-Day Transition Schedule:
Days 1-2: 75% current food + 25% homemade
Days 3-4: 50% current food + 50% homemade
Days 5-6: 25% current food + 75% homemade
Day 7: 100% homemade food
Watch for loose stools, gas, or decreased appetite during transition. If these occur, slow down the transition and maintain the current ratio for a few more days before progressing.
Some dogs transition easily in 3-4 days, while others need the full week or longer. Follow your dog’s lead.
Signs Your Dog Is Thriving
After 2-3 weeks on homemade food, you should notice positive changes:
Physical signs:
- Shinier, softer coat
- Clearer, brighter eyes
- Firmer, smaller stools (better nutrient absorption)
- Healthy energy levels
- Ideal body condition (can feel ribs without seeing them)
Behavioral signs:
- Increased enthusiasm at mealtimes
- Better focus and attentiveness
- Improved appetite
- More playful energy
If you notice negative changes—weight loss, dull coat, lethargy, or digestive issues—consult your veterinarian. Your dog might need different ratios, additional supplements, or a modified recipe.
Frequently Asked Questions
Is cooked dog food better than kibble?
Homemade cooked dog food offers benefits like quality control, fresh ingredients, and customization for specific needs. However, high-quality commercial kibble is nutritionally complete and convenient. The “better” choice depends on your dog’s needs, your time availability, and whether you’re willing to add necessary supplements for complete nutrition.
Do I need to add supplements to homemade dog food?
For occasional homemade meals mixed with commercial food, supplements aren’t necessary. However, if homemade food makes up more than 50% of your dog’s diet, you’ll need calcium, fish oil (if not in recipe), and a multivitamin to ensure complete nutrition. Consult your vet for specific recommendations.
Can puppies eat homemade cooked dog food?
Puppies can eat homemade food, but their nutritional needs are more demanding than adult dogs. They require precise calcium-to-phosphorus ratios and higher protein levels for growth. Work closely with your veterinarian or veterinary nutritionist to ensure proper nutrition during this critical development stage.
How do I know if my homemade dog food is balanced?
Signs of balanced nutrition include healthy weight maintenance, shiny coat, firm stools, good energy, and overall vitality. For certainty, consult a veterinary nutritionist to analyze your recipes. They can recommend adjustments or supplements to ensure complete nutritional balance for long-term feeding.
Final Words
Cooking for your dog doesn’t require culinary expertise or hours in the kitchen. These two beginner-friendly recipes prove that homemade dog food can be simple, affordable, and nutritious.
Start with one recipe this week. See how your dog responds, notice the excited tail wags at mealtime, and watch their health improve over the coming weeks. You’re not just feeding your dog—you’re investing in their long-term health and happiness.
Remember to consult your vet, transition gradually, and monitor your dog’s response. With these foundations in place, you’ll have the confidence to provide your pup with fresh, wholesome meals made with love.