I stopped using store-bought dog shampoo after reading the ingredient list.
Sodium lauryl sulfate. Artificial fragrance. Parabens. FD&C Red No. 40. A bunch of chemicals I couldn’t pronounce, let alone feel good about rubbing into my dog’s skin.
Here’s the thing: dogs absorb everything through their skin. Just like us. And most commercial dog shampoos are loaded with synthetic detergents, harsh surfactants, and fragrances that can irritate skin, dry out their coat, and even mess with their endocrine system.
So I started making my own.
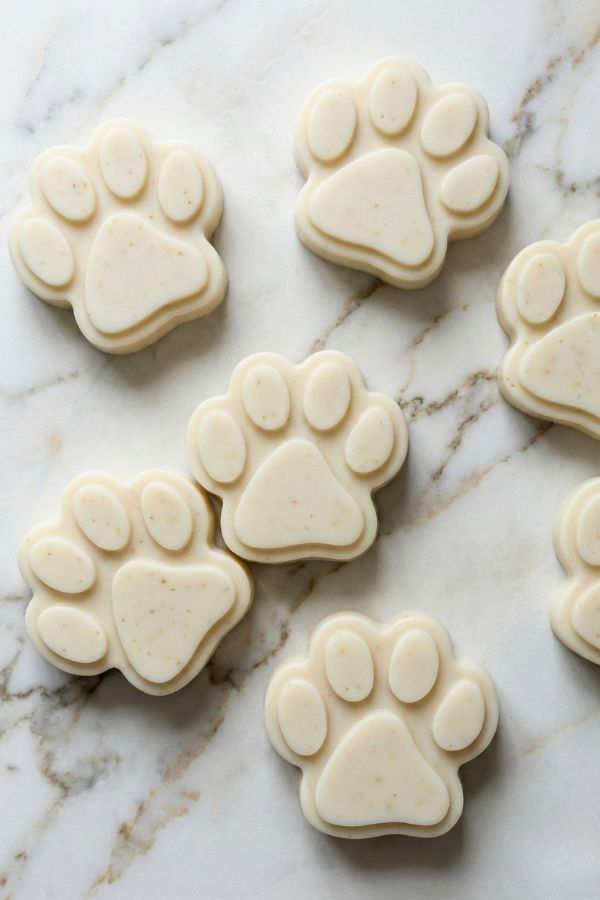
This homemade dog shampoo bar is budget friendly and makes six paw-shaped soaps. It’s made with skin-nourishing oils like olive, coconut, and castor. It includes neem oil—a natural insect repellent that helps with flea prevention and itchy skin. And it’s scented with lavender essential oil, which is calming and antibacterial.
It lathers beautifully. It rinses clean. And my dog’s coat comes out soft, shiny, and smelling like a spa day instead of a chemical factory.
Let me walk you through it.
A Quick Safety Note About Neem Oil (Read This First)
Neem oil is incredible for dogs. It’s a natural insect repellent, antifungal, and antibacterial. It helps with hot spots, dry skin, and minor irritations. It even discourages fleas and ticks.
But there’s one critical warning: Neem oil should NOT be handled by pregnant women or anyone trying to conceive. It has been shown to affect fertility in some studies.
Also, do not use neem oil soap on pregnant dogs. It’s generally safe for healthy, non-pregnant dogs, but if your dog is expecting puppies, skip the neem and substitute with more olive oil or castor oil instead.
Okay. Safety lecture over. Let’s make soap.
What You’ll Need
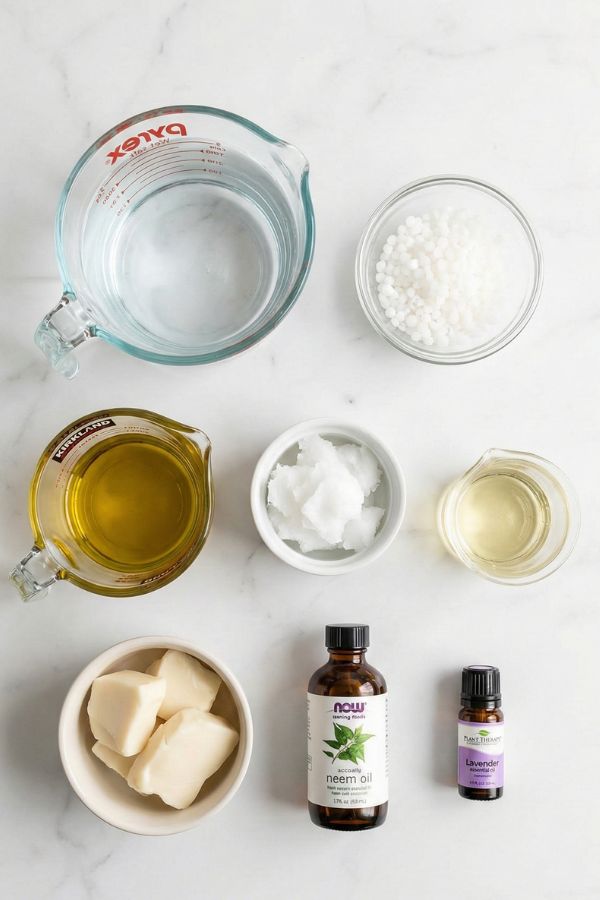
The Ingredients
| Ingredient | Amount |
|---|---|
| Distilled water | 7 oz |
| Olive oil | 9 oz |
| Coconut oil | 4.5 oz |
| Castor oil | 3 oz |
| Tallow | 3 oz |
| Neem oil | 0.5 oz |
| Sodium hydroxide (lye) | 2.75 oz |
| Lavender essential oil | 2 tsp |
Yield: 6 paw-shaped soap bars
The Supplies
- Digital kitchen scale (soap making requires precise measurements by weight, not volume)
- Safety goggles and rubber gloves (lye is caustic—don’t skip this)
- Stainless steel or heavy-duty plastic container for mixing lye (never use aluminum or glass)
- Heat-safe mixing bowl for oils
- Immersion blender (makes mixing soap WAY easier)
- Silicone soap molds (paw-shaped molds are adorable, but any mold works)
- Thermometer (digital is best)
- Wax paper and towels for insulating
Where to buy lye: You can find sodium hydroxide (lye) at some hardware stores (labeled as drain cleaner, but check that it’s 100% sodium hydroxide with no additives) or order it online from soap-making suppliers.
Before You Start: Soap Making 101 Crash Course
If you’ve never made cold process soap before, here’s what you need to know:
Lye (sodium hydroxide) is not optional. Without lye, you don’t have soap—you just have a bowl of oils. The lye reacts with the oils in a process called saponification, turning them into soap. By the time the soap is cured, there’s no lye left. It’s completely safe.
Lye is dangerous when you’re handling it. It’s highly caustic. It can burn your skin and damage your eyes. Always wear goggles and gloves. Always add lye to water (never water to lye—that can cause a dangerous reaction). Work in a well-ventilated area because the fumes are strong for the first minute or two.
Soap needs to cure for 4-6 weeks. Freshly made soap is too soft and has excess moisture. Curing allows the water to evaporate and the saponification process to fully complete. The result is a harder, longer-lasting, gentler bar.
Okay. Now that you know the basics, let’s make some dog shampoo bars.
Step-by-Step Dog Shampoo Bar Recipe
Step 1: Gear Up and Prep Your Workspace
Put on your safety goggles and rubber gloves. I’m serious. Lye doesn’t care if you’re being careful. One splash and you’ll regret it.
Clear your workspace and make sure pets and kids are out of the room.
Step 2: Mix the Lye Solution
Weigh 7 oz of distilled water into your stainless steel container. In a separate cup, weigh 2.75 oz of lye.
Working near an open window or outside, slowly sprinkle the lye into the water while stirring constantly. Never dump it all at once. The mixture will heat up to 200°F and release harsh fumes—don’t breathe them in.
Once dissolved, set it aside in a safe spot to cool for 30-40 minutes until it reaches 100-115°F.
Step 3: Prepare and Heat the Oils
Weigh the tallow and coconut oil in a heat-safe bowl. Melt them gently in the microwave or on the stovetop. Once melted, add the olive oil, castor oil, and neem oil. Stir together. The mixture should be around 100-110°F.
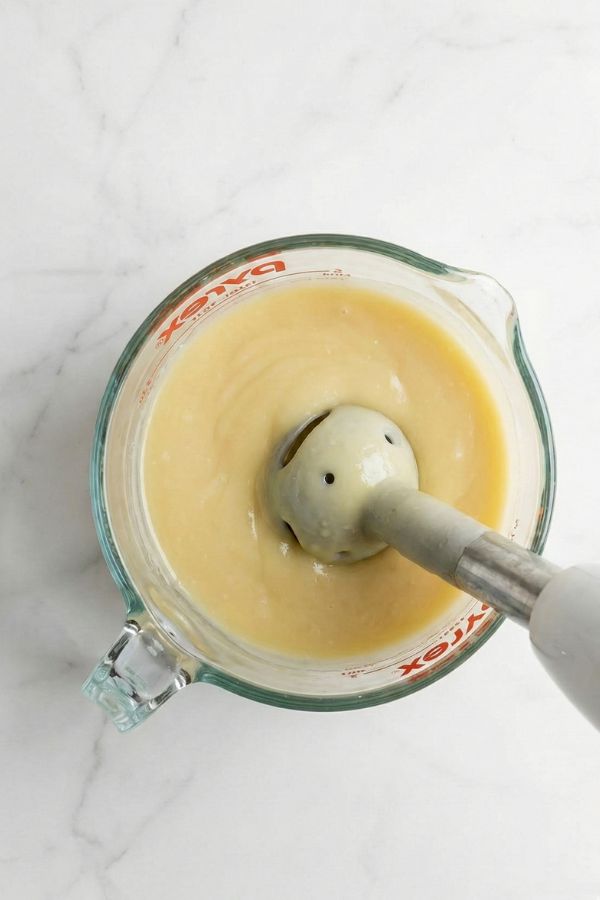
Step 4: Combine Lye and Oils
When both mixtures are around 100-115°F, pour the lye solution into the oils. Stir gently with a spoon, then use your immersion blender in short 2-3 second bursts. Alternate between hand stirring and pulsing until the mixture reaches light trace—it should look like thin pudding and leave a faint trail when drizzled from a spoon. This takes about 3-5 minutes.
Step 5: Add Lavender Essential Oil
Once you’ve reached light trace, add 2 teaspoons of lavender essential oil and stir gently until evenly distributed.
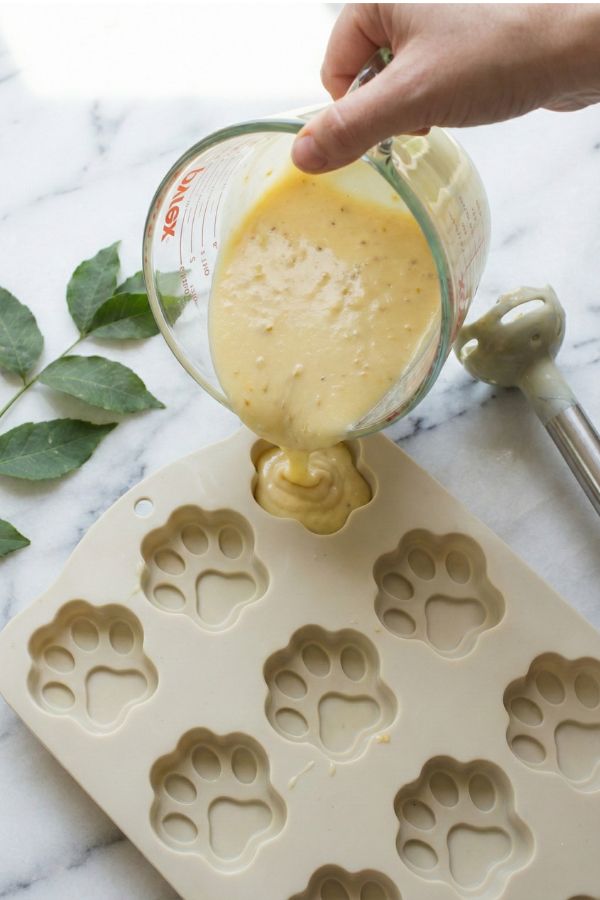
Step 6: Pour and Insulate
Pour the mixture into your soap molds. Tap gently on the counter to release air bubbles. Cover lightly with wax paper, then wrap in a towel or blanket to keep the heat in. Leave undisturbed for 24-48 hours.
Step 7: Unmold
After 1-2 days, the soap should be firm enough to release from the molds. If it’s still soft, give it another day.
Step 8: Cure (The Waiting Game)
Place the bars on wax paper or a drying rack in a cool, dry, well-ventilated area. Let them cure for at least 4 weeks, turning them occasionally. This step is non-negotiable—it makes the bars harder, gentler, and longer-lasting.
After 4 weeks, your soap is ready to use.
How to Use the Shampoo Bars on Your Dog
Wet your dog’s coat thoroughly with warm water.
Rub the shampoo bar directly onto their fur, working up a lather. Focus on areas that get dirtiest—chest, belly, paws, butt.
Massage the lather into their coat, avoiding their eyes and ears.
Rinse thoroughly. Make sure you get all the soap out—leftover residue can cause itching or dullness.
Towel dry (or let them shake water all over your bathroom—we both know that’s what’s happening anyway).
What It Smells Like (And Why Dogs Don’t Hate It)
Lavender is one of the few essential oils that’s safe for dogs and actually smells good. It’s calming, which helps anxious dogs relax during bath time.
The neem oil has a strong, earthy smell in its raw form, but once it’s blended into the soap and diluted with other oils, it’s barely noticeable.
Your dog will smell clean—not perfumed. Just fresh and natural.
How Long Do the Bars Last?
Each bar lasts 4-6 baths depending on the size of your dog and how much lather you use.
Store unused bars in a cool, dry place. They’ll stay good for up to a year if stored properly.
Common Mistakes (And How to Avoid Them)
Not Wearing Protective Gear
Lye burns. Period. Always wear goggles and gloves. No exceptions.
Adding Water to Lye Instead of Lye to Water
This can cause a dangerous volcanic reaction. Always add lye to water—slowly—while stirring.
Skipping the Cure Time
I know 4 weeks feels like forever. But using soap too early means it’ll be soft, crumbly, and potentially irritating to your dog’s skin. Be patient.
Over-Blending
If you blend too long, your soap will thicken too fast and become difficult to pour. Use short pulses and check the consistency frequently.
Using Tap Water Instead of Distilled
Tap water contains minerals that can interfere with saponification. Always use distilled water for soap making.
Why Homemade Is Better Than Store-Bought
Commercial dog shampoos are full of ingredients you don’t need and your dog doesn’t want:
- Sulfates (harsh detergents that strip natural oils)
- Artificial fragrances (can cause allergic reactions)
- Parabens (preservatives linked to hormone disruption)
- Synthetic dyes (purely cosmetic, zero benefit)
This homemade version has eight ingredients. All of them serve a purpose. None of them are harmful.
Plus, you know exactly what’s going into it. No surprises. No fine print. Just clean, effective soap.
What If My Dog Has Sensitive Skin?
This recipe is already gentle—olive oil and castor oil are soothing and moisturizing. But if your dog has particularly sensitive skin, you can make a few adjustments:
- Skip the neem oil and replace it with more olive oil or sweet almond oil
- Use oatmeal powder (finely ground oats) mixed into the soap at trace for extra soothing properties
- Reduce or omit the lavender essential oil if your dog reacts to fragrances
Always test a small area first before doing a full bath.
The Bottom Line
Making your own dog shampoo bars isn’t hard. It’s just unfamiliar.
But once you’ve done it once, you’ll realize how simple it actually is. And how much better it is than anything you can buy at the store.
Your dog’s skin will thank you. Your wallet will thank you. And honestly, there’s something deeply satisfying about lathering up your pup with soap you made yourself.
The first time I used this on my dog, she came out of the bath with the softest coat she’d ever had. Shiny. Clean. No residue. No weird chemical smell. Just a happy, fresh-smelling dog who didn’t scratch herself raw for the next three days.
That’s when I knew I’d never go back to store-bought.
Now go make some soap. Your dog is waiting.