Some recipes come out of pure necessity. I remember one rainy Saturday when the kids were bouncing off the walls, Snickers was underfoot begging for attention, and I just needed SOMETHING.
Anything to keep everyone busy and happy.
That’s when this recipe became a lifesaver. Three ingredients I already had, one bowl, ten minutes in the oven, and suddenly the house smelled like a bakery.
Snickers was doing his happy spin, the kids were sneaking pieces of banana, and I had that rare feeling of winning the day with almost no effort.
Why These 3-Ingredient Baked Treats Are a Must-Try
Dogs go absolutely crazy for the combination of pumpkin and banana! The natural sweetness from the ripe banana paired with the earthy, subtly sweet flavor of pumpkin creates an irresistible treat that will have your pup doing every trick in their repertoire.
The Health Benefits
What makes these treats even better is that they’re made with ingredients that are actually good for your dog:
Pumpkin Puree is rich in fiber and packed with vitamins A, C, and E. It supports healthy digestion, can help with both diarrhea and constipation, and promotes a shiny coat. Pumpkin is also low in calories, making it perfect for dogs watching their weight.
Banana is loaded with potassium, vitamins, and fiber. It’s a natural energy booster that also aids in digestion and supports heart health.
Oat Flour is a gentle, easily digestible whole grain that provides fiber and helps maintain healthy blood sugar levels. It’s also great for dogs with wheat sensitivities.
Banana Pumpkin Baked Dog Treats Recipe
Makes approximately 20-30 treats, depending on size
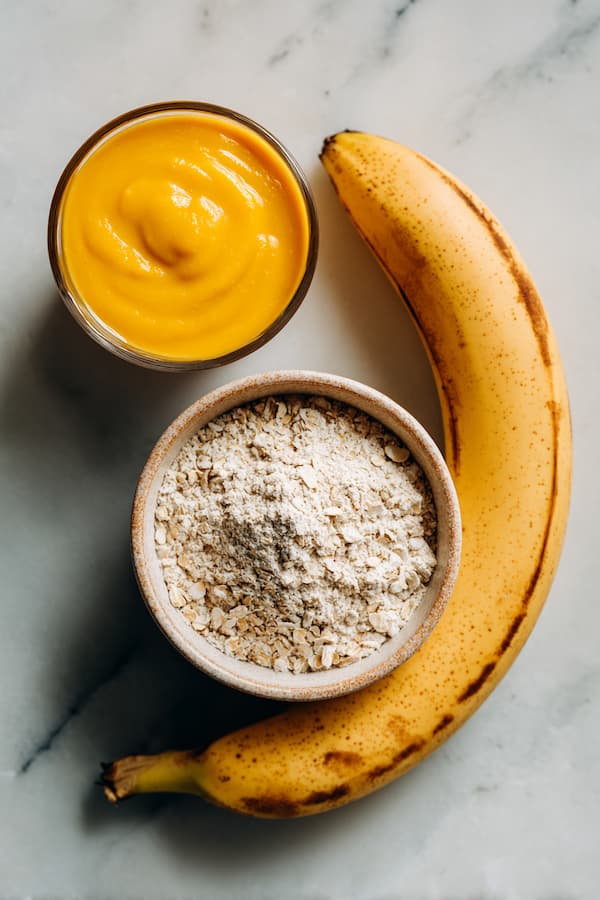
Ingredients
| Ingredient | Amount |
|---|---|
| Pure pumpkin puree (not pie filling) | ⅓ cup |
| Ripe banana, mashed | ½ cup |
| Oat flour | 1 cup |
Ingredient Notes
Pure pumpkin puree – Make sure you’re using 100% pure pumpkin, not pumpkin pie filling which contains added sugars and spices like nutmeg that can be harmful to dogs. Check the ingredient list—it should only say “pumpkin.”
Ripe banana – The browner the better! Overripe bananas with brown spots mash more easily and provide extra sweetness.
Oat flour – You can buy pre-ground oat flour or make your own by blending old-fashioned oats in a high-speed blender until fine and powdery.
Step-by-Step Instructions
Step 1: Preheat and Prepare
Set your oven to 350°F. Line a cookie sheet with parchment paper or a silicone baking mat. Having everything ready prevents the dough from drying out while you’re setting up.
Step 2: Create Your Oat Flour (If Needed)
If you’re starting with whole oats, add them to a high-speed blender and pulse until you achieve a fine, flour-like consistency. This takes about 30-45 seconds. If you’re using store-bought oat flour, skip ahead!
Step 3: Mash Your Banana
In a large mixing bowl, thoroughly mash your banana with a fork until smooth with minimal lumps. The smoother your banana, the more evenly your dough will come together.
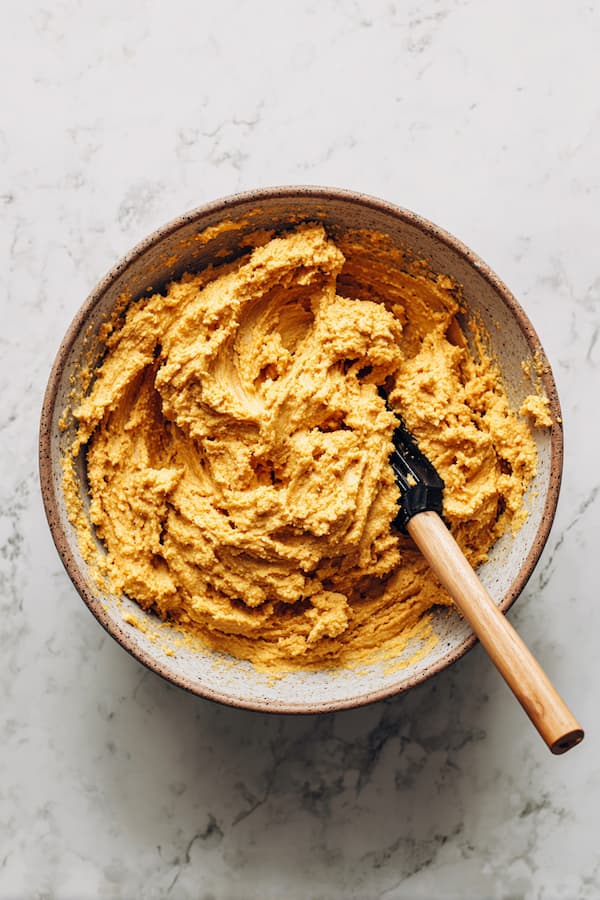
Step 4: Combine Your Ingredients
Add the oat flour and pumpkin puree to the bowl with your mashed banana. Using a fork, begin working the ingredients together, incorporating the pumpkin puree into the banana and flour.
Step 5: Knead the Dough
Once the mixture starts coming together, use your hands to knead it into a cohesive dough. Work it for about 1-2 minutes until smooth and pliable. The warmth from your hands helps bring everything together beautifully. The dough should feel like playdough and not sticky.
Step 6: Roll Out the Dough
On a clean countertop or large cutting board, roll your dough to approximately ¼-inch thickness. Use a rolling pin for even results. If the dough sticks to your rolling pin, dust it lightly with oat flour.
Step 7: Cut Your Shapes
Use cookie cutters to create fun shapes—bones, hearts, paw prints, or whatever makes you smile! Press straight down and lift straight up for clean cuts. Re-roll scraps and continue cutting until all dough is used.
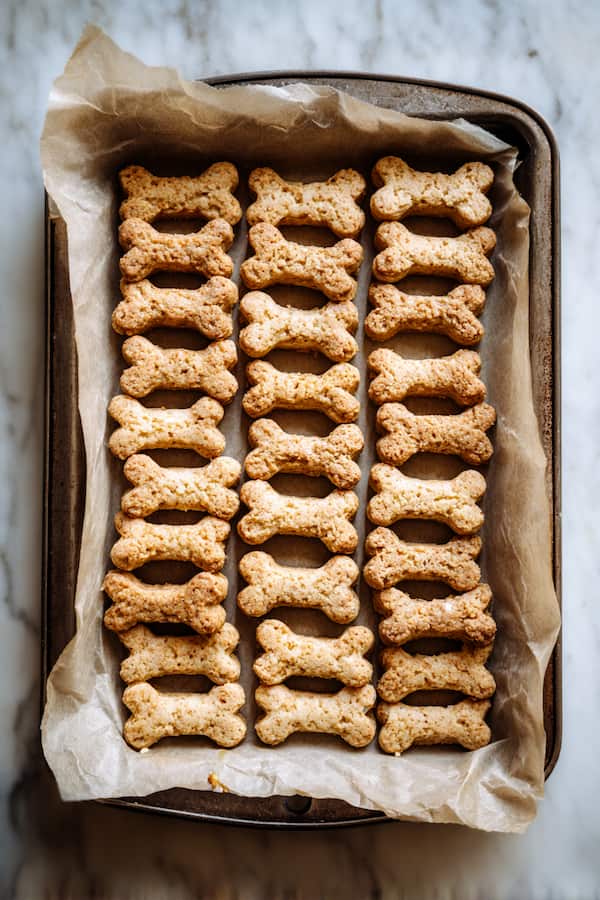
Step 8: Arrange and Bake
Transfer the cut-out treats to your prepared baking sheet. They can be close together since they won’t spread. Bake for 10 minutes until firm to the touch and lightly golden on the edges.
Step 9: Cool Completely
Remove from the oven and let the treats cool completely on the baking sheet. This is crucial—the treats will firm up as they cool, developing that perfect crunchy texture. Resist those puppy-dog eyes for at least 15-20 minutes!
Storage
Short-Term (Up to 5 Days): Store in an airtight container on the counter. Keep them away from moisture and heat sources to maintain crispness.
Long-Term (Up to 3-4 Months): Freezer Method: Place cooled treats in a sealed jar or freezer-safe container. They’ll stay fresh for several months and can be served straight from the freezer or thawed for 5-10 minutes.
Quality Check: While safe to eat beyond 4 months, texture may become less appealing over extended freezer storage.
Serving Guidelines and Nutritional Considerations
| Dog Weight | Daily Limit |
|---|---|
| 5-15 lbs | 1-2 treats |
| 16-30 lbs | 2-3 treats |
| 31-50 lbs | 3-4 treats |
| 51-70 lbs | 4-5 treats |
| 71+ lbs | 5-6 treats |
I’m not a professional canine nutritionist, and every dog is different. Factors like size, age, weight, activity level, and any existing allergies or health conditions all play a role in determining the right amount of food or treats.
As a general guideline, dog treats should make up no more than 10% of your pup’s daily calorie intake. If you’re ever unsure about what’s best for your dog, it’s always safest to consult with your veterinarian.
Frequently Asked Questions
Can I use fresh pumpkin instead of canned?
Yes! Cooked, mashed fresh pumpkin works perfectly. Just make sure it’s plain pumpkin without any added ingredients. Avoid using raw pumpkin as it’s harder to digest.
Can I make these treats softer for my senior dog with dental problems?
Absolutely! Reduce baking time to 8 minutes for a softer texture, or roll the dough slightly thicker (closer to ½ inch). You can also break them into smaller pieces before serving.
Can I double or triple this recipe?
Yes! This recipe scales beautifully. Just make sure to work in batches when rolling and cutting so the dough doesn’t dry out while waiting.
Final Thoughts
And that’s really the heart of it – easy wins. These little treats take almost no time, no stress, and give back tenfold in tail wags and peace of mind. Bake a batch once, and you’ll see why they’ve earned a permanent spot in my kitchen. Simple, wholesome, and guaranteed to bring joy to your pup. Go on, try them (you’ll thank me later).