I’ll never forget the look on my dog’s face the day I came home with yet another bag of store-bought treats. He sniffed, took one half-heartedly, then left the rest on the floor. That was my “enough is enough” moment.
Why was I paying so much for snacks loaded with ingredients I couldn’t even pronounce, when I had perfectly good, wholesome basics sitting right in my pantry?
Funny enough, these crunchy 4-ingredient dog treats were actually one of the very first recipes I ever made for Snickers. Don’t know why I haven’t shared them with you guys earlier, but here we are!
And trust me, your furry friends are going to love them. Simple, healthy, and baked in silicone molds that make every batch look fun, these treats turned snack time into a little celebration we both look forward to.
Why Your Dog (and You) Will Love These Treats
- Simple Ingredients, Maximum Impact
With just four wholesome ingredients, you know exactly what your furry friend is getting. No fillers, no artificial colors, no weird chemical names.
- Budget-Friendly Tail-Wagging
I calculated it once—these treats cost about 30 cents per batch to make, compared to the $8-12 I was spending on premium store-bought treats.
- Perfectly Crunchy Texture
That satisfying crunch is what dogs crave! These treats are hard enough to help clean teeth naturally while being gentle enough for dogs of all ages and sizes.
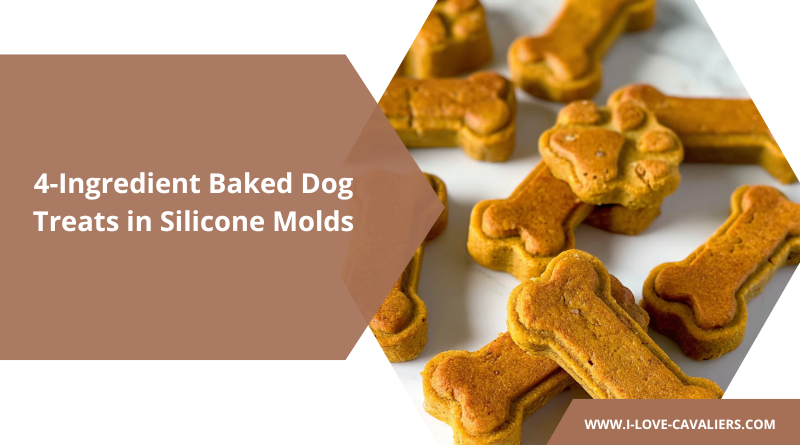
Baked Dog Treats in Silicone Molds

Ingredient Breakdown
| Ingredient | Amount |
|---|---|
| Pure pumpkin puree | ½ cup |
| Natural peanut butter | 3 tbsp |
| Eggs | 2 medium |
| Oat flour | 1⅔ cups |
The Critical Safety Note About Peanut Butter
This is so important I’m giving it its own section: ALWAYS check your peanut butter label for xylitol. This artificial sweetener is extremely toxic to dogs and can cause life-threatening drops in blood sugar. Stick to natural peanut butter!
Essential Tools for Treat-Making Success
You don’t need a professional kitchen, but having the right tools makes the process so much smoother:
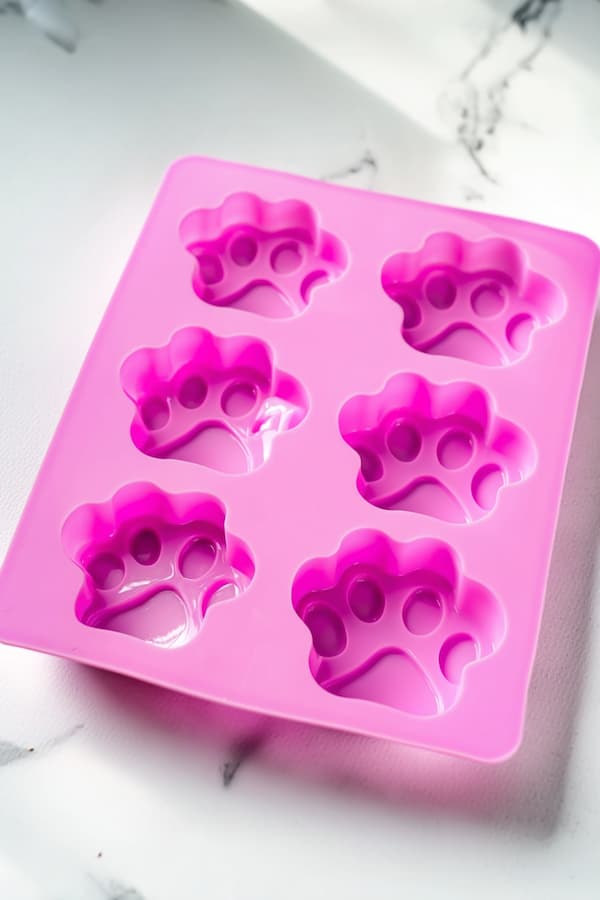
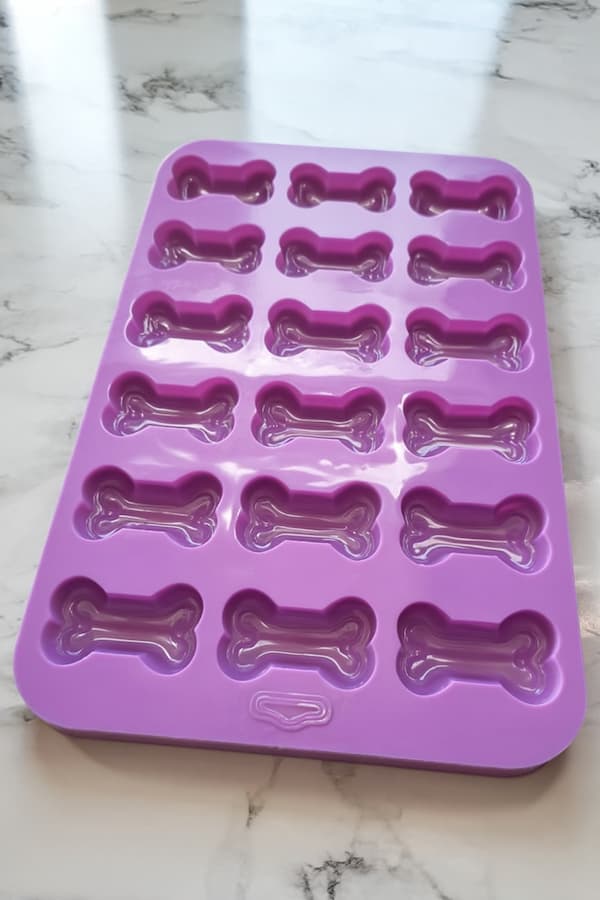
- Silicone treat molds: Easy release, fun shapes, and dishwasher safe
- Medium mixing bowl: For combining all your ingredients
- Sturdy wooden spoon: For mixing that slightly thick dough
- Cookie scoop or small spoon: For portioning dough evenly
- Baking sheet: To hold your molds steady in the oven
- Wire cooling rack: For proper cooling and that perfect crunchy texture
Pro tip: I found my silicone molds at the dollar store, and they work perfectly! You don’t need to spend a fortune on fancy ones.
Step-by-Step Instructions
Step 1: Get Your Kitchen Ready
First things first—preheat that oven to 350°F and give it about 10 minutes to heat up properly. While you’re waiting, lay out your silicone molds on a sturdy baking sheet. This makes moving them in and out of the oven so much easier and safer.
Step 2: Create Your Base Mixture
In a medium bowl, combine your pumpkin puree, peanut butter, and eggs. Here’s where I like to get my hands dirty (literally)! Mix everything together until you have a smooth, well-combined mixture. The pumpkin’s natural moisture balances perfectly with the richness of the peanut butter, while those eggs work their binding magic.
Step 3: The Flour Integration
I’ve learned to add flour gradually, about half a cup at a time, mixing well after each addition. You want a dough that holds together but isn’t too sticky. It should feel slightly tacky but not leave residue all over your hands.
Texture checkpoint: Your dough should hold together when you squeeze it, but not be so wet that it sticks to everything. If it’s too dry, add a tiny bit of water. Too wet? Add a bit more oat flour.
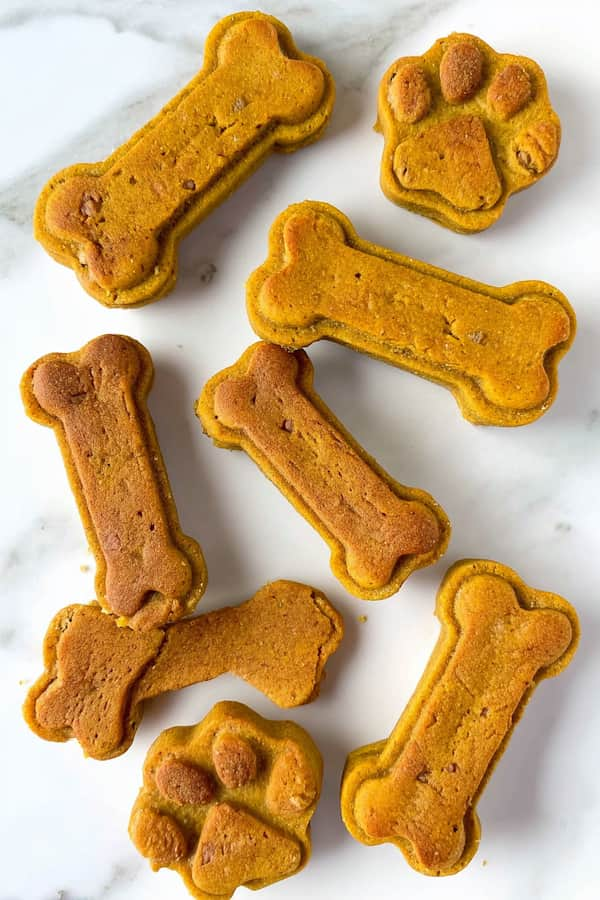
Step 4: Shape and Fill Those Molds
I like to roll the dough into small balls about the size of a large marble, then gently press them into the molds. Fill them just level with the top—resist the urge to overfill because these little treats will puff up slightly as they bake.
Important tip: Overfilled molds create treats that stick together and lose their cute shapes!
Step 5: Bake
Slide your mold-filled baking sheet into the oven for about 30 minutes. You’ll know they’re done when they’re firm to the touch and have developed a lovely golden color. The smell alone will have your dog doing circles in the kitchen!
Storage Secrets for Maximum Freshness
One of the best things about these treats is how well they keep! Store them in an airtight container at room temperature, and they’ll stay fresh and crunchy for over a week. I use a large mason jar—it keeps them fresh and looks cute on my counter.
For longer storage: Pop them in the fridge for up to a month, or freeze them for up to three months. Snickers actually loves them straight from the freezer on hot summer days—like doggie popsicles!
Nutritional Benefits: Why These Treats Are Actually Good for Your Dog
- Fiber from pumpkin: Supports healthy digestion and can help with both diarrhea and constipation
- Healthy fats from peanut butter: Promotes a shiny coat and healthy skin
- Complete protein from eggs: Builds and maintains strong muscles
- Complex carbs from oats: Provides steady energy without sugar spikes
- Beta-carotene from pumpkin: Acts as an antioxidant and supports eye health
What Your Dog Doesn’t Get:
- No artificial preservatives
- No mystery meat by-products
- No excessive salt or sugar
- No artificial colors or flavors
- No guilt from you about what you’re feeding them!
Size Matters: Portioning Guidelines
Getting the size right is crucial for both safety and enjoyment:
Small Dogs (under 25 lbs):
- Break treats in half or use mini molds
- 1-2 treats per day maximum
Medium Dogs (25-60 lbs):
- Full-size treats work perfectly
- 2-3 treats per day
Large Dogs (over 60 lbs):
- Can handle full-size treats easily
- 3-4 treats per day
Remember: Treats should make up no more than 10% of your dog’s total daily calories!
Frequently Asked Questions
Can puppies eat these treats?
Absolutely! These are perfect for puppies over 8 weeks old. Just make sure to break them into appropriately small pieces. The simple ingredients are gentle on developing digestive systems.
Can I make these without special molds?
Definitely! Roll the dough into small balls and place them on a parchment-lined baking sheet. They won’t have fancy shapes, but they’ll taste just as good.
Can I freeze the dough for later?
Yes! Roll it into balls and freeze on a baking sheet, then transfer to freezer bags. Bake directly from frozen, adding 5-10 minutes to the baking time.
Are these treats suitable for dogs with sensitive stomachs?
The simple, natural ingredients make these great for most dogs with sensitivities. Pumpkin is actually often recommended by vets for digestive issues. However, always check with your vet if your dog has severe allergies or medical conditions.