The first time I opened a bag of store-bought freeze-dried treats and saw “beef liver” buried beneath a list of preservatives, I knew I could do better.
Snickers sure thought so too, he gave them one sniff, then walked away unimpressed. That moment pushed me to try making my own, especially once I invested in a freeze dryer.
What started as a simple experiment with fresh liver, pumpkin, and broth quickly became a household favorite. Now, every morning, my pup plants himself by the pantry, waiting patiently (or not so patiently) for his “golden nuggets.”
And honestly? Watching Snicker’s excitement makes the effort more than worth it.
Why Your Dog (and You) Will Love These Treats
- Maximum Nutritional Density
Freeze-drying preserves 97% of the original nutrients while removing all moisture, creating incredibly nutrient-dense treats that pack serious nutritional punch in every bite.
- Unmatched Shelf Stability
Properly stored, these treats last 2 years without refrigeration. Perfect for emergency preparedness or long camping trips with your dog.
- Irresistible Flavor Concentration
The freeze-drying process intensifies flavors dramatically. Dogs go absolutely wild for the concentrated liver taste that’s impossible to achieve with other preservation methods.
- Cost-Effective Premium Quality
Commercial freeze-dried liver treats cost $25-40 per pound. Making your own costs roughly $8-12 per pound for superior quality ingredients.
- No Artificial Preservatives Needed
The freeze-drying process naturally preserves treats without chemicals, creating shelf-stable nutrition your dog’s ancestors would recognize.
Freeze-Dried Dog Treats Recipe
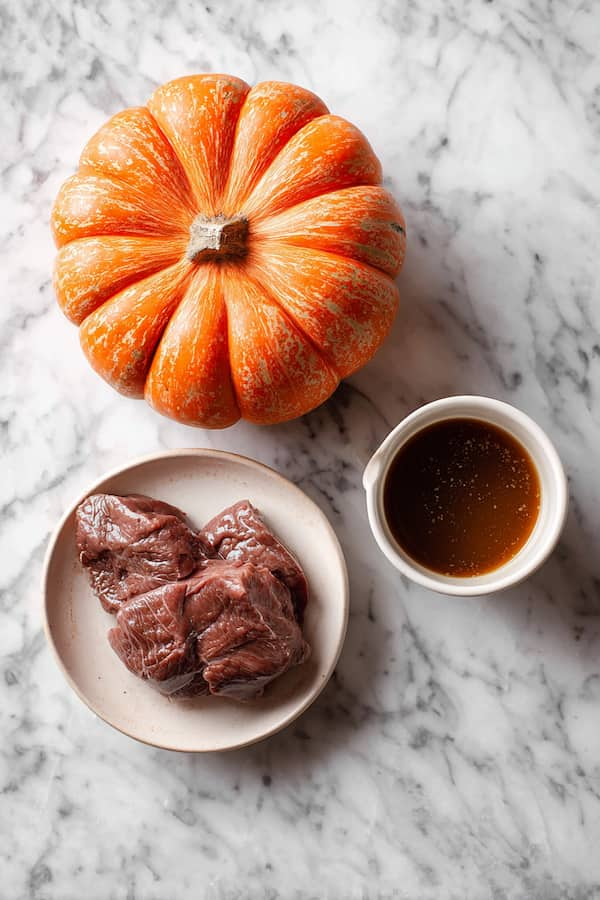
| Ingredient | Amount |
|---|---|
| Beef liver | 1 lb |
| Large pumpkin | 1 whole |
| Beef broth | 1 cup |
Must-Have Equipment:
- Home freeze dryer
- Large pot for cooking
- Food processor or meat grinder
- Silicone molds
- Digital scale
- Mylar bags with oxygen absorbers
How to Make Long-Lasting Freeze-Dried Dog Treats

Step 1: Prepare Your Workspace
Set up your cooking area with all equipment clean and ready. Fresh liver requires immediate processing once cooked, so having everything prepared prevents delays that could affect texture and safety.
Step 2: Cook the Liver
Place the pound of beef liver in a large pot and cover with water. Bring to a rolling boil, then reduce heat and simmer for 15-20 minutes until completely cooked through. The liver should be firm with no pink remaining when cut. Properly cooked liver will have a uniform brown color throughout.
Critical safety note: Undercooked liver can harbor bacteria. Always ensure complete cooking before proceeding.
Step 3: Process the Pumpkin
While the liver cooks, prepare your pumpkin. Cut into large chunks, remove seeds (save these – they’re great roasted for humans!), and steam until fork-tender, about 20-25 minutes. The pumpkin should mash easily when ready.
Step 4: Create the Base Mixture
Chop the cooked liver into small, uniform pieces – roughly ¼-inch cubes work perfectly. In a large bowl, mash the cooked pumpkin until smooth, then fold in the liver pieces. The combination should be thick but mixable.
Step 5: Add the Broth Integration
Slowly pour in the beef broth while mixing continuously. The mixture should have the consistency of thick cookie dough – moldable but not runny. If too thick, add broth gradually. If too thin, let it sit for 10 minutes to allow the pumpkin to absorb excess moisture.
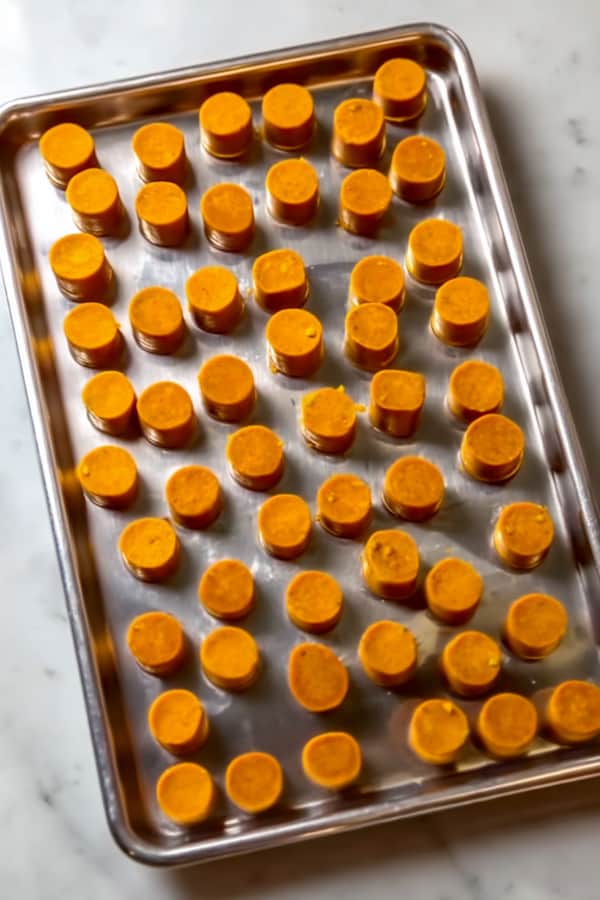
Step 6: Mold for Uniform Drying
Spoon the mixture into silicone molds, filling each cavity completely but not overfull. Press gently to remove air pockets, which can cause uneven drying. Uniform shapes ensure consistent drying times.
Step 7: The Deep Freeze
Place filled molds in your freezer for 4-6 hours or overnight until completely solid. This step is crucial – any unfrozen portions will not freeze-dry properly and could spoil the entire batch.
Step 8: Freeze-Dry to Perfection
Remove frozen treats from molds and arrange on freeze dryer trays without touching. Set your freeze dryer according to manufacturer instructions. The process typically takes 18-24 hours depending on thickness and moisture content.
Quality check: Properly dried treats will be rock-hard with no soft spots. They should snap cleanly when broken and show no signs of moisture when pressed.
Storage Tips for Maximum Shelf Life
- Short-Term Storage (1-3 months)
Store in airtight containers at room temperature away from direct sunlight. Mason jars work well for daily portions.
- Long-Term Storage (6+ months)
Use mylar bags with oxygen absorbers inside airtight containers. Store in cool, dry locations below 70°F for maximum shelf life.
- Portion Control Strategy
Package in weekly portions to minimize air exposure when accessing treats. Once opened, use portions within 30 days for best quality.
Nutritional Powerhouse: Why These Treats Transform Health
What Your Dog Gets Per Serving
- Vitamin A: 200-300% daily requirement for eye and immune health
- B-Complex vitamins: Essential for nervous system and energy metabolism
- Iron: Supports oxygen transport and prevents anemia
- Fiber: Promotes healthy digestion and gut microbiome
- Antioxidants: Fight free radicals and support longevity
Homemade vs. Commercial Price Breakdown
- Your cost per pound: $8-12 depending on liver source
- Commercial equivalent: $25-40 per pound for similar quality
- Annual savings: $200-400 for average dog treat consumption
- Quality advantage: Control over ingredient sourcing and processing
Proper Portioning Guidelines
- Small dogs (under 25 lbs): 1-2 pieces daily
- Medium dogs (25-60 lbs): 2-4 pieces daily
- Large dogs (over 60 lbs): 4-6 pieces daily
Important: These nutrient-dense treats are more filling than commercial alternatives. Start with smaller portions and adjust based on your dog’s response.
Frequently Asked Questions
How long does the freeze-drying process take?
Complete freeze-drying typically takes 18-24 hours depending on treat thickness and your freeze dryer model. Thicker pieces require longer processing times.
Can I use frozen liver from the store?
Yes, but thaw completely and pat dry before cooking. Fresh liver provides slightly better texture, but frozen works well and is more budget-friendly.
How do I know if treats are properly dried?
Correctly dried treats will be rock-hard with no soft spots and will snap cleanly when broken. Any flexibility indicates incomplete drying.
Can I make these without a freeze dryer?
Unfortunately, no. Dehydrating or oven-drying will not achieve the same shelf stability or nutritional preservation that freeze-drying provides.
The Investment That Pays Dividends
What I love most about these freeze-dried treats (besides the look on my dog’s face when he hears the bag crinkle) is how practical they are. Long shelf life, nutrient-packed, and budget-friendly all rolled into one.
It’s the kind of recipe that makes you feel like you’ve cracked a code: premium-quality treats, made right in your own kitchen.
And the best part is that you don’t need to wonder what’s hiding in the ingredient list. It’s just real food, preserved in the smartest way possible. Your dog gets the flavor they crave, you get the peace of mind you deserve. That’s a win on both ends of the leash.