
I noticed Snickers scratching behind his ear one morning. Not the casual, absent-minded kind. The intense, back-leg-going-a-mile-a-minute kind where you can hear the thumping from the next room. I checked for fleas. Nothing. Checked for ticks. Clean.
But the skin behind his ear was dry, flaky, and slightly pink.
The vet said it wasn’t anything serious. Just dry skin, probably from the weather changing. She recommended a fish oil supplement and said something offhand that stuck with me: “Coconut oil works well too. You can put it in his food or even rub it on the dry spots.”
So I started adding a teaspoon of coconut oil to Snickers’ dinner. Within about two weeks, the scratching slowed down. By week three, the flaky patch behind his ear was gone. His coat looked different too. Shinier. Smoother. Like he’d been to some kind of dog spa I couldn’t afford.
That’s when I started wondering if I could turn the coconut oil into treats instead of just stirring it into his food. Partially because treats are more fun to give. But mostly because Snickers had figured out the oil was in his dinner and started licking around it to eat the food first, leaving a greasy puddle at the bottom of the bowl. Classic Cavalier move.
These two recipes solved that problem. The coconut oil is baked or frozen right into the treat, so he can’t separate it out. He just eats the whole thing and gets the skin benefits without the greasy bowl situation.
Why Coconut Oil Helps With Skin and Coat
Coconut oil isn’t a miracle ingredient, but the science behind it is pretty straightforward. It works for dogs the same basic way it works for humans.
- It’s packed with medium-chain fatty acids (MCFAs). Lauric acid specifically makes up about 50% of coconut oil. It has natural anti-inflammatory and antimicrobial properties, which means it helps calm irritated skin and fight the bacteria or yeast that can make dry patches worse.
- It moisturizes from the inside out. When dogs eat coconut oil regularly, the fatty acids get absorbed into the bloodstream and eventually reach the skin. This is why the effect takes 2 to 3 weeks to show up. It’s not a surface fix.
- It supports coat quality. The same fats that hydrate skin also condition the hair follicle. Dogs on regular coconut oil tend to have softer, shinier coats with less shedding. Snickers sheds less now than he did before I started using it, which means less fur on the couch. Not no fur. Just less.
- It’s gentle on the stomach. Unlike some supplements that cause digestive issues, most dogs tolerate coconut oil without any problems. Start with small amounts and work up, but it’s rare for it to cause trouble.
The amount matters though. Too much coconut oil can cause loose stools. For a small dog like Snickers (15 lbs), one teaspoon per day is the right dose. For medium dogs (30 to 50 lbs), one tablespoon. Both recipes below are portioned so each treat delivers the right amount without overdoing it.
How Much Coconut Oil Per Day?
Quick reference before you start baking. This is the general guideline my vet gave me.
| Dog Weight | Daily Coconut Oil |
|---|---|
| Under 15 lbs | 1 teaspoon |
| 15-30 lbs | 2 teaspoons |
| 30-50 lbs | 1 tablespoon |
| 50+ lbs | 1.5 tablespoons |
If your dog has never had coconut oil before, start with half the recommended amount for the first week. Some dogs need time to adjust.
Here’s the thing though. These treats are meant to deliver coconut oil in a way your dog actually enjoys. They’re not just coconut oil shaped into a biscuit. There’s enough flavor and texture in each recipe that your dog will think it’s a regular treat. The skin benefits are just a bonus they don’t know about.
Recipe 1: Coconut Oil & Blueberry Frozen Bites (No Bake)
This one takes about 10 minutes of actual work and then your freezer does the rest. I make a batch every couple of weeks and keep them in a bag in the freezer door. Snickers gets one after his evening walk, and the routine is so locked in now that he sits by the freezer the second we get back inside.
Blueberries aren’t just here for flavor. They’re loaded with antioxidants that support skin cell repair, which pairs well with the coconut oil doing its thing on the moisture side.
Ingredients
| Ingredient | Amount |
|---|---|
| Coconut oil (unrefined, virgin) | 3 tablespoons |
| Fresh or frozen blueberries | 1/2 cup |
| Plain yogurt (no artificial sweeteners) | 1/4 cup |
| Honey | 1 teaspoon |
Use unrefined virgin coconut oil, not the refined kind. Unrefined keeps more of the lauric acid and beneficial compounds intact. It’s the one that smells like coconut when you open the jar.
Steps

Step 1: Melt the Coconut Oil
Scoop 3 tablespoons of coconut oil into a small microwave-safe bowl. Microwave in 15-second bursts until it’s fully liquid. Usually takes 30 to 45 seconds. You can also melt it in a small saucepan over low heat if you prefer. It melts fast either way.
Step 2: Mash the Blueberries
Put the blueberries in a medium bowl and mash them with a fork. You don’t need a smooth puree. Chunky is fine. Some pieces, some juice, some whole berries that escaped the fork. All good. If you’re using frozen blueberries, let them thaw for about 10 minutes first so they’re soft enough to mash.
Step 3: Mix Everything Together
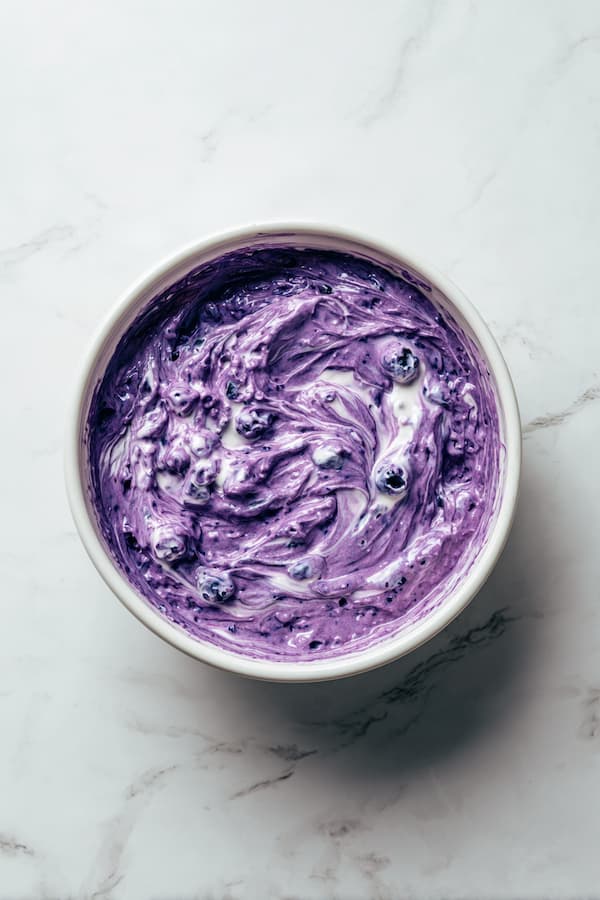
Pour the melted coconut oil into the blueberry bowl. Add the yogurt and honey. Stir until everything is combined. The mixture will be thin and purple, like a smoothie that’s not quite thick enough.
Step 4: Pour Into Molds
Spoon the mixture into a silicone ice cube tray or mini muffin tin. Fill each well about three-quarters full. This batch makes roughly 14 to 16 small treats depending on your mold size. A regular ice cube tray works perfectly.
Step 5: Freeze Solid
Place the tray in the freezer for at least 4 hours, or overnight. The coconut oil needs to fully solidify for the treats to hold their shape. Don’t try to pop them out early or they’ll crumble.
Step 6: Store
Pop the frozen treats out and transfer them to a freezer bag. Squeeze out as much air as you can before sealing. They’ll stick together if you don’t, so if you’re worried about that, lay them on a parchment-lined plate first, freeze for an hour, and then bag them.

Storage
Freezer only. These last up to 3 months. They start melting within a few minutes at room temperature, so pull one out just before you’re ready to give it. Snickers eats his in about 30 seconds, so melting hasn’t been an issue.
Serving
One treat per day for dogs under 30 lbs. Two per day for larger dogs. Each treat contains roughly 1 teaspoon of coconut oil, so one treat matches the daily dose for a small dog. If you’re already adding coconut oil to your dog’s meals, reduce the food amount on days you give a treat so you don’t double up.
Recipe 2: Coconut Oil, Oat & Turmeric Biscuits (Baked)
This is the one I make when I want treats that last longer and don’t need to live in the freezer. They’re crunchy, they smell like a bakery, and Snickers can hear me opening the container from two rooms away. The turmeric in this recipe isn’t random. It’s a natural anti-inflammatory that works alongside the coconut oil to help with skin irritation. My vet mentioned the combination when Snickers had his dry skin episode, and it’s been part of our rotation since.
If you’ve never baked dog treats before, our beginner treat recipes walk you through the basics. This recipe is only slightly more involved than those.
Ingredients
| Ingredient | Amount |
|---|---|
| Old-fashioned oats | 2 cups |
| Coconut oil (unrefined, virgin) | 3 tablespoons, melted |
| Pumpkin puree (canned, pure) | 1/3 cup |
| Turmeric powder | 1/2 teaspoon |
| Cinnamon | 1/4 teaspoon |
| Water | 2-3 tablespoons |
Use Ceylon cinnamon if you can find it. Cassia cinnamon (the common kind) is safe in small amounts, but Ceylon is gentler on a dog’s liver at regular doses. Either works for this recipe since the amount is so small.
Steps


Step 1: Blend the Oats
Pour the oats into a blender or food processor and pulse until you get a coarse flour. A few visible flakes are fine. You’re not making pastry flour here. Thirty seconds of pulsing gets it right.
Step 2: Melt the Coconut Oil
Melt the coconut oil in the microwave (15-second bursts) or on the stove over low heat. Let it cool for a minute so it’s liquid but not hot. Hot oil will cook the pumpkin on contact and make the dough grainy.
Step 3: Mix the Dough
In a medium bowl, combine the oat flour, melted coconut oil, pumpkin puree, turmeric, and cinnamon. Stir with a spoon until a dough forms. It’ll be thick and slightly sticky. If it’s too dry and crumbly, add water one tablespoon at a time. If it’s too wet and sticking to everything, sprinkle in a little more oat flour. You want Play-Doh consistency.
Your hands and the dough will turn slightly yellow from the turmeric. That’s normal. It washes off. The counter might stain temporarily if you’re not careful, so work on parchment paper or a cutting board.
Step 4: Preheat and Prep
Set your oven to 325 degrees F (165 C). Slightly lower than a typical dog biscuit because coconut oil has a lower smoke point and you want it to bake into the treat, not burn off. Line a baking sheet with parchment paper.
Step 5: Roll and Cut
Dust your surface with a little oat flour. Press or roll the dough out to about 1/4 inch thick. Cut shapes with whatever you have. Cookie cutter, cup rim, knife. This batch makes roughly 20 to 24 biscuits depending on size. Place them on the baking sheet with a little space between each one.
Step 6: Bake
Bake for 22 to 25 minutes until the edges are golden and the tops feel dry to the touch. They’ll be slightly soft when they come out. That’s fine. They firm up as they cool. For extra crunchy treats, turn the oven off and leave them inside with the door cracked for another 15 minutes. This dries them out without burning them.
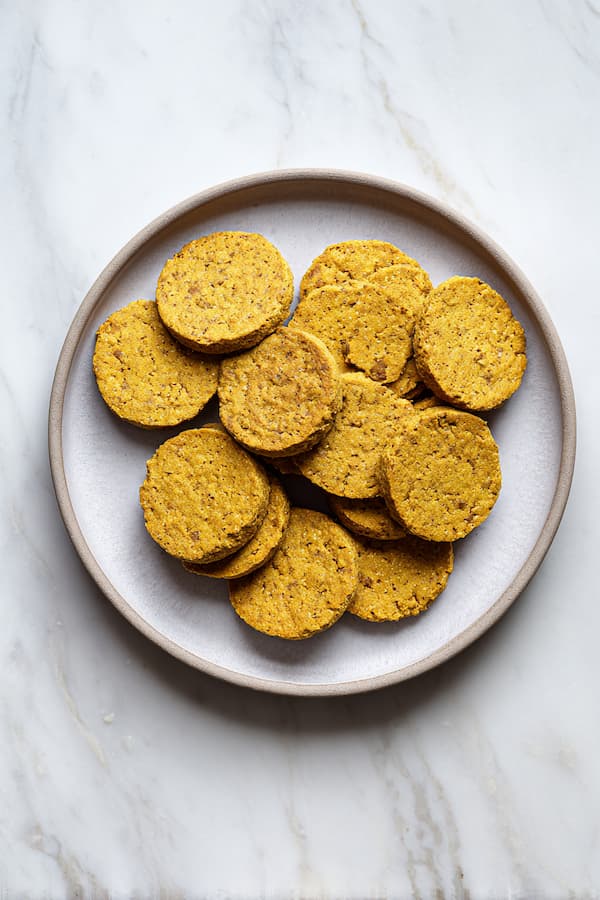
Step 7: Cool Completely
Let the biscuits cool on the baking sheet for at least 30 minutes before moving them. Break one in half to check. If it snaps cleanly, they’re done cooling. If it bends, give them more time. The coconut oil solidifies as the treats cool, which is what gives them that satisfying crunch.
Storage
Airtight container at room temperature for up to 2 weeks. Fridge for up to a month. Freezer for up to 3 months. The coconut oil acts as a natural preservative, so these actually last longer than most homemade biscuits. I keep a jar on the counter and the rest in the freezer.
Serving
One to two biscuits per day for small dogs. Two to three for medium dogs. Each biscuit contains roughly half a teaspoon of coconut oil, so two biscuits equals one teaspoon, which is the daily amount for a small dog. Adjust based on the chart above.
When You’ll See Results
This is the part people always ask about. Coconut oil doesn’t work overnight. Here’s the timeline I experienced with Snickers, and what I’ve heard from other dog owners who tried the same approach.
- Week 1: Probably nothing visible. The fatty acids are being absorbed but haven’t reached the skin yet. Don’t give up.
- Week 2: Coat might start feeling slightly softer when you pet your dog. Snickers’ fur felt different around day 10, like it had a bit more slip to it.
- Week 3: Dry patches start improving. The flaky spot behind Snickers’ ear was noticeably smaller by this point. Less scratching too.
- Week 4 and beyond: Full effect. Shinier coat, less flaking, reduced scratching. This is when other people start commenting on your dog’s coat. My neighbor asked if I switched shampoos. I hadn’t. I switched treats.
If you don’t see improvement after a full month of daily coconut oil, the dry skin might have a different underlying cause. Allergies, thyroid issues, or nutritional deficiencies can all cause similar symptoms. Worth a vet visit at that point.
Quick Note on Coconut Oil Quality
Not all coconut oil is the same, and this matters for these recipes.
- Virgin, unrefined coconut oil is what you want. It’s cold-pressed and retains the lauric acid and other compounds that actually help skin. It smells strongly like coconut.
- Refined coconut oil has been processed to remove the flavor and scent. It’s fine for cooking your own food, but it loses some of the beneficial fatty acids in the refining process. Skip it for dog treats.
- Coconut oil sprays or blends often contain additives. Check the ingredient list. It should say one thing: coconut oil. Nothing else.
A 16-ounce jar of good virgin coconut oil costs about $6 to $8 and will last you several months of making treats. One jar covers roughly 8 to 10 batches of either recipe.
FAQ
Can I just give my dog coconut oil straight from the jar?
You can. Some dogs lick it right off the spoon. Snickers won’t. He sniffs it, looks at me, and walks away like I’ve insulted him. That’s why the treats exist. If your dog happily eats it plain, you don’t need the recipes. Just give the right daily amount based on their weight.
Will coconut oil help with hot spots?
It can help with mild hot spots when used alongside proper treatment. The anti-inflammatory properties of lauric acid can reduce irritation. But hot spots often need veterinary attention, especially if they’re oozing or your dog won’t stop licking them. Use the treats for general skin maintenance, not as a replacement for medical care.
Is coconut oil safe for dogs with pancreatitis?
Coconut oil is high in fat, and dogs with pancreatitis need low-fat diets. If your dog has a history of pancreatitis, skip these recipes and talk to your vet about alternative skin supplements. Fish oil is usually a safer option for dogs with pancreatic issues.
Can puppies have these treats?
Puppies over 12 weeks old can have coconut oil in small amounts. Use half the adult dose and give half-sized treats.
I’m a passionate dog owner who enjoys experimenting in the kitchen, but I’m not a veterinarian or certified animal nutritionist. Coconut oil is generally safe for most dogs, but every dog is different. If your dog has specific health conditions or you’re unsure about the right dosage, check with your vet before starting.
Happy treating!