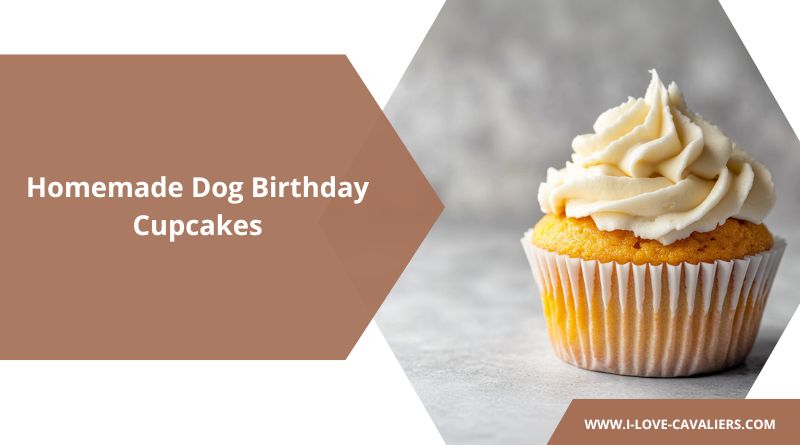
Every dog deserves a special treat on their big day, and these homemade dog birthday cupcakes are the perfect way to celebrate!
I still remember the first time I made these for my pup’s birthday—he sniffed them, took one cautious bite, and then devoured the whole thing in seconds.
That tail wag told me everything I needed to know! These pupcakes are made with simple, dog-friendly ingredients like peanut butter, pumpkin, and whole wheat flour, so you can feel good about spoiling your furry friend.
Dog Birthday Cupcakes
For this delicious treat, you’ll need the following ingredients:
For the Pupcakes

- 1 cup whole wheat flour: A nutritious base that’s easy to digest.
- 1/2 cup natural peanut butter (unsalted, xylitol-free): A dog-friendly source of healthy fats and protein.
- 2/3 cup pumpkin puree: Packed with fiber and vitamins for digestive health.
- 1/3 cup unsweetened applesauce: Adds natural sweetness and moisture.
- 1 egg: Helps bind the ingredients together.
- 1/2 teaspoon baking soda: Gives the cupcakes a little lift.
For the Frosting

- 2/3 cup plain Greek yogurt: A creamy, protein-rich topping.
- 1/3 cup peanut butter: Adds richness and flavor to the frosting.
For the Topping (Optional)
- Dog-friendly biscuits: Crushed or whole, for a festive touch.
Step-by-Step Instructions
Step 1: Preheat the Oven
Preheat your oven to 350°F (175°C). Line a muffin tin with silicone or paper liners to prevent sticking and make cleanup easier.
Step 2: Mix the Wet Ingredients
In a large mixing bowl, combine the peanut butter, pumpkin puree, applesauce, and egg. Stir well until smooth and fully blended.
Step 3: Add the Dry Ingredients
Gradually mix in the whole wheat flour and baking soda, stirring until a thick batter forms. The batter should be well combined but not overmixed.
Step 4: Fill the Muffin Tin
Spoon the batter evenly into the prepared muffin tin, filling each cup about 3/4 full to allow space for rising.
Step 5: Bake the Pupcakes
Place the muffin tin in the preheated oven and bake for 18-20 minutes, or until a toothpick inserted into the center comes out clean.
Step 6: Cool Completely
Allow the pupcakes to cool in the tin for a few minutes before transferring them to a wire rack. Let them cool completely before frosting.
Step 7: Mix the Frosting
In a small bowl, combine the Greek yogurt and peanut butter. Stir until the mixture is smooth and creamy.
Step 8: Frost the Pupcakes
Once the pupcakes are fully cooled, spread the frosting evenly over the tops. For a decorative touch, use a piping bag to swirl the frosting on.
Step 9: Add the Topping
For a festive look, sprinkle crushed dog-friendly biscuits on top or place a whole biscuit in the center of each pupcake.
These birthday pupcakes are now ready to make your furry friend’s special day even sweeter!

Feeding Guidelines
Just like any indulgence, treats should be given in moderation to maintain a healthy diet. Here’s a simple rule of thumb:
To ensure treats remain a beneficial part of your dog’s meals, they should account for no more than 10% of their daily calorie intake. The bulk of their nutrition—at least 90%—should come from a well-rounded dog food source, such as a commercial brand or a homemade recipe crafted with veterinary guidance.
For example, if your dog consumes 200 calories daily, limit treats to 20 calories, leaving 180 calories for their primary food. This keeps treats as an enjoyable bonus without compromising their well-being.
Storage and Serving Tips
- Storage: Store the unfrosted pupcakes in an airtight container at room temperature for up to 2 days. If frosted, refrigerate for up to 3 days.
- Freezing: Wrap individual pupcakes in plastic wrap and store them in a freezer-safe bag for up to 2 months. Thaw at room temperature before serving.
- Serving: Cut the pupcakes into smaller pieces for training rewards or for smaller dogs. Always supervise your dog while they enjoy their treat.
Tips for Success
- Use Pure Pumpkin Puree: Ensure the pumpkin puree is 100% pure and not pumpkin pie filling, which contains added sugars and spices.
- Check for Xylitol: Always ensure your peanut butter is xylitol-free, as it’s toxic to dogs.
- Cool Completely: Let the pupcakes cool entirely before frosting to prevent the frosting from melting.
- Portion Control: Even though these pupcakes are healthy, they’re still a treat. Stick to the recommended serving sizes.
Benefits of the Ingredients
- Pumpkin Puree: High in fiber, which aids digestion and helps with upset stomachs.
- Peanut Butter: A great source of healthy fats and protein, but always ensure it’s xylitol-free.
- Whole Wheat Flour: Provides energy and fiber, making it a healthier alternative to refined flour.
- Greek Yogurt: Packed with probiotics for gut health and calcium for strong bones.
- Applesauce: Adds natural sweetness without added sugar.
- Eggs: High-quality protein to keep your pup strong and happy.
FAQs
1. Can I use a different flour?
Yes! You can substitute whole wheat flour with oat flour, coconut flour, or almond flour. Just adjust the quantity as needed, as some flours absorb more moisture.
2. Can I skip the frosting?
Absolutely! The pupcakes are delicious on their own, but the frosting adds a fun, festive touch.
3. Can I use store-bought peanut butter?
Yes, but make sure it’s natural, unsalted, and free from xylitol, which is toxic to dogs.
Final Words
Whether it’s your pup’s birthday, gotcha day, or just an excuse to show them some extra love, these dog-friendly cupcakes are sure to be a hit! They’re easy to make, packed with wholesome ingredients, and topped with a creamy peanut butter frosting that dogs go crazy for. So grab your mixing bowl and get baking—your pup will thank you with plenty of tail wags and happy licks!