I can still picture my first Cavalier, Bentley. As he got older, getting up from his bed took longer, the stairs became a daily battle, and those once-bouncy morning greetings turned into slow, gentle steps.
I knew joint problems were common in senior dogs, but seeing my lively boy slow down was heartbreaking. So I started searching for natural ways to ease his discomfort, and that’s when I found the powerful anti-inflammatory combo of turmeric and flaxseed.
These homemade treats weren’t a miracle cure, but after a few weeks, I saw a change: more tail wags, smoother movement, and that little spark returning to his eyes.
Why You Should Try These Anti-Inflammatory Treats
- Natural Joint Support
Turmeric contains curcumin, a powerful anti-inflammatory compound that has been shown to help reduce joint pain and stiffness in dogs, especially those with arthritis or hip dysplasia.
- Omega-3 Powerhouse
Ground flaxseeds are loaded with omega-3 fatty acids, which fight inflammation throughout the body and support joint health, heart health, and a shiny coat.
- Preventative Care
You don’t have to wait until your dog shows signs of joint issues. These treats can help support healthy joints in active adult dogs, potentially preventing problems down the road.
Anti-Inflammatory Dog Treats for Joints
Makes approximately 25-35 treats, depending on cutter size
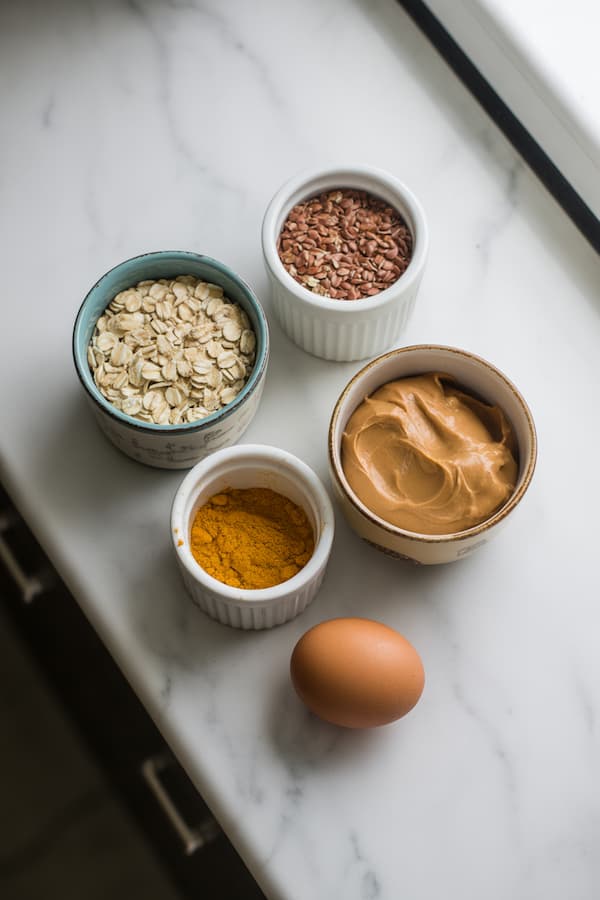
Ingredients
| Ingredient | Amount |
|---|---|
| Instant quick oats | 3 cups |
| Ground flaxseeds | 1⅓ tablespoons |
| Ground turmeric | ½ teaspoon |
| Natural peanut butter (xylitol-free) | 2½ tablespoons |
| Water | 1 cup |
| Large egg | 1 |
Step-by-Step Instructions
Step 1: Prepare Your Baking Setup
Preheat your oven to 350°F (180°C). Line a large baking sheet with parchment paper or a silicone baking mat.
Step 2: Combine Your Dry Ingredients
In a large mixing bowl, add the instant oats, ground flaxseeds, and turmeric. Whisk them together thoroughly with a fork or small whisk until the turmeric is evenly distributed throughout the oats. You should see flecks of golden color throughout—no clumps of turmeric in one spot.
Step 3: Prepare Your Wet Ingredients
In a separate small bowl or measuring cup, crack the egg and beat it lightly with a fork. Add the peanut butter and water to the beaten egg. Whisk together until the peanut butter starts to break up and the mixture becomes relatively smooth.
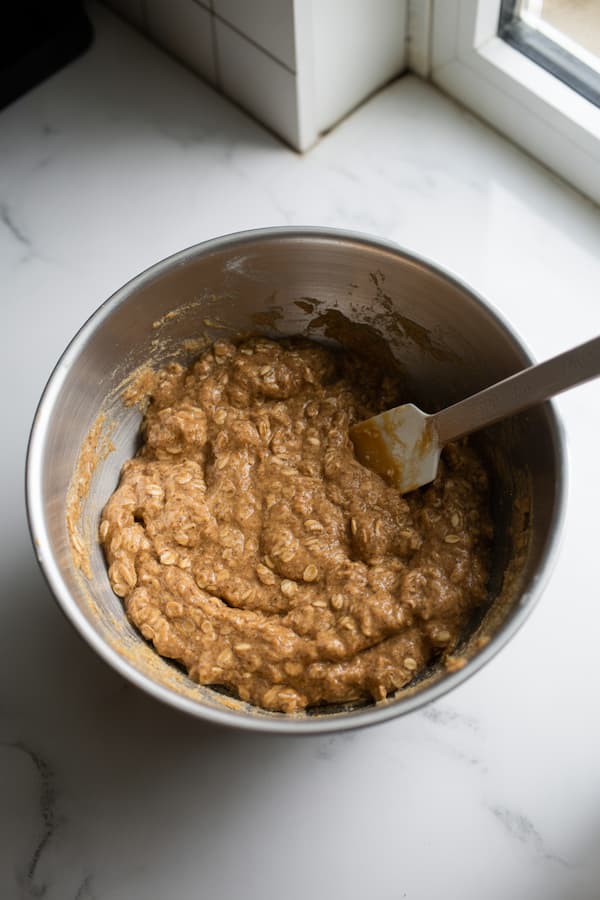
Step 4: Create Your Dough
Pour the wet ingredients into the bowl with the dry ingredients. Using a wooden spoon or sturdy spatula, stir everything together. At first, it will seem too wet and soupy—that’s completely normal. Keep stirring for 1-2 minutes until all the oats are moistened and the mixture starts clumping together.
Step 5: Knead and Rest
Switch from the spoon to your hands and knead the dough directly in the bowl for about 30 seconds. The dough will be very sticky and wet. This is exactly what you want. Shape it into a ball, cover the bowl with a clean kitchen towel, and let it rest on the counter for 15 minutes. The oats will absorb the liquid and the dough will become much more manageable.
Step 6: Prepare for Rolling
After resting, the dough should be firm enough to handle but still slightly sticky. Tear off two large sheets of parchment paper. Place the ball of dough on one sheet, then cover it with the second sheet. This sandwich method prevents the dough from sticking to your rolling pin and makes cleanup effortless.
Step 7: Roll to Even Thickness
Using a rolling pin, roll the dough through the parchment paper to approximately ¼-inch thickness. Check the thickness by peeking under the top sheet of parchment. Roll from the center outward in all directions for even results. If the dough starts pushing out from between the sheets, just tuck it back in and continue rolling.
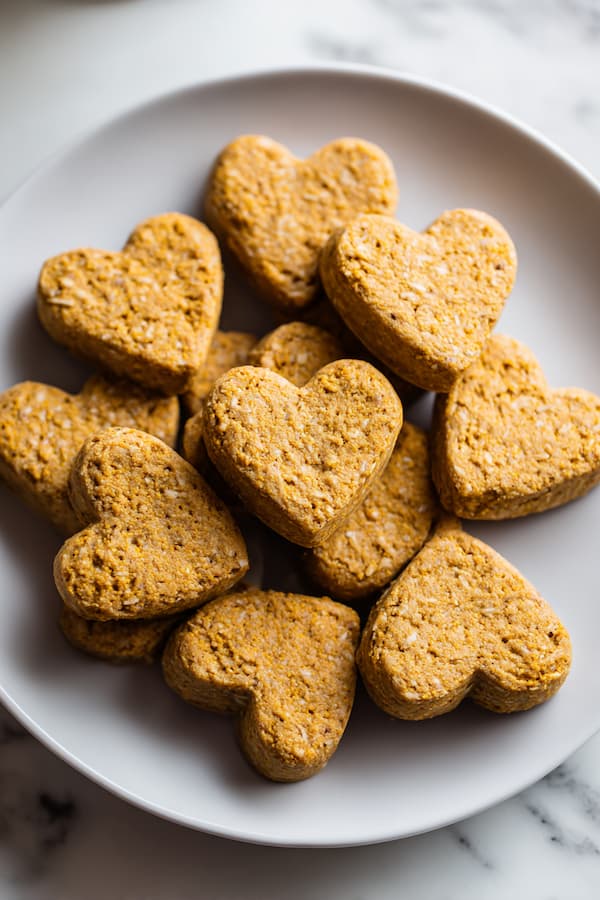
Step 8: Cut Your Shapes
Carefully peel off the top sheet of parchment paper. Using cookie cutters in any shape you like, press straight down and lift straight up to cut out your treats. Bones, hearts, circles—whatever makes you happy! Place each cut-out treat on your prepared baking sheet, leaving about ½ inch between them.
Step 9: Maximize Your Dough
Gather up the scraps, ball them together, re-sandwich between the parchment sheets, roll out again, and cut more treats. Repeat until you’ve used all the dough. The re-rolled treats will be just as good as the first batch.
Step 10: Bake to Perfection
Place the baking sheet in your preheated oven and bake for 30 minutes. The treats should be golden brown and firm to the touch when done. If they still feel soft in the center, bake for an additional 5 minutes and check again.
Step 11: Cool Completely
Remove from the oven and immediately transfer the treats to a wire cooling rack. Let them cool completely—at least 20-30 minutes. They’ll continue to firm up as they cool, developing that perfect slightly crunchy exterior with a chewy center.
Storage Tips for Freshness
Short-Term (Up to 2 Weeks): Store cooled treats in an airtight container at room temperature in a cool, dry place. They’ll stay fresh and maintain their texture for about 2 weeks. If your home is particularly humid, refrigerate them to prevent any moisture buildup.
Long-Term (Up to 4 Months):
Freezer Storage: Transfer completely cooled treats to freezer-safe bags or containers. Remove as much air as possible to prevent freezer burn. Layer parchment paper between treats if stacking to prevent them from freezing together.
Portion Control: Divide into weekly portions in separate bags so you’re not constantly opening and re-freezing the entire batch.
Serving: Treats can be served directly from the freezer or thawed for 5-10 minutes at room temperature. Both ways work perfectly.
Serving Guidelines and Important Considerations
| Dog Weight | Treat Size | Daily Limit |
|---|---|---|
| 5-15 lbs | Small (1 inch) | 1-2 treats |
| 16-30 lbs | Medium (1.5 inch) | 2-3 treats |
| 31-50 lbs | Medium (1.5 inch) | 3-4 treats |
| 51-70 lbs | Large (2 inch) | 4-5 treats |
| 71+ lbs | Large (2 inch) | 5-6 treats |
Consistency Is Key: Anti-inflammatory benefits build over time with regular use. Give these treats daily for at least 2-3 weeks before expecting to see noticeable improvements in mobility or joint comfort.
Not a Replacement for Veterinary Care: These treats support joint health naturally, but they’re not a substitute for veterinary treatment. If your dog has severe arthritis, hip dysplasia, or other diagnosed joint conditions, continue any prescribed medications and discuss these treats with your vet.
Turmeric Caution: While turmeric is generally safe for dogs, it can interact with certain medications, particularly blood thinners. Always check with your veterinarian before adding turmeric to your dog’s diet, especially if they’re on any medications.
Watch for Digestive Changes: Introducing new ingredients, especially turmeric and flaxseed, can cause mild digestive changes in some dogs. Start with half a treat for the first few days to ensure your dog tolerates the ingredients well.
Frequently Asked Questions
Can I increase the turmeric for more anti-inflammatory benefits?
No, don’t exceed the recommended amount. Too much turmeric can cause stomach upset, and the benefits don’t increase proportionally. The ½ teaspoon in this recipe is the sweet spot for effectiveness without side effects.
My dog has a peanut allergy. What can I substitute?
Try sunflower seed butter or pumpkin puree as alternatives. Use the same amount (2½ tablespoons). The texture might vary slightly, but both work as binders.
How long before I see results?
Every dog is different, but many pet parents report seeing improvements in mobility and stiffness within 2-4 weeks of daily treats. Some dogs show changes sooner, others take longer. Patience and consistency matter.
Will the turmeric stain my dog’s fur?
The small amount in these treats shouldn’t cause staining. However, turmeric can temporarily stain light-colored fur if your dog is messy while eating. Wipe their mouth after treats if you’re concerned.
Conclusion
Watching an aging dog struggle with mobility is heartbreaking, but knowing you’re doing something proactive to help makes a real difference. These aren’t magic pills, but they’re a delicious, wholesome way to support your dog’s joints as they age.
Bake a batch, stay consistent, and give it time. Your senior pup (and their creaky joints) will thank you with every easier step and happier tail wag.