Picture this: Your loyal companion looks up at you with those irresistible puppy eyes, tail wagging with anticipation. But instead of another boring dog biscuit, you’re about to serve up something that’ll make their entire day—a creamy, tail-wagging cheesecake made just for dogs.
We’ve all spoiled our furry friends with treats, but this isn’t just another snack. This is a love letter baked into a dessert, a moment of pure canine happiness that’s as nutritious as it is delicious.
It’s about transforming mealtime from a routine to a celebration, showing our four-legged family members just how much we care.
Get ready to become the ultimate dog parent with a treat that’ll have tails wagging and hearts melting.
Why Your Dog Will Love This Cheesecake
- Creamy and Delicious: The rich, velvety texture is a treat for your pup’s palate.
- Nutritious Ingredients: Packed with protein, fiber, and probiotics for a healthy snack.
- Special Occasion Treat: Perfect for birthdays, holidays, or just because your dog deserves it!
Cheesecake for Dogs Recipe
For this delicious dog treat, you’ll need the following ingredients:
Ingredients
For the Crust
- ¾ cup old-fashioned oats: A gentle, fiber-rich base that’s easy on sensitive stomachs.
- ¼ cup shredded unsweetened coconut: Adds a hint of natural sweetness and texture.
- 1 egg: Helps bind the crust ingredients together.
- 1 tablespoon melted unsalted butter: Adds richness and flavor.
- 1 tablespoon maple syrup (or honey): A touch of sweetness, perfectly safe in moderation.
For the Cheesecake Filling
- ½ cup cottage cheese: A protein-rich ingredient that adds creaminess.
- ½ cup cream cheese: Smooth and tangy, the foundation of the cheesecake.
- ½ cup plain Greek yogurt: Adds a creamy texture and probiotics.
- 1 egg: Helps set the cheesecake filling.
- 2 tablespoons unsweetened almond milk: Lightens the mixture for a smoother texture.
- 1½ tablespoons almond flour: Adds structure and subtle nuttiness.
Instructions: How to Make Dog-Friendly Cheesecake
Step 1: Prepare the Crust
- Process the Dry Ingredients
Start by placing the oats into a food processor. Pulse them until they turn into a coarse powder. This forms the base of your crust. - Mix the Crust Ingredients
Add the shredded coconut, melted butter, egg, and maple syrup (or honey) to the food processor with the powdered oats. Blend everything together until the mixture becomes cohesive and sticks together when pressed between your fingers. - Shape the Crust
Take two small 4-inch springform pans or silicone molds and evenly divide the crust mixture between them. Press the mixture firmly into the bottoms of the pans, ensuring an even layer for the perfect base. - Bake the Crust
Preheat your oven to 350°F (175°C). Bake the crusts for 7-10 minutes, or until you see a light golden color. Keep an eye on them to avoid overbaking. - Cool Completely
Remove the pans from the oven and place them on a wire rack. Let the crusts cool completely before moving to the next step. Cooling ensures the crust holds together when you add the filling.
Step 2: Prepare the Cheesecake Filling
- Blend the Cottage Cheese
Clean the food processor from earlier and add the cottage cheese. Blend until smooth and creamy, ensuring no lumps remain. - Combine the Remaining Ingredients
To the processed cottage cheese, add the cream cheese, Greek yogurt, egg, almond milk, and almond flour. Blend everything together until the mixture is velvety smooth and fully combined. - Divide and Pour the Filling
Once the filling is ready, evenly divide it between the two crusts you prepared earlier. Use a spatula to smooth the tops for an even finish.
Step 3: Bake the Cheesecake
- Create a Water Bath
To ensure even baking and prevent cracks, place the springform pans in a larger baking pan. Carefully pour about ½ inch of warm water into the larger pan, creating a water bath. This gentle cooking method keeps the cheesecakes creamy and smooth. - Bake the Cheesecakes
Bake the cheesecakes in the preheated oven at 350°F (175°C) for about 40-45 minutes. You’ll know they’re done when the edges are set, but the centers still have a slight jiggle when you gently shake the pans. - Cool Gradually
Once baked, turn off the oven and leave the cheesecakes inside with the oven door slightly open. This gradual cooling process prevents the tops from cracking. Leave them until completely cooled to room temperature.
Step 4: Chill and Serve
- Refrigerate to Set
After cooling, carefully remove the cheesecakes from the springform pans. Wrap them tightly in plastic wrap or place them in airtight containers. Chill in the refrigerator for at least 2 hours, allowing the cheesecakes to firm up for perfect slicing. - Serve with Dog-Safe Toppings
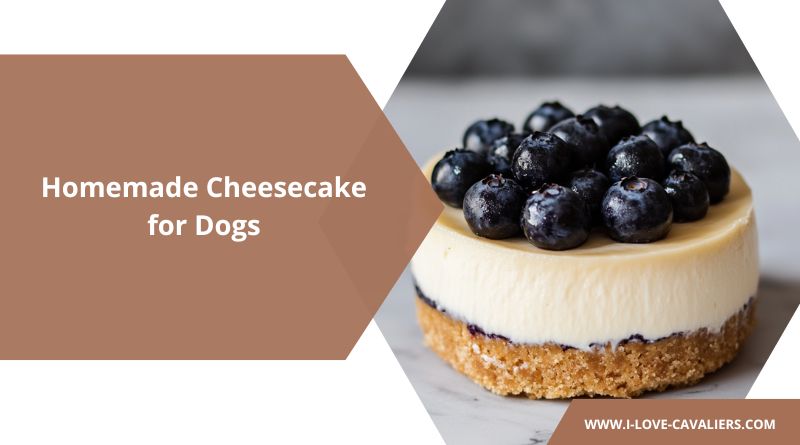
When ready to serve, garnish the cheesecakes with dog-safe toppings like crushed biscuits, blueberries, raspberries, or a drizzle of plain yogurt. Slice them into portions that are appropriate for your dog’s size and let your pup savor this special treat!
Storage and Shelf Life
- Refrigeration: Store leftover cheesecake in an airtight container in the refrigerator for up to 5 days.
- Freezing: Freeze individual portions for up to 3 months. Thaw in the refrigerator before serving.
Tips for Success
- Use Fresh Ingredients: Ensure all dairy products are fresh and unsweetened for maximum flavor and safety.
- Chill the Filling: The cheesecake sets better after a few hours in the fridge. Overnight chilling is even better!
- Size Matters: Use silicone molds for single-serving portions to make it easier to serve and store.