
Who’s up for some quick and easy kitchen magic that will make your dog’s day? Get ready to be your pup’s favorite chef with these 8 simple two-ingredient dog treats.
These recipes are not only ridiculously easy to whip up, but they’re also super healthy and delicious—perfect for rewarding your four-legged friend.
Whether you’re a busy pet parent or just looking for a fun project, these treats are the way to go.
Let’s get started and see those tails wagging!
No-Bake Two-Ingredient Dog Treats
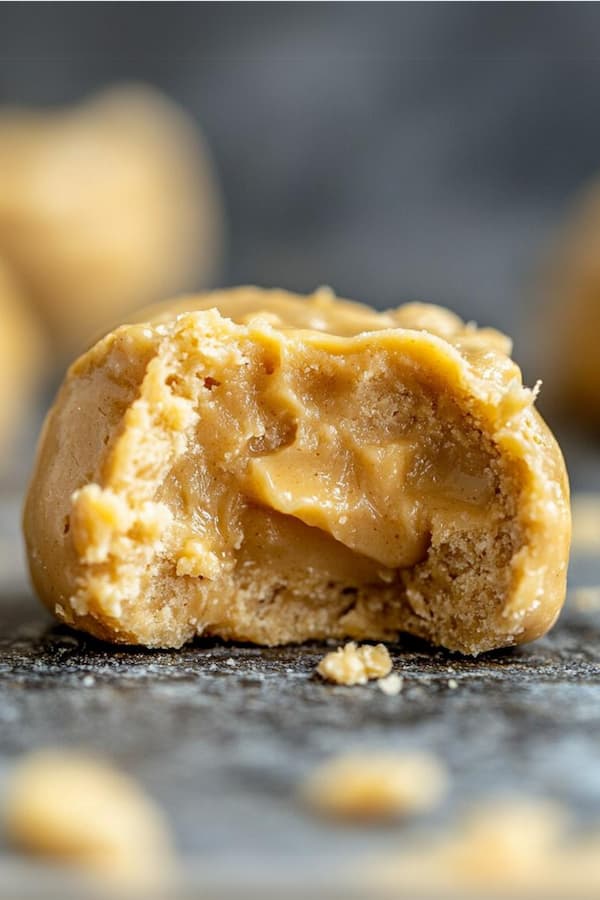
1. Peanut Butter Banana Bites
A delightful blend of creamy peanut butter and sweet banana, these no-bake treats are perfect for dogs who enjoy a soft, chewy snack. They’re easy to make and require no cooking, making them a quick option for busy pet owners.
Ingredients
- 1 cup peanut butter (unsalted and xylitol-free)
- 1 ripe banana
Instructions
Step 1: Select and Mash Banana
Choose 1 ripe banana with brown spots for maximum sweetness and easy mashing. Peel and mash in a medium bowl with a fork for 1-2 minutes until smooth and creamy, ensuring no chunks remain for a uniform treat texture; if too firm, microwave for 10 seconds to soften.
Step 2: Verify Peanut Butter Safety
Measure 1 cup peanut butter, ensuring it’s unsalted and xylitol-free—check the label, as xylitol is toxic to dogs. Stir well to blend separated oils, achieving a creamy, pourable consistency; use a glass measuring cup for easy pouring and minimal mess.
Step 3: Combine Ingredients
Add 1 cup peanut butter to the mashed banana in the bowl. Mix with a sturdy spoon for 2-3 minutes until a thick, cohesive mixture forms, smelling sweet and nutty; if the mixture is lumpy, use a hand mixer on low for 20 seconds to ensure smoothness.
Step 4: Adjust Mixture Consistency
Check the mixture—it should be soft but moldable, like cookie dough. If too sticky, add 1 tbsp rolled oats; if too dry, mix in 1 tsp water; stir for 30 seconds to achieve a uniform texture, making it easy to shape without sticking to hands.
Step 5: Shape Bites
Line a baking tray with parchment paper for easy cleanup. Scoop teaspoon-sized portions using a cookie scoop or spoon, rolling into 1-inch balls with lightly damp hands to prevent sticking; place on the tray, ensuring even sizes for consistent chilling.
Step 6: Chill and Store
Place the tray in the refrigerator for 1 hour until the bites are firm and set, perfect for a chewy texture. Transfer to an airtight container and store chilled; serve directly from the fridge, ensuring small sizes to avoid choking.
2. Frozen Pumpkin Yogurt Dog Treats
Combining the digestive benefits of pumpkin with the probiotic advantages of yogurt, these frozen treats are a healthy snack for soothing your dog’s tummy. They’re especially refreshing on warm days and can help keep your dog hydrated.

Ingredients
- 1 cup pumpkin puree (not pie filling)
- 1 cup plain yogurt
Instructions
Step 1: Verify Pumpkin Purity
Select 1 cup pumpkin puree, ensuring it’s 100% pure pumpkin, not pie filling with sugars or spices. Scoop into a measuring cup, leveling for accuracy; the puree should be thick and orange, providing moisture without excess liquid for a firm treat.
Step 2: Choose Yogurt
Measure 1 cup plain yogurt, opting for Greek or regular with live cultures for probiotic benefits. Strain with cheesecloth for 10 minutes if watery, ensuring a thick consistency that holds shape in molds; check for no added sugars or flavors.
Step 3: Mix Ingredients
In a large bowl, combine 1 cup pumpkin puree and 1 cup plain yogurt. Whisk for 1-2 minutes until a smooth, creamy mixture forms, smelling tangy with a pumpkin undertone; if lumpy, blend with a hand mixer on low for 20 seconds to achieve uniformity.
Step 4: Check Mixture Consistency
Ensure the mixture is thick but pourable, like a smoothie. If too runny, add 1 tbsp yogurt; if too stiff, mix in 1 tsp water; stir for 30 seconds to achieve a consistent flow, ideal for filling molds without air pockets.
Step 5: Fill Molds
Pour the mixture into silicone molds (paw or bone shapes for fun) using a small funnel or spoon for precision. Fill to the top, tapping molds gently to remove air bubbles, ensuring smooth, even treats that pop out easily after freezing.
Step 6: Freeze and Serve
Place molds in the freezer for 2-3 hours until treats are hard and solid. Pop out and store in a freezer-safe bag; serve frozen, ensuring small sizes for safe chewing, perfect for a refreshing snack on warm days.
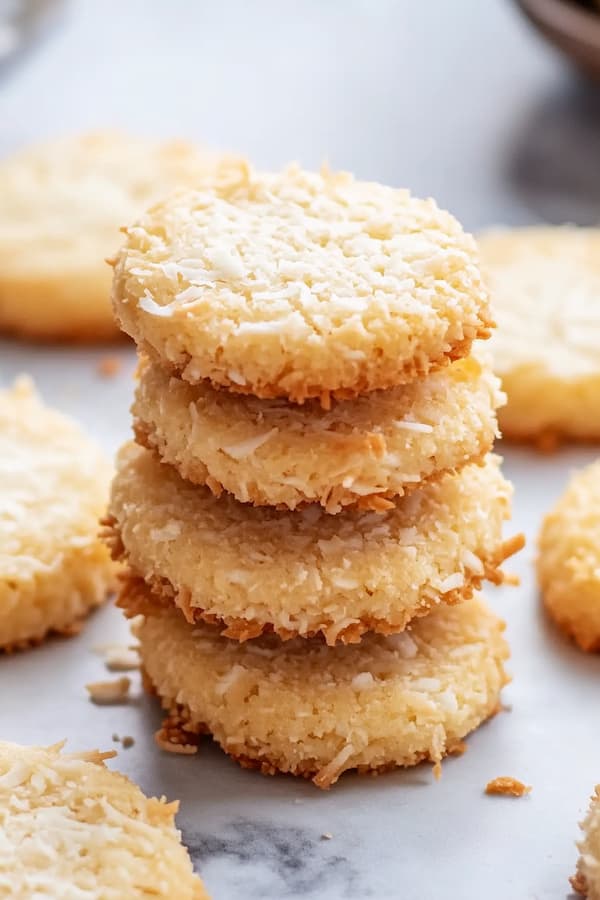
3. Coconut Cookies
These coconut cookies are not only tasty but also great for your dog’s skin and coat, thanks to the natural oils in coconut. The maple syrup adds a hint of sweetness, making them a wholesome and satisfying snack for your pup.
Ingredients
- 1 cup unsweetened shredded coconut
- 3 tbsp maple syrup
Instructions
Step 1: Preheat Oven and Prep Pan
Preheat your oven to 325°F (165°C) to ensure even baking for a golden finish. Line a baking sheet with parchment paper, smoothing it out to prevent curling, ensuring cookies release easily and maintain a crisp texture.
Step 2: Verify Maple Syrup
Measure 3 tbsp maple syrup, ensuring it’s 100% pure with no added sugars or artificial flavors. Stir gently if crystallized, achieving a smooth, sticky consistency; use a liquid measuring spoon for accuracy to coat coconut evenly.
Step 3: Combine Ingredients
In a medium bowl, mix 1 cup unsweetened shredded coconut and 3 tbsp maple syrup. Stir with a spatula for 2 minutes until the coconut is fully coated and sticky, forming a cohesive mixture with a sweet, tropical aroma; press firmly to blend if clumpy.
Step 4: Adjust Mixture Texture
Check the mixture—it should be moist but hold shape when pressed. If too dry, add ½ tsp maple syrup; if too wet, sprinkle 1 tbsp coconut; mix for 30 seconds to achieve a uniform texture, ideal for shaping without crumbling.
Step 5: Shape Cookies
Scoop small spoonfuls (about 1 tbsp) and shape into 1-inch rounded mounds with your hands, pressing lightly to form a cookie shape. Place on the prepared baking sheet, spacing 1 inch apart for even baking and a polished look.
Step 6: Bake and Cool
Bake at 325°F (165°C) for 10-12 minutes, checking at 10 minutes for golden-brown edges. Cool completely on the baking sheet for 15 minutes to set crispness; transfer to a wire rack if storing to prevent softening.
Baked Two-Ingredient Dog Treats
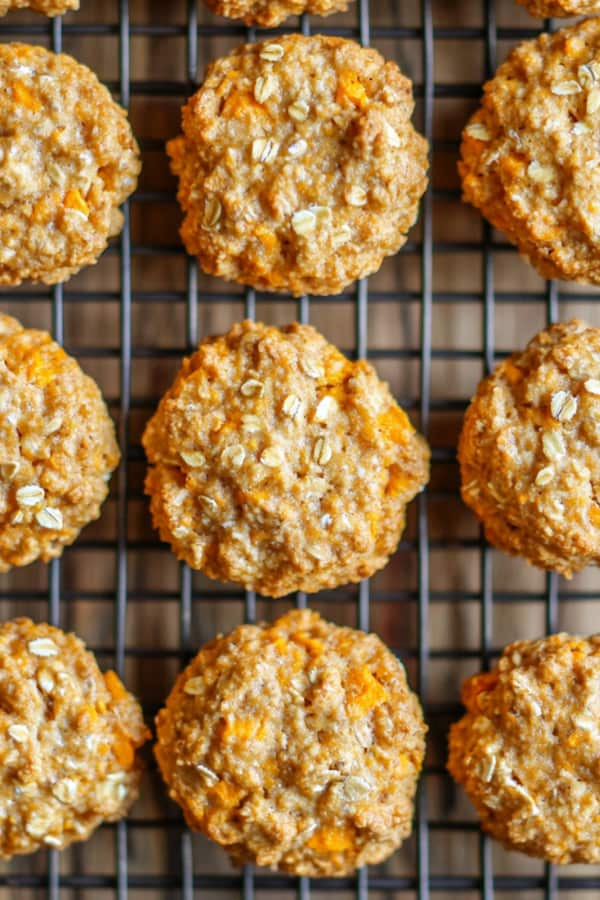
4. Sweet Potato and Oat Flakes
Packed with fiber and vitamins, these treats combine sweet potatoes and oats for a crunchy texture that dogs love. They are perfect for dogs with wheat allergies and can help keep their digestion regular.
Ingredients
- 1 large sweet potato, cooked and mashed
- 2 cups rolled oats
Instructions
Step 1: Preheat Oven and Prep Pan
Preheat your oven to 350°F (175°C) to ensure a steady bake for crunchy treats. Line a baking sheet with parchment paper, securing edges to prevent slipping, ensuring treats bake evenly and release without sticking.
Step 2: Cook Sweet Potato
Cook 1 large sweet potato by baking at 400°F for 40-50 minutes or boiling for 15 minutes until fork-tender. Peel and mash until smooth and lump-free, yielding about 1 cup; cool slightly to avoid clumping with oats.
Step 3: Combine Ingredients
In a large bowl, mix mashed sweet potato and 2 cups rolled oats. Stir with a wooden spoon for 2-3 minutes until a firm, cohesive dough forms, smelling earthy and sweet; if too sticky, let sit for 1 minute to absorb moisture.
Step 4: Adjust Dough Consistency
Ensure the dough is pliable but not sticky, holding together when pressed. If too wet, add 1 tbsp oats; if too dry, mix in 1 tsp water; knead for 1 minute to achieve a uniform texture, perfect for rolling and cutting.
Step 5: Shape Treats
Roll out the dough on a lightly floured surface to ¼-inch thickness, using a rolling pin for evenness. Cut into desired shapes with a cookie cutter (bones or hearts for fun), placing on the prepared baking sheet with ½-inch spacing for crisp edges.
Step 6: Bake and Cool
Bake at 350°F (175°C) for 25-30 minutes, flipping halfway for even crunchiness, until golden and firm. Cool on the baking sheet for 10 minutes, then transfer to a wire rack to cool completely for 20 minutes before serving.
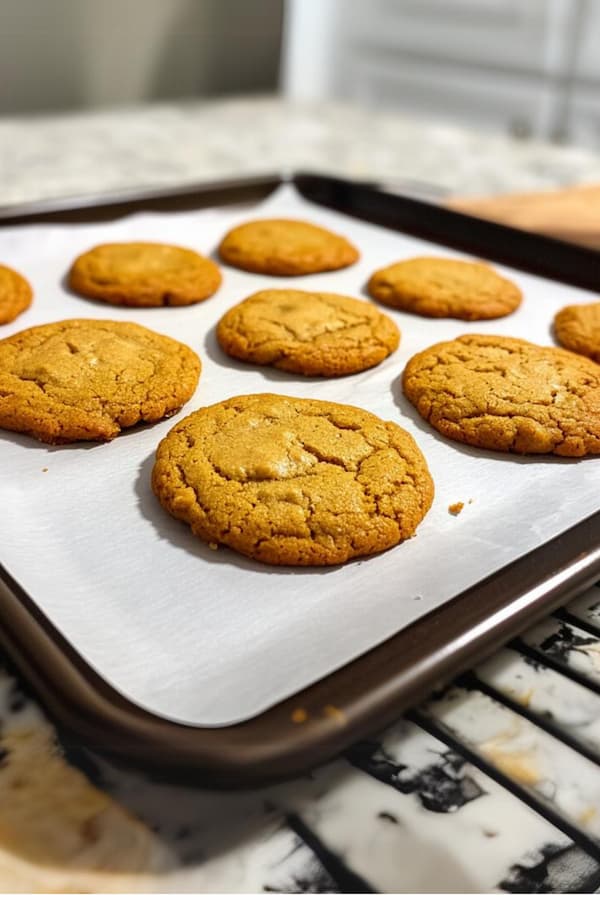
5. Peanut Butter and Pumpkin Cookies
These cookies offer a festive blend of peanut butter and pumpkin, making them a tasty and nutritious treat that’s especially perfect for fall and holiday seasons. They’re rich in proteins and vitamins, supporting your dog’s overall health.
Ingredients
- 1 cup pumpkin puree
- 1 cup peanut butter (unsalted and xylitol-free)
Instructions
Step 1: Preheat Oven and Prep Pan
Preheat your oven to 350°F (175°C) to ensure a consistent bake for golden cookies. Line a baking sheet with parchment paper, smoothing it for a flat surface, preventing sticking and ensuring easy cleanup.
Step 2: Verify Pumpkin and Peanut Butter
Measure 1 cup pumpkin puree, confirming it’s pure pumpkin, not pie filling. Check 1 cup peanut butter is xylitol-free; stir both to ensure smooth, uniform textures, using glass measuring cups for accuracy and easy pouring.
Step 3: Mix Ingredients
In a large bowl, combine 1 cup pumpkin puree and 1 cup peanut butter. Mix with a spatula for 2-3 minutes until a thick, cohesive dough forms, smelling nutty with a pumpkin tang; if lumpy, use a hand mixer on low for 20 seconds.
Step 4: Adjust Dough Texture
Check the dough—it should be soft but scoopable, like cookie dough. If too sticky, add 1 tbsp rolled oats; if too dry, mix in 1 tsp water; stir for 30 seconds to achieve a uniform consistency, ideal for shaping without sticking.
Step 5: Shape Cookies
Scoop tablespoon-sized portions onto the prepared baking sheet, spacing 1 inch apart. Flatten each with a fork to create a ½-inch thick cookie with a crisscross pattern, ensuring even baking and a classic cookie look.
Step 6: Bake and Cool
Bake at 350°F (175°C) for 20-25 minutes, checking at 20 minutes for golden-brown edges. Cool on the baking sheet for 10 minutes to set, then transfer to a wire rack to cool completely for 15 minutes before serving.
6. Chicken and Rice Crisps
Ideal for dogs with sensitive stomachs, these simple crisps combine chicken and rice for a bland, yet appetizing treat. They’re easy to digest and can be a great low-fat option for dogs on a diet.
Ingredients
- 1 cup cooked chicken, finely chopped
- 1 cup rice, cooked and cooled
Instructions
Step 1: Preheat Oven and Prep Pan
Preheat your oven to 350°F (175°C) to ensure even baking for crisp treats. Line a baking sheet with parchment paper, securing edges to prevent curling, ensuring patties bake uniformly and release easily.
Step 2: Prepare Chicken
Cook 1 cup chicken, boiling or baking without seasoning, then chop finely with a knife or food processor for 20 seconds to create a uniform texture. Cool to room temperature, ensuring a lean, digestible base for sensitive stomachs.
Step 3: Combine Ingredients
In a medium bowl, mix 1 cup chopped chicken and 1 cup cooked, cooled rice. Stir with a fork for 2 minutes until a cohesive, slightly sticky mixture forms, smelling savory; press firmly to blend if rice is too loose.
Step 4: Adjust Mixture Consistency
Ensure the mixture is moldable but not crumbly. If too dry, add 1 tsp water; if too wet, mix in 1 tbsp rice; blend for 30 seconds to achieve a uniform texture, making it easy to shape without falling apart.
Step 5: Shape Crisps
Scoop tablespoon-sized portions and form into small, flat patties or 1-inch balls, flattening slightly with your hands. Place on the prepared baking sheet, spacing 1 inch apart for even cooking and a crisp finish.
Step 6: Bake and Cool
Bake at 350°F (175°C) for 30 minutes, flipping halfway to ensure crisp, golden surfaces. Cool on the baking sheet for 10 minutes, then transfer to a wire rack to cool completely for 20 minutes before serving.
7. Beef and Sweet Potato Chewies
These hearty treats mix beef and sweet potato for a taste your dog won’t resist. They are packed with protein and beta-carotene, promoting muscle health and good vision.

Ingredients
- 1 cup cooked beef, finely chopped
- 1 cup sweet potato, cooked and mashed
Instructions
Step 1: Preheat Oven and Prep Pan
Preheat your oven to 350°F (175°C) to ensure a steady bake for chewy treats. Line a baking sheet with parchment paper, smoothing it for a flat surface, preventing sticking and ensuring easy removal.
Step 2: Prepare Beef
Cook 1 cup ground beef in a skillet for 5-7 minutes until fully browned, draining excess fat with a colander. Chop finely or pulse in a food processor for 20 seconds to create a uniform texture, cooling to blend safely with sweet potato.
Step 3: Combine Ingredients
In a large bowl, mix 1 cup chopped beef and 1 cup mashed sweet potato (cooked and cooled). Stir with a wooden spoon for 2-3 minutes until a cohesive, slightly sticky dough forms, smelling savory and sweet; press firmly if mixture is loose.
Step 4: Adjust Dough Texture
Check the dough—it should be pliable but hold shape. If too wet, add 1 tbsp rolled oats; if too dry, mix in 1 tsp water; knead for 1 minute to achieve a uniform consistency, ideal for shaping into sticks or balls.
Step 5: Shape Chewies
Scoop tablespoon-sized portions and form into 2-inch sticks or 1-inch balls, smoothing edges for a neat look. Place on the prepared baking sheet, spacing 1 inch apart to ensure even baking and a chewy texture.
Step 6: Bake and Cool
Bake at 350°F (175°C) for 25-30 minutes, checking at 25 minutes for firm, slightly crispy surfaces. Cool on the baking sheet for 10 minutes, then transfer to a wire rack to cool completely for 20 minutes before serving.
8. Apple Oatmeal Cookies
These apple oatmeal dog treats are a perfect, healthy snack for your furry friend! With the natural sweetness of applesauce and the hearty texture of oats, they make a wholesome and fiber-rich treat. Simple and easy to make, these treats are ideal for supporting digestion and adding a bit of variety to your dog’s diet.

Ingredients
- 1/2 cup unsweetened applesauce
- 1 cup rolled oats
Instructions
Step 1: Preheat Oven and Prep Pan
Preheat your oven to 350°F (175°C) to ensure even baking for firm cookies. Line a baking sheet with parchment paper, securing edges to prevent slipping, ensuring cookies bake evenly and release without sticking.
Step 2: Verify Applesauce
Measure ½ cup unsweetened applesauce, confirming it’s 100% apples with no added sugars or spices. Stir to ensure a smooth consistency, as chunky applesauce can affect shaping; use a liquid measuring cup for accuracy.
Step 3: Combine Ingredients
In a medium bowl, mix ½ cup applesauce and 1 cup rolled oats. Stir with a spatula for 2 minutes until a thick, cohesive dough forms, smelling sweet and earthy; if too dry, let sit for 1 minute to absorb moisture.
Step 4: Adjust Dough Consistency
Ensure the dough is soft but moldable, holding together when pressed. If too sticky, add 1 tbsp oats; if too dry, mix in 1 tsp water; knead for 30 seconds to achieve a uniform texture, perfect for shaping without crumbling.
Step 5: Shape Cookies
Scoop small spoonfuls (about 1 tbsp) and shape into 1-inch cookie rounds with your hands, flattening slightly for even baking. Place on the prepared baking sheet, spacing 1 inch apart for a crisp, golden finish.
Step 6: Bake and Cool
Bake at 350°F (175°C) for 15 minutes, checking for golden edges and a firm texture. Cool on the baking sheet for 10 minutes to set, then transfer to a wire rack to cool completely for 15 minutes before serving.
How do I store chicken and rice treats?
.looking for dog treats that. Include baby food meat peanut butter and i don’t remember what else
How do you store these treats?
No-bake treats should be refrigerated and last about 5–7 days, or frozen for up to 2 months.
Baked treats can be kept at room temp for a few days, or refrigerated up to 2 weeks. Freeze if you want them to last longer!