You ever have those sweltering summer days where you’re just searching for an excuse to open the freezer—maybe for the third time in an hour?
Now, imagine your furry best friend, panting away on the kitchen tiles, giving you that “I’m melting” face. We’ve all been there. Honestly, the heat can be brutal—for us and for our pups.
That’s exactly why I started experimenting with frozen treats a few years back, after watching my dog Daisy discover the simple joys of a single ice cube. You know what? That “aha!” moment led me to this recipe. It’s so simple, I almost feel guilty calling it a recipe at all.
But sometimes, the best ideas are the ones that make you wonder why you didn’t try them sooner.
Are These Safe?
First, let’s address the elephant in the room: “Can dogs even eat cucumbers?”—a question I asked myself more times than I’ll admit. The answer?
Absolutely, in moderation. Most dogs tolerate plain Greek yogurt just fine, and cucumbers are as safe as they come.
Just steer clear of flavored yogurts and always double-check your labels for sneaky sweeteners or unnecessary thickeners. And if your pup has a sensitive stomach or is lactose intolerant (yep, it happens), a quick call to your vet can put your mind at ease.
Why Cucumber and Yogurt?
- Cucumbers are mostly water—crisp, hydrating, and low in calories.
- Packed with vitamins K and C for a gentle health boost.
- Light, refreshing, and easy for most dogs to digest.
- Greek yogurt adds creaminess and is a good source of protein.
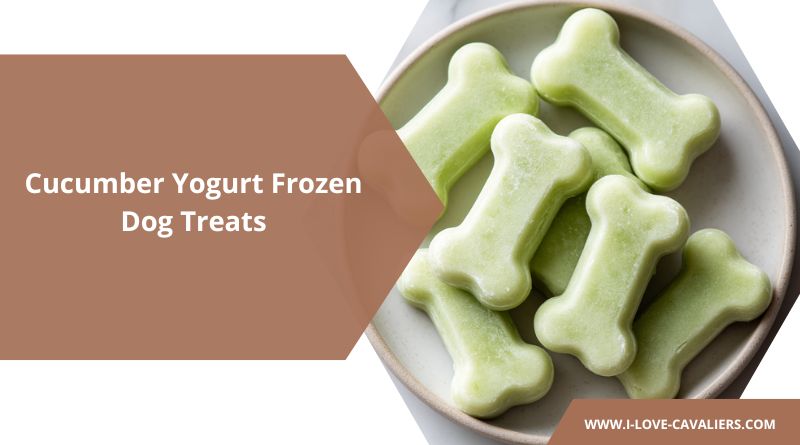
2-Ingredient Cucumber Yogurt Frozen Dog Treats Recipe
Ready for the best part? You don’t need any space-age gadgets, rare ingredients, or gourmet molds. Here’s the basic toolkit:
Ingredients
| Ingredient | Amount |
|---|---|
| Large cucumber | 1 (peeled and sliced) |
| Plain Greek yogurt | ½ cup (full-fat or low-fat, plain only) |

Tools You’ll Need
- A blender or food processor (or, in a pinch, a sturdy fork and some determination)
- Silicone treat molds, an ice cube tray, or even a mini muffin tin
And a little pro tip: Pouring the mixture is about as easy as herding cats, so a measuring cup with a spout can save you a lot of cleanup (trust me).
Step-by-Step: The Easiest Dog Treats You’ll Ever Make
Let me walk you through it. And don’t stress—this is supposed to be fun, not a kitchen marathon.
Step 1: Blend It Up
Toss your cucumber slices and Greek yogurt into your blender or food processor. Whiz it together for about 30 to 45 seconds, or until it’s as smooth as you can get it. If you prefer a chunkier texture (or just want to make a little less noise), pulsing works fine too. You might need to scrape down the sides once or twice.
Step 2: Pour with (Some) Precision
Carefully pour your green, creamy mixture into your chosen molds. Don’t overthink it—a little spill here and there just adds character. Fill each cavity, but leave a smidge of space at the top to avoid overflow. Wipe away any messes (or let your pup “help” with cleanup).
Step 3: Freeze and Forget (for a Little While)
Pop the tray into the freezer and forget about it for at least 2 to 3 hours. If you’re anything like me, you’ll check at the 90-minute mark “just to see.” Once they’re solid, pop the treats out and get ready for a very happy pup.

How to Store
These little pops will keep in an airtight container or a zip-top bag in your freezer for up to a month—if they last that long! Pro tip: Place a layer of parchment between stacks to keep them from sticking.
And yes, if you’re feeling brave, go ahead and try one. They’re…well, refreshing, but definitely more “dog spa day” than dessert for humans. Still, I won’t judge!
Just watch out for freezer burn—if you notice any icy crystals, it’s time to toss and make a fresh batch.
How Often Should You Serve These?
Moderation is key—even with the good stuff. One or two treats a day is perfect for most pups, especially on hot days or after playtime. I like to serve them in the afternoon when the sun’s high and the sidewalk’s basically lava.
Just remember, these are snacks, not meal replacements. And treats in general should be less than 10% of the total daily calorie intake.
For senior dogs or those with dental issues, let the treats thaw for a few minutes so they’re softer on sensitive teeth. And if you’ve got a puppy with more energy than sense, these are a great way to cool them off after a wild game of fetch.
Variations and Add-Ins
Want to put your own stamp on these treats? Here’s where you can let your inner “dog chef” shine.
- A few blueberries for antioxidants
- A dash of chopped mint for breath
- A spoonful of dog-safe peanut butter for flavor
Just remember: When it comes to extras, less is more, especially if your pup is new to these flavors.
Benefits of Homemade Frozen Dog Treats
Why make treats at home? Let me count the ways:
- Healthier Ingredients: You’re in control—no hidden fillers, no suspicious “natural flavors.”
- Budget-Friendly: A couple of kitchen staples, and you’re set for weeks.
- Bonding Time: There’s something special about making something just for your dog. It’s a love language all its own.
- Tailored to Your Pup: Got a picky eater or a dog with allergies? DIY means you can adjust as needed.
Besides, have you ever seen a dog happier than when they realize you’re making treats just for them? Pure joy.
Wrap Up
If you ask me, making your own dog treats isn’t just about saving money or knowing what’s in your dog’s snacks—it’s about those small, joyful moments you share. The wiggle of a tail. The satisfied sigh after a chilly treat. The way your dog looks at you like you’ve just done something absolutely magical.
So next time the heatwave rolls in, don’t sweat it. Grab a cucumber, some yogurt, and a blender. In just a few minutes, you’ll have a freezer full of homemade happiness—ready to make summer a little cooler, one lick at a time.
Now, go make your dog’s day. And hey, maybe treat yourself to a popsicle, too.