You know that sound. The thump-thump-thump of your dog’s leg kicking wildly as they scratch the same itchy spot for the third time in an hour.
It starts with a little shuffle here and there—and then suddenly, it’s constant. You check their skin. Maybe it’s dry, a little red, maybe even flaky. And your heart sinks a bit.
You want to help. But the last thing you want is to load up your dog’s skin with harsh chemicals, mystery ingredients, or overpriced boutique products that might make things worse.
So what do you do?
You go natural. You make something at home, something simple, safe, and soothing. This DIY dog shampoo is one of those rare things that checks every box: easy to make, super effective, and gentle enough for your most sensitive pup.
And yes—it actually works.
Why You’ll Love This DIY Dog Shampoo
- Soothes itchy, irritated skin using gentle, anti-inflammatory ingredients.
- No harsh chemicals or artificial fragrances—just real stuff you’d put on yourself.
- Customizable to your dog’s needs, whether they’re extra dry, extra flaky, or just plain sensitive.
- Budget-friendly and easy to make with ingredients you probably already have in your kitchen.
- Safe for frequent use, especially during dry seasons or allergy flare-ups.
This isn’t just a one-time fix—it’s something you’ll reach for again and again whenever your pup’s skin needs a little TLC.
The Key Ingredients and What They Actually Do
Let’s be honest—when your dog is itching like crazy, you don’t want guesswork. You want ingredients that do something. This DIY dog shampoo isn’t just thrown together for convenience. Each part has a clear, skin-soothing job:
Oatmeal (Colloidal or Ground)
This is the star of the show. Oatmeal has long been used to calm irritated skin—on both humans and pets. It contains compounds like avenanthramides and beta-glucans that reduce inflammation, soothe redness, and lock in moisture. When ground into a fine powder and added to water, it forms a natural emollient that coats your dog’s skin and provides relief.
Bonus: It’s gentle enough for daily use and won’t disrupt your dog’s natural skin barrier.
Baking Soda
This might sound too simple, but it’s a powerful helper. Baking soda balances pH levels, absorbs odors, and gently exfoliates. It helps neutralize itch-causing agents on the skin without being abrasive. If your dog has been rolling in grass, dirt, or mystery smells at the park—this is your best friend.
Just don’t overdo it. A little goes a long way when it comes to baking soda.
Coconut Oil (Optional, but Magical)
If your dog’s skin is flaky or crusty, coconut oil adds moisture and antimicrobial protection. It contains lauric acid, which helps with fungi, bacteria, and yeast—the kind of stuff that sometimes contributes to itchiness.
Melt it gently and add it to the mixture. You can also rub it directly onto dry patches post-bath.
Aloe Vera (Optional Soother)
Aloe vera gel is like a cooling balm for itchy, irritated skin. If your dog’s skin is red, hot, or inflamed, a few drops of pure aloe can make a noticeable difference. Just be sure it’s pure, without added alcohol or chemicals.
Apple Cider Vinegar (for After the Rinse)
Used as a diluted rinse, ACV helps restore the skin’s natural pH and can help control yeast and bacteria. It’s especially helpful if your dog has that “doggy smell” that keeps coming back.
Always dilute with water (1 part vinegar to 3 parts water) and avoid using on open wounds or raw skin.
What You’ll Need
Let’s gather everything you need to whip up this calming, anti-itch shampoo. You likely have most of it in your pantry already.
Ingredients:
- 1 cup plain, uncooked old-fashioned oats
- 1 cup baking soda
- 4 cups warm water
- (Optional) 1–2 tablespoons coconut oil
- (Optional) 1–2 teaspoons pure aloe vera gel
- (Optional)Apple cider vinegar rinse (1 part vinegar to 3 parts water, made separately)
Tools:
- Blender, food processor, or coffee grinder (for the oats)
- Large mixing bowl
- Measuring cups/spoons
- Spoon or whisk for mixing
- Container or squeeze bottle for storage
That’s it. No preservatives. No tongue-twisting labels. Just clean, simple, skin-soothing goodness for your itchy pup.
How to Make the Shampoo (Step-by-Step)
Now that you’ve got everything on hand, let’s put it all together. This won’t take more than 5 minutes — no science degree required.
Step 1: Grind the Oats
Start by turning your plain oats into a fine powder. Use a blender, food processor, or even a clean coffee grinder. You want the texture to be soft and flour-like — this helps it mix evenly and coat your dog’s skin smoothly.
Tip: If you can find colloidal oatmeal at the store, you can skip this step—but grinding at home works just as well.
Step 2: Mix Dry Ingredients
In a mixing bowl, combine your ground oatmeal and baking soda. Stir gently to distribute the ingredients evenly.
Step 3: Add Warm Water
Slowly pour in 4 cups of warm (not hot!) water while stirring to prevent clumping. You’ll notice the mixture thickens slightly — that’s the oatmeal doing its magic.
Step 4: Add Optional Soothing Boosters
If your dog has extra dry skin or red patches, this is where coconut oil and aloe vera come in:
- Add 1–2 tablespoons of coconut oil (warmed slightly to melt it).
- Add 1–2 teaspoons of pure aloe vera gel.
Stir well until fully combined.
Optional: If you’d like to add a drop of dog-safe essential oil (like lavender), now’s the time — but skip it entirely if your dog has sensitive skin.
Step 5: Store It
Pour the mixture into a container or squeeze bottle for easier application. If you made a large batch, keep it in the fridge for up to a week — just warm slightly before use.
How to Use It On Your Dog
Okay, the shampoo is ready. Now it’s time to get your pup clean and comfortable. Here’s exactly how to do it without turning bath time into a wrestling match:
Step 1: Prep Your Pup
Before anything else, give your dog a quick brush to remove excess loose hair and debris. This helps the shampoo get right down to the skin.
Then, gently wet your dog’s coat with warm water — not too hot, not too cold. Think “cozy bath” level.
Step 2: Apply the Shampoo
Pour a generous amount of the DIY shampoo into your hands or directly onto your dog’s coat. Massage it in using slow, circular motions, focusing on dry, flaky, or irritated areas. Don’t forget the underarms, belly, and tail base — these spots often get missed and tend to itch the most.
Pro tip: Speak calmly and offer treats if needed — itchy dogs can be squirmy dogs.
Step 3: Let It Sit (Just for a Few Minutes)
Give the ingredients time to do their job. Let the shampoo sit for 3–5 minutes, especially over hot spots or scaly skin patches. Use this time to give them a little back rub or ear scratch — it makes the wait easier for both of you.
Step 4: Rinse Thoroughly
Use clean, warm water to rinse everything out. Take your time. Leftover shampoo can lead to irritation, so rinse until the water runs completely clear.
Step 5: (Optional) Apple Cider Vinegar Rinse
If your dog’s skin is especially prone to yeast or odors, follow up with a diluted rinse made of:
- 1 part apple cider vinegar
- 3 parts warm water
Pour gently over your dog’s body (avoid the eyes and any open wounds). Let it sit for 30 seconds, then rinse again with water.
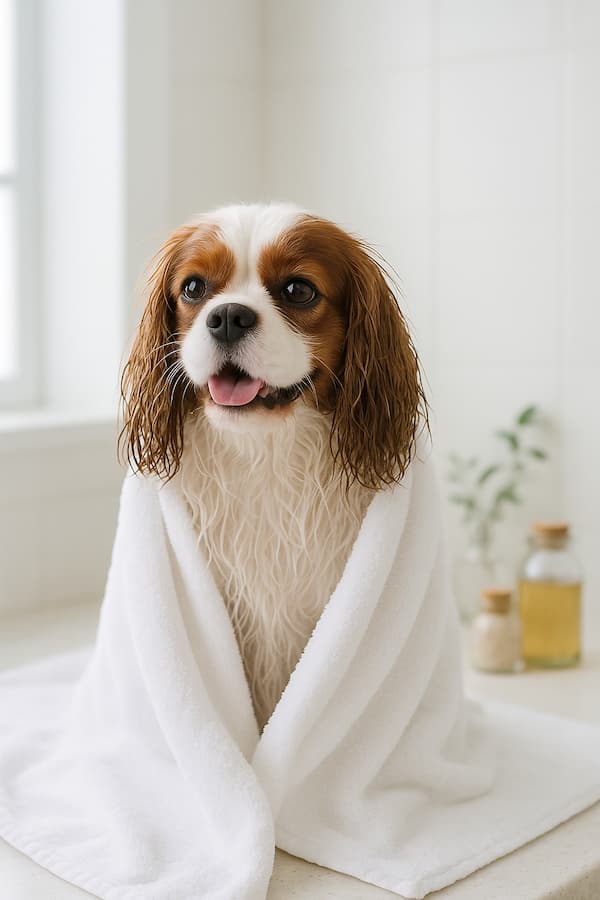
Step 6: Dry & Relax
Towel dry your dog gently. You can use a low-heat blow dryer if your pup tolerates it, but never use high heat. Once dry, you can rub a little coconut oil into problem spots as a leave-in skin moisturizer.
Optional Add-Ons and When to Use Them
While the base recipe is already soothing and effective, you can level it up depending on your dog’s skin needs. Just remember: less is more, and always patch test if your dog has sensitive skin.
1. Apple Cider Vinegar Rinse
If your dog tends to have yeast issues (like that musty smell or constant licking of paws), this rinse helps rebalance skin pH and acts as a natural antimicrobial.
- How to use: Mix 1 part raw, unfiltered apple cider vinegar with 3 parts warm water. After shampooing and rinsing, pour the vinegar rinse gently over your dog (avoiding eyes and broken skin). Let it sit for about 30 seconds, then rinse again with warm water.
Use this only once a week, max—overdoing it can dry out the skin.
2. Coconut Oil (Post-Bath Moisturizer)
If your pup’s skin looks dry or flaky even after a bath, you can apply a small amount of melted coconut oil directly to problem spots once they’re fully dry.
- Why it helps: Coconut oil is naturally antibacterial, antifungal, and deeply hydrating. It absorbs slowly, so don’t be alarmed if your pup looks a little greasy for a bit. Most dogs love it—and it’s totally safe if they lick it.
3. Dog-Safe Essential Oils
Used very sparingly, certain essential oils can add calming benefits:
- Lavender: Calming and skin-soothing.
- Chamomile: Great for redness and irritation.
- Copaiba: Anti-inflammatory and mild.
Only add 1–2 drops per entire batch of shampoo and always make sure the oil is therapeutic-grade and safe for dogs. Never apply directly to their skin undiluted.
Common Mistakes to Avoid
Even with the best intentions, it’s easy to go wrong when making homemade shampoo. Here’s what to watch out for:
Using Human Shampoo (Even Baby Shampoo)
It may seem gentle, but human shampoos (yes, even the “natural” or “tear-free” ones) are formulated for human pH levels—not dogs’. They can disrupt the skin barrier and make itching worse.
Not Rinsing Thoroughly
One of the most common culprits behind post-bath itchiness? Leftover shampoo residue. Always rinse longer than you think necessary. If in doubt, rinse again.
Using Unsafe Essential Oils
Some oils—like tea tree, eucalyptus, or citrus—can be harmful or even toxic to dogs, especially in high concentrations. When in doubt, leave it out or consult your vet.
Bathing Too Often
Overbathing can strip your dog’s natural oils and actually lead to more itching. Once every 2–4 weeks is usually enough unless your vet advises otherwise.
Ignoring Persistent Symptoms
If your dog’s skin is cracked, bleeding, scabby, or the itching seems extreme or constant, this isn’t a job for shampoo alone. It’s time to consult your vet to rule out allergies, infections, or parasites.
When to Call the Vet
Homemade remedies can work wonders for occasional dryness or mild itchiness, but sometimes the scratching signals something deeper.
Here’s when you should stop DIY-ing and get your vet involved:
- Persistent scratching, even after trying the shampoo and coconut oil treatments.
- Open sores, scabs, or raw spots that aren’t healing.
- Excessive licking of paws, chewing at legs, or rubbing their face.
- Odor coming from the skin, which could point to yeast or bacterial infections.
- Hair loss or patchy fur, especially if it comes with red, flaky skin.
It’s okay to try natural remedies first—but don’t hesitate to get a professional opinion if your dog’s skin just isn’t improving. You’re not failing your pup by asking for help—you’re protecting their health.
Final Thoughts: Your Dog Deserves Relief
When your dog’s scratching keeps you both up at night, it’s more than just a skin issue—it’s a quality of life issue. The good news? You don’t need a shelf full of expensive, chemical-filled products to start helping your pup feel better.
This DIY dog shampoo is a small, simple step with a big impact. It’s gentle, customizable, and made with love—exactly what your itchy pup needs. And even if it doesn’t solve everything, it gives your dog soothing relief, helps you feel like you’re doing something good, and buys you both some comfort while you figure out what’s next.
So go ahead—mix up a batch, grab a towel, and give your dog a bath that’s just as kind as your love for them.